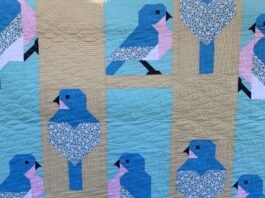
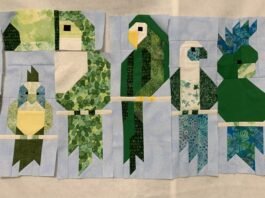
Transforming a simple armchair into a cozy and stylish statement piece can be easily achieved with patchwork quilts.
This tutorial will guide you through creating a padded armchair using beautiful quilt patterns.
Whether you’re a quilting enthusiast or a beginner, this step-by-step guide will help you craft a unique and comfortable piece of furniture. Let’s dive into this creative project!

Gathering Materials and Choosing Quilt Patterns
Before you begin, it’s essential to gather all the necessary materials and decide on the quilt patterns that will complement your armchair.
Materials Needed: To create a padded armchair with patchwork quilts, you’ll need the following materials:
- Fabric scraps or fat quarters in various colors and patterns for the patchwork quilt
- Batting: 2 yards (depending on the size of the armchair)
- Backing fabric: 2 yards
- Thread to match your fabrics
- A sewing machine and basic sewing tools (scissors, rotary cutter, cutting mat, quilting ruler)
- Upholstery foam (optional, for extra padding)
- Upholstery tacks or a staple gun
Choosing Quilt Patterns: Selecting the right quilt patterns is crucial for achieving the desired look. Popular choices include:
- Log Cabin Quilt Pattern: A classic design that creates a striking visual effect with its concentric squares.
- Hexagon Quilt Pattern: Offers a modern and geometric appeal, perfect for contemporary armchairs.
- Flying Geese Quilt Pattern: Adds a dynamic touch with its triangular shapes pointing in various directions.
Color Scheme and Fabric Selection: Consider the overall color scheme and style of your living space. Choose fabrics that complement or contrast with the existing décor. For a cohesive look, select a color palette that ties the quilt patterns together harmoniously.

Cutting and Preparing the Fabric
Accurate cutting and preparation of the fabric are vital steps in ensuring the success of your patchwork quilt.
Cutting the Patchwork Pieces: Depending on the quilt patterns you’ve chosen, cut the fabric into the required shapes and sizes. For example, if you’re using a Log Cabin pattern, cut strips of fabric measuring 2.5” wide and varying lengths. If opting for a Hexagon pattern, use a template to cut hexagon shapes from the fabric.
Preparing the Batting and Backing: Cut the batting and backing fabric to the dimensions of your armchair cushions, adding an extra inch on all sides for seam allowance. The batting provides extra padding and comfort, while the backing fabric ensures a neat finish.
Assembling the Patchwork Top: Lay out the cut fabric pieces in the desired quilt pattern arrangement. Sew the pieces together using a quarter-inch seam allowance, pressing the seams open or to one side as you go. Continue until you have a complete patchwork top that fits the dimensions of your armchair cushions.

Quilting the Patchwork and Assembling the Cushions
Now that you have your patchwork top ready, it’s time to quilt and assemble the padded armchair cushions.
Layering the Quilt Sandwich: Create a quilt sandwich by layering the backing fabric, batting, and patchwork top. Make sure the patchwork top is centered on the batting and backing fabric. Use pins or spray adhesive to hold the layers together securely.
Quilting the Layers: Quilt the layers together using your sewing machine. You can choose a simple straight-line quilting pattern or a more intricate free-motion design. Quilting not only holds the layers together but also adds texture and visual interest to your patchwork.
Assembling the Cushions: Once the quilting is complete, trim any excess batting and backing fabric. Sew the quilted patchwork to the cushion covers, leaving one side open for inserting the foam or padding. If using upholstery foam, cut it to the size of the cushion and insert it into the cover. Close the open side using upholstery tacks or a staple gun, ensuring a snug fit.

Attaching the Quilted Cushions to the Armchair
The final step is attaching the quilted cushions to the armchair, creating a beautifully padded and cozy seating area.
Preparing the Armchair: Before attaching the cushions, clean the armchair thoroughly and make any necessary repairs. Remove any old padding or upholstery that may be in poor condition.
Attaching the Seat Cushion: Place the quilted seat cushion on the armchair, ensuring it fits well. Use upholstery tacks or a staple gun to secure the cushion in place, starting from the back and working your way to the front. Pull the fabric taut to avoid any wrinkles or sagging.

Attaching the Back and Arm Cushions: Repeat the process for the back and arm cushions, making sure they are evenly aligned and securely attached. Take your time to ensure the cushions are properly positioned and comfortable.
Final Touches: Trim any excess fabric and add finishing touches such as decorative piping or trim if desired. Step back and admire your beautifully transformed armchair, now featuring custom quilted cushions that add both comfort and style.
Creating a padded armchair with patchwork quilts is a rewarding and creative project that brings warmth and personality to your home.
By following this tutorial, you can craft a unique piece of furniture that showcases your quilting skills and complements your décor.
Whether you choose classic quilt patterns or modern designs, the result will be a cozy and inviting armchair that is perfect for relaxing with a good book or enjoying a cup of tea.
Enjoy the process of selecting fabrics, cutting and piecing the quilt patterns, and assembling the cushions.
Each step is an opportunity to express your creativity and make something truly special. Happy quilting!


