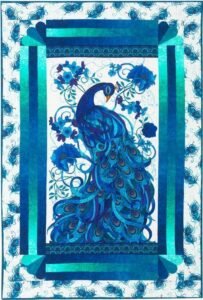
The Peacock Quilt Pattern is a vibrant and elegant design that captures the beauty and grace of a peacock’s feathers. This pattern, with its intricate details and colorful palette, can be a stunning centerpiece for any quilt project.
In this tutorial, we will guide you step-by-step on how to create your own Peacock Quilt, complete with fabric cuts and measurements.
By following this guide, you’ll be able to master this exquisite quilt pattern and add a striking new piece to your quilting collection.
Materials and Fabric Selection
Choosing the right materials and fabrics is essential for the success of your Peacock Quilt. Here’s what you’ll need:
- Fabric A (background): 2 yards
- Fabric B (main peacock color): 1 yard
- Fabric C (secondary peacock color): 1 yard
- Fabric D (accent color): 1/2 yard
- Fabric E (additional colors for feathers): Various scraps or 1/2 yard each of 3-4 different colors
- Batting: 1 yard
- Backing fabric: 2 yards
- Rotary cutter, mat, and ruler
- Sewing machine and thread
- Iron and ironing board
Selecting Your Fabrics
When selecting fabrics for your Peacock Quilt, opt for rich, vibrant colors that mimic the hues of a peacock’s feathers.
Consider using a mix of solids and prints to add depth and interest to the design. The background fabric should be a neutral color that allows the peacock design to stand out.
Preparing Your Fabric
Before you start cutting, make sure to wash and iron your fabrics. This step helps to preshrink the fabric and remove any creases, ensuring more accurate cuts and seams.
Cutting the Fabric
Accurate cutting is crucial for the Peacock Quilt pattern due to its intricate design. Here are the cuts you’ll need to make:
- Fabric A (background):
- Cut 4 squares, each measuring 12.5 inches.
- Cut 8 rectangles, each measuring 6.5 inches by 12.5 inches.
- Fabric B (main peacock color):
- Cut 2 squares, each measuring 10.5 inches.
- Cut 6 strips, each measuring 2.5 inches by 18 inches.
- Fabric C (secondary peacock color):
- Cut 2 squares, each measuring 10.5 inches.
- Cut 6 strips, each measuring 2.5 inches by 18 inches.
- Fabric D (accent color):
- Cut 8 strips, each measuring 1.5 inches by 18 inches.
- Fabric E (feathers):
- Cut various shapes and sizes to create the feather details, ensuring a mix of colors and patterns.

WATCH A VIDEO LESSON ON THIS PATTERN NOW!!
Assembling the Peacock Body
The key to the Peacock Quilt is the precise assembly of the peacock’s body and feathers. Follow these steps to piece together the body:
Step 1: Create the Body Pieces
- Combine Fabrics: Take the squares from Fabrics B and C. Sew them together to form a larger square, alternating the colors (B-C-B-C). Repeat this with the remaining squares.
- Press Seams: Press the seams open or to one side, ensuring the fabric lies flat.
Step 2: Cut and Assemble Body Units
- Cut Squares: Place the combined squares on your cutting mat. Align your quilting ruler at a 45-degree angle to the square.
- Cut Units: Cut the square into smaller units, each measuring 5.25 inches on all sides. Repeat this process with all squares to create the required number of units.
Step 3: Sew Body Units Together
- Pair Units: Pair each unit with another unit of the same color combination. Align the edges and sew them together to form larger body units.
- Press Seams: Press the seams open or to one side, ensuring each unit is flat.
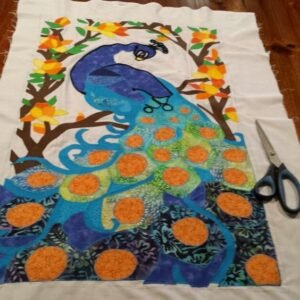
Constructing the Feathers
With your body units prepared, you can now assemble the feathers:
Step 1: Layout the Feathers
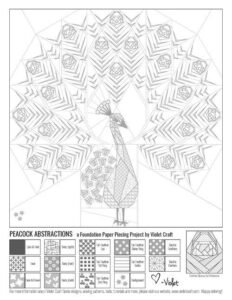
- Arrange Shapes: Lay out the feather shapes on a flat surface, forming the feather design. Ensure the colors alternate correctly to create the desired pattern.
- Check Alignment: Double-check the alignment of the shapes to avoid any mistakes during sewing.
Step 2: Sew Feather Shapes Together
- Sew Rows: Start by sewing the shapes together in rows. Align the edges and use pins to keep them in place while sewing.
- Join Rows: Once the rows are complete, join them together to form the full feather design. Press all seams flat.
Step 3: Add Background Fabric
- Attach Rectangles: Take the rectangles cut from Fabric A and sew them to the edges of the feather design to form a square block. Ensure each rectangle is centered on the feather’s edges.
- Attach Squares: Sew the 12.5-inch squares of Fabric A to the corners of the block, completing the background.

Final Assembly and Finishing Touches
With the body and feathers assembled, it’s time to finalize your Peacock Quilt:
Step 1: Square Up the Block
- Trim Edges: Use your rotary cutter and ruler to trim the edges of the block, ensuring it measures 24.5 inches square. This step ensures the block is uniform and ready for assembly into a quilt.
Step 2: Quilt the Block
- Layering: If you’re making a single block or a small project, layer your block with batting and backing fabric. Pin the layers together to prevent shifting.
- Quilting: Quilt as desired, following the lines of the design or adding your own quilting pattern. This step adds texture and stability to the block.
Step 3: Bind the Edges
- Cut Binding Strips: Cut strips of fabric 2.5 inches wide for binding. Join the strips end-to-end to create a continuous binding strip.
- Attach Binding: Sew the binding to the front of the quilt block, fold it over the edges, and hand stitch it to the back for a clean finish.
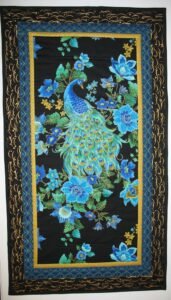
Tips and Tricks for a Successful Peacock Quilt
Creating a Peacock Quilt can be challenging, but with these tips, you can achieve beautiful results:
Precision is Key
- Accurate Cutting: Ensure your fabric cuts are precise and consistent. This accuracy is crucial for the shapes to fit together perfectly.
- Consistent Seams: Maintain consistent seam allowances throughout the project. This consistency helps the units align correctly.
Use a Design Wall
- Visualize Layout: Lay out your shapes on a design wall or flat surface before sewing. This step allows you to see the overall design and make adjustments if necessary.
- Avoid Mistakes: Double-check the arrangement to avoid any mistakes in the color pattern or alignment.

Press Seams Carefully
- Press Open or to One Side: Press seams open or to one side, depending on your preference. This step reduces bulk and ensures the block lies flat.
- Avoid Stretching: Be gentle when pressing to avoid stretching the fabric, especially on the bias edges of the shapes.
LEARN HOW TO MAKE THE HUNTER’S STAR BLOCK QUILT PATTERN!
By following this detailed tutorial, you can create a stunning Peacock Quilt. This classic pattern is a beautiful addition to any quilt, and mastering it will enhance your quilting skills. Enjoy the process and the beautiful results of your hard work!

