If you’re looking to take your quilting skills to the next level, disappearing blocks offer an exciting and creative challenge.
These blocks are designed by cutting traditional blocks into smaller pieces and rearranging them to create new and unexpected patterns.
In this tutorial, we’ll explore various tricks for disappearing blocks, showing you how to transform basic blocks into stunning, dynamic quilt patterns.
Whether you’re an experienced quilter or just starting out, this guide will give you everything you need to know about disappearing blocks, from fabric cuts to the final assembly. Let’s dive in and learn how to make your quilt blocks “disappear” into something beautiful and fresh!
What are Disappearing Quilt Blocks?
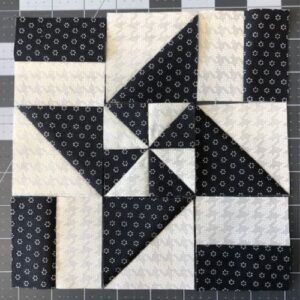
Disappearing blocks are a fun and modern twist on traditional quilting. In essence, they start with a simple block—like a 9-patch or 4-patch—and then that block is cut into smaller sections. These sections are rearranged to create a completely new design. The name “disappearing” comes from the fact that the original block seems to vanish, replaced by a more complex pattern.
For example, in a disappearing 9-patch, a traditional 9-patch block is cut into four pieces, and then these pieces are rotated and sewn back together in a new arrangement. The result is a complex-looking quilt that actually started with a simple block. This technique is perfect for quilters who want to add a bit of flair and creativity to their work without making the process too complicated.
Disappearing blocks can be made using various block styles, but some of the most popular are disappearing 4-patch, 9-patch, and even half-square triangles. Each one brings a different look to the quilt, and you can play with fabric choices to create even more variety in your quilt patterns.
Materials and Fabric Requirements
Before starting your disappearing blocks project, you’ll need to gather the following materials:
- Quilt fabric (assorted prints and solids)
- Rotary cutter and ruler
- Cutting mat
- Sewing machine
- Neutral thread
- Pins or clips
- Iron and ironing board
- Batting and backing fabric
To keep your quilt visually interesting, choose a mix of prints and solids. A combination of light and dark fabrics will help emphasize the disappearing effect in the blocks. If you’re working on a disappearing 9-patch or 4-patch, make sure the colors have enough contrast so that the pattern stands out clearly after you cut and rearrange the pieces.
For a lap quilt (approximately 50 x 60 inches), you’ll need about 2.5 yards of fabric for the quilt top, 3 yards for the backing, and batting of the same size. Adjust these measurements depending on the size of your project. As with any quilting project, it’s a good idea to pre-wash your fabric to prevent shrinkage later on.
Now that you have your materials ready, let’s move on to the fabric cutting and block assembly process.
How to Make a Disappearing 9-Patch Block
The disappearing 9-patch is one of the most popular disappearing block patterns due to its versatility and ease. To start, you’ll need to create a traditional 9-patch block. For each block, you will need:
- Five squares of one fabric (cut to 5 x 5 inches)
- Four squares of another fabric (cut to 5 x 5 inches)
Arrange the squares in a 3×3 grid, alternating the fabrics so that the five matching squares are in the center and corners. Sew the squares together, row by row, using a quarter-inch seam allowance. Once the rows are sewn, sew the rows together to complete the 9-patch block.
Now for the magic: once you’ve completed your 9-patch block, it’s time to cut it. Using your rotary cutter and ruler, cut the entire block into four equal sections by making two cuts—one vertically through the middle and one horizontally through the middle. You now have four smaller blocks.
To create the disappearing effect, rotate or rearrange the smaller blocks as you like. You can rotate them by 90 degrees, switch their positions, or even flip some of them upside down. The possibilities are endless, and each variation will give you a unique final quilt pattern.
Assembling the Disappearing 9-Patch Quilt
Once you’ve made and rearranged several disappearing 9-patch blocks, it’s time to assemble them into a quilt top. Lay out your blocks in rows and columns, experimenting with the layout until you’re happy with the design. You can create an orderly, symmetrical quilt or go for a more randomized look.
Start sewing the blocks together row by row. Be sure to use a consistent seam allowance—typically ¼ inch—for all your seams. After sewing each row, press the seams flat with an iron to reduce bulk and ensure that everything lies flat. This step is crucial for a professional-looking quilt.
Once all the rows are sewn together, press the entire quilt top one final time. At this point, you can admire your completed quilt top and see how the original 9-patch blocks have “disappeared” into a completely new and interesting design.
How to Make a Disappearing 4-Patch Block
Another popular option is the disappearing 4-patch block, which follows a similar process to the 9-patch but starts with a simpler block. Here’s how to make it:
- Two squares of one fabric (cut to 8 x 8 inches)
- Two squares of a contrasting fabric (cut to 8 x 8 inches)
Arrange the squares in a 2×2 grid, alternating the fabrics diagonally. Sew the squares together, first by rows and then sewing the rows together to create a traditional 4-patch block.
Once your 4-patch block is complete, use your rotary cutter and ruler to make four cuts: two vertical cuts and two horizontal cuts. The cuts should be made about 2 inches from the center seam in each direction, leaving you with nine smaller sections.
Now, rearrange the sections. You can rotate the corners, flip some of the inner sections, or mix them up for an entirely new look. The result is a disappearing 4-patch that looks much more intricate than the simple block it started from. Sew the sections back together to complete your block.
Quilting and Finishing Your Disappearing Block Quilt
Once your quilt top is complete, it’s time to move on to quilting and finishing. Start by creating a quilt sandwich: lay out the backing fabric with the wrong side facing up, place the batting on top, and then the quilt top with the right side facing up. Make sure all the layers are smooth and free of wrinkles.
Pin or clip the layers together to hold everything in place. You can now quilt the layers by hand or machine. For a disappearing block quilt, straight-line quilting is a simple yet effective option. Quilting along the seams will enhance the disappearing effect and give the quilt a neat, finished look.
After the quilting is complete, trim the edges of the quilt and add binding. Cut strips of fabric for the binding, fold them over the quilt’s edges, and sew them in place. Once the binding is attached, your disappearing block quilt is finished and ready to be admired!
Customizing Your Disappearing Block Quilt
One of the best things about disappearing blocks is their versatility. You can create a wide range of designs by simply changing the size of the blocks, the number of cuts, or how you rearrange the pieces. If you prefer a more structured look, stick to symmetrical cuts and arrangements. If you want a more playful quilt, try randomizing the layout.
Another way to customize your quilt is through fabric choice. Using bold, contrasting colors can highlight the disappearing effect, while a more subtle palette will create a softer, more understated quilt. You can even use this technique to highlight special fabrics, like novelty prints or batiks.
No matter how you choose to customize it, the disappearing block technique offers endless possibilities for creating unique and eye-catching quilt patterns.
🌟 Join our exclusive Quilt broadcast list on Messenger! Receive the best patterns, tips, and updates directly in your inbox. Our team is ready to send you delightful content that will inspire your projects. Don’t miss this opportunity to stay updated and create amazing pieces. Join now and be part of this passionate quilt community! ✨📩
Conclusion: Mastering the Art of Disappearing Blocks
Disappearing blocks are a wonderful way to add complexity and interest to your quilts without needing advanced skills. By cutting and rearranging traditional quilt blocks, you can create intricate-looking designs that will impress both novice and experienced quilters alike.
With this tutorial, you now have the tools to create your own disappearing block quilt, from cutting and arranging the blocks to assembling and finishing the quilt. Whether you stick to a classic disappearing 9-patch or experiment with your own variations, the end result will be a quilt that’s as unique as it is beautiful.
Incorporating key SEO terms like quilt and quilt patterns throughout this blog ensures that your tutorial will reach a wide audience. By following these tips and techniques, you can master the art of disappearing blocks and add a new layer of creativity to your quilting projects!