The Summer Flower Quilt Block is a vibrant and joyful addition to any quilt collection. Known for its floral-inspired design, this quilt block pattern captures the essence of summer, adding warmth and color to your quilting projects.
In this tutorial, we’ll guide you through every step needed to make a Summer Flower Quilt Block, from fabric choices and precise cuts to the final assembly.
This floral quilt pattern is beginner-friendly and fun to create, so let’s dive into the process and get started on this beautiful quilt!

Choosing the Right Fabrics for Your Summer Flower Quilt Block
Selecting fabrics for a floral-themed quilt block is essential for capturing the beauty and color of a real flower. For the Summer Flower Quilt Block, it’s best to choose a color palette that represents the vibrancy of summer. Think bold colors for the petals, such as pinks, reds, yellows, and oranges, paired with a contrasting center color like green or blue to represent foliage or background.
If you’re aiming for a more classic look, go with softer hues like pastels or earth tones, which give the block a vintage floral appeal. Mixing different shades within the same color family can also add depth to the flower design. For example, using two shades of pink for the petals can create a dimensional effect that makes the block come to life.
SEE OTHER FACE PATTERNS HERE!
Lastly, ensure you’re using high-quality cotton quilting fabric. Cotton is ideal because it’s durable, easy to sew, and holds its shape well. Once you’ve selected your fabrics, pre-wash them to prevent any color bleeding or shrinkage later on. With your fabric ready, you’re all set to begin the cutting process for the Summer Flower Quilt Block.
Fabric Cutting Guide for the Summer Flower Quilt Block
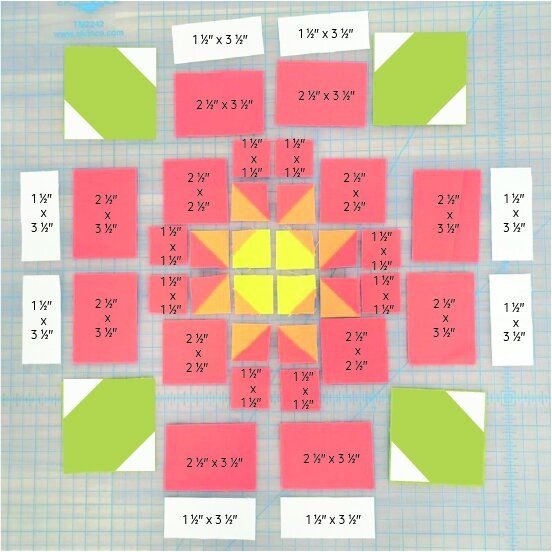
Precise cutting is key for achieving a polished look with this quilt block pattern. For a standard 12-inch finished block, here’s a detailed list of fabric cuts you’ll need:
- Petal Fabric (Main Color): Cut eight 4-inch squares to form the flower petals.
- Flower Center Fabric (Accent Color): Cut one 4.5-inch square for the center of the flower.
- Background Fabric: Cut four 4.5-inch squares and four 3-inch squares. These will form the negative space around the flower and enhance its shape.
Before you start sewing, arrange the cut pieces on your workspace according to the layout of the block. This visual reference will help ensure you’re placing each piece in the correct position. Double-check your cuts to make sure all pieces are uniform; accuracy here will make the sewing process smoother and give your block a professional finish.
Having your fabric pieces cut and laid out will simplify the assembly process and help keep your project organized. Now that your fabric is ready, let’s move on to the layout and sewing instructions for the Summer Flower Quilt Block.
Arranging the Layout for the Summer Flower Quilt Block
The layout of the Summer Flower Quilt Block is where the magic happens, as each piece comes together to form a cohesive flower design. Start by placing the 4-inch petal squares around the central 4.5-inch square in a circular pattern. This arrangement will form the “petals” surrounding the flower center.
Next, add the 4.5-inch background squares around the petal squares, filling in the outer spaces to frame the flower shape. This step gives the block a balanced look and emphasizes the floral design. Ensure each background square is placed in the correct position, creating a symmetrical and even border around the flower.
Finally, position the 3-inch background squares at the corners of the block to complete the overall layout. Step back and take a look to make sure everything looks balanced and that the colors flow well together. Once you’re satisfied with the layout, you’re ready to begin sewing the pieces together for a flawless Summer Flower Quilt Block.
Assembling the Summer Flower Quilt Block: Step-by-Step Sewing Guide
Start by sewing the petal squares to the center square. Use a 1/4-inch seam allowance, which is standard in quilting, and be sure to press each seam as you go. Pressing seams toward the darker fabric is typically best for this block to minimize bulk and enhance the design’s appearance.
Once the petals are attached, continue by sewing the background squares to each side of the flower block. This will form a frame around the floral design, bringing out the shape of the “flower” even more. Double-check your seams to make sure each piece aligns perfectly; this alignment will ensure a polished final look for your block.
Finally, attach the corner squares to complete the block. At this point, pressing the entire block with an iron can help flatten seams and give it a crisp, clean finish. By following these steps, you’ll have completed your Summer Flower Quilt Block with accuracy and elegance.
Tips for Perfecting Your Summer Flower Quilt Block
To make your Summer Flower Quilt Block look as professional as possible, it’s important to focus on a few key quilting tips. First, maintaining consistent seam allowances is essential for achieving a precise, uniform block. Using a 1/4-inch seam throughout will make the sewing process smoother and improve the block’s overall appearance.
Pressing seams carefully is another important step. Press each seam as you sew, which reduces bulk and keeps the block looking crisp and flat. Taking the time to press seams toward the darker fabric will give your quilt a cleaner finish, making the colors in your design pop.
Lastly, consider experimenting with color combinations. Changing the petal and center colors in each block can add a playful, patchwork effect to the quilt. A bit of creativity here can go a long way, transforming a simple block into a visually captivating quilt with a touch of personal flair.
Creating Multiple Summer Flower Quilt Blocks for a Full Quilt
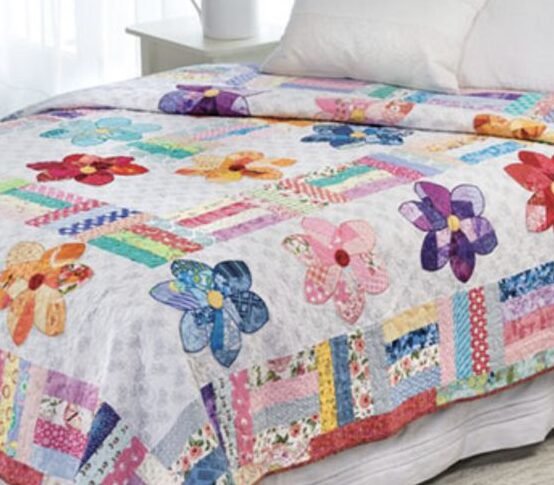
Once you’ve mastered the Summer Flower Quilt Block, you can start creating additional blocks for a full quilt. By arranging multiple flower blocks in rows, you can create a vibrant and eye-catching floral quilt. Try alternating the colors of each flower for a diverse, lively quilt that celebrates the beauty of summer blooms.
When joining the blocks, use a consistent 1/4-inch seam allowance to ensure that each block aligns properly. Press each row as you go to reduce bulk and keep the quilt top flat. This attention to detail will ensure that the finished quilt looks neat and cohesive.
If you’d like to add even more dimension, consider adding sashing or borders between each block. This framing technique enhances each flower block individually and can add visual depth to the entire quilt. With each block carefully assembled and joined, you’ll soon have a stunning Summer Flower Quilt that’s perfect for displaying or gifting.
Finishing Touches: Quilting and Binding Your Summer Flower Quilt
Once your quilt top is assembled, it’s time to add the finishing touches that will bring everything together. Choose a batting that complements the weight and feel of your quilt; cotton or cotton-blend batting works well for a medium-weight quilt that’s comfortable year-round.
🌟Join our exclusive Quilt broadcast list on Messenger! Receive the best patterns, tips, and updates directly in your inbox. Our team is ready to send you delightful content that will inspire your projects. Don’t miss this opportunity to stay updated and create amazing pieces. Join now and be part of this passionate quilt community!✨📩
Quilt the layers together using a quilting pattern that enhances the floral design. Straight-line or echo quilting can help highlight the flower shapes within each block, while free-motion quilting adds a whimsical touch that complements the summer theme. Experiment with quilting styles to find the one that best suits your vision for the quilt.
Finally, finish your quilt with a coordinating binding. A colorful binding can frame the quilt and give it a polished, professional edge. Whether you’re new to quilting or an experienced quilter, completing a Summer Flower Quilt is a rewarding project that showcases the beauty of floral quilt patterns and brings a splash of summer to any space.
This tutorial provides everything you need to know to create a beautiful Summer Flower Quilt Block, from choosing fabrics to sewing each piece with precision. With these steps and tips, you’ll be well on your way to making a vibrant, floral-inspired quilt that embodies the joy of summertime blooms. Enjoy the creative process, and let your finished quilt bring warmth and cheer to your home!


