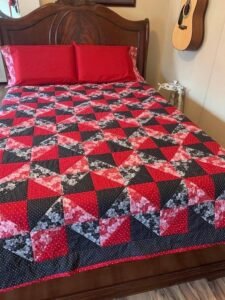
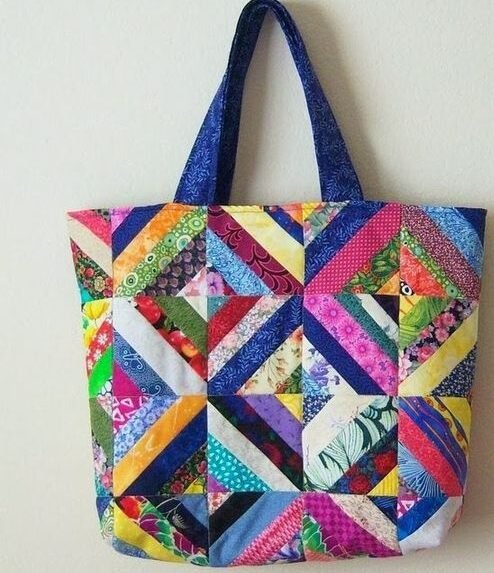
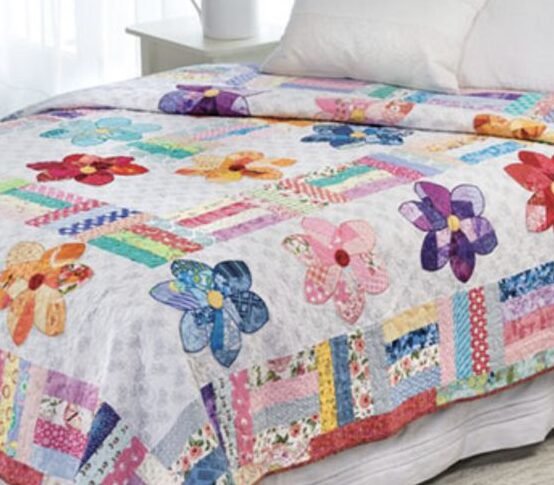
The Woven Quilt pattern is a timeless choice for quilters looking to combine simple geometric shapes with a complex, woven appearance.
Its design resembles an interlaced fabric structure, giving the quilt a textured, almost three-dimensional look. For both beginners and advanced quilters, this pattern offers a beautiful and practical project, transforming strips of fabric into a striking woven masterpiece.
In this guide, we’ll take you through each step, from cutting fabric pieces to stitching them into an eye-catching Woven Quilt.

Understanding the Woven Quilt Pattern
The Woven Quilt pattern creates an optical illusion of woven strips, even though the quilt is crafted entirely from square and rectangular shapes. It’s an ideal project for quilters interested in playing with color, texture, and layout to achieve a modern and striking effect.
SEE OTHER FACE PATTERNS HERE!
The Visual Appeal of the Woven Quilt
A Woven Quilt is an interplay of colors and lines, which provides a beautifully intricate look. By selecting contrasting fabric colors, you can emphasize the woven pattern, making each strip appear as if it’s overlapping with the others. Experimenting with various color palettes or keeping a monochromatic theme can result in unique quilts, all with the signature woven look.
Why Choose a Woven Quilt Pattern?
This quilt pattern is not only visually appealing but also practical for quilters of all levels. Since it primarily relies on squares and rectangles, it’s an accessible pattern that avoids complex angles or curves. It’s an excellent project to practice accuracy in cutting and stitching, resulting in a neat and organized quilt design.
Suitable Fabric Choices for a Woven Quilt
For a Woven Quilt, consider selecting fabrics with contrasting colors or patterns to help define the illusion of woven strips. Solid colors in complementary shades, or a combination of patterns and solids, work well to create depth. Additionally, using high-quality cotton fabric ensures durability and ease of handling throughout the quilting process.
Preparing Materials and Cutting Fabric for the Woven Quilt
Preparation is essential in creating a Woven Quilt, as precise cuts will help achieve the clean, interlocked look that characterizes this quilt pattern.
Essential Materials for Your Woven Quilt
Gather your materials: choose three to four fabrics for the woven effect, or even more if you’d like a multi-colored quilt. You’ll need a rotary cutter, cutting mat, ruler, sewing machine, thread, batting, and backing fabric. Also, consider fabric markers and pins to keep your pieces organized as you assemble.
Cutting Fabric Strips and Squares
For a Woven Quilt pattern, start by cutting fabric strips to create the woven sections. A typical approach includes cutting 2.5-inch strips from each fabric, though you can adjust the width depending on your desired final look. Additionally, cut small squares of the same width for connecting intersections where strips overlap.
Ensuring Accuracy in Cuts
Precision in cutting is critical for this pattern. Use a rotary cutter and quilting ruler to ensure clean edges and uniform sizing. For larger quilts, organize your strips by color or pattern to avoid confusion during assembly. Accurate cuts are the foundation of the woven effect, so take your time to measure and cut carefully.
Laying Out the Woven Design
Arranging the fabric pieces before stitching is key to achieving the woven appearance. Take your time to play with different layouts, trying various color combinations until you’re satisfied with the result.
Creating a Woven Layout with Fabric Strips
Place the strips horizontally and vertically to create the woven effect. Start by laying horizontal strips across your workspace, and then layer vertical strips over the top. The intersections between the strips are where the “woven” effect will be most noticeable, so check that colors and patterns contrast well here.
Securing the Layout for Easy Assembly
Once you’re happy with the layout, pin down the strips to keep them from shifting. Mark where the intersections will be, as these will require smaller squares to hold the woven look together. Pins or fabric clips are essential at this stage to keep the pieces in place as you begin stitching.
Checking Color Balance and Contrast
Step back and examine your layout from a distance. Look for areas that may need more contrast or balance, adjusting strips as necessary. A well-balanced layout ensures that the woven effect is pronounced and visually striking.
Stitching the Woven Quilt Top
After finalizing your layout, it’s time to stitch the strips and squares together. Precision during this step will ensure that the woven pattern appears seamless.
Starting with Horizontal Rows
Begin by stitching together each row of horizontal strips. Use a ¼-inch seam allowance, which is standard for quilting. Press the seams open or to one side to reduce bulk and keep the quilt top smooth. Assemble all the horizontal rows in the order they appear in your layout.
Adding Vertical Strips for the Woven Effect
Once all horizontal rows are complete, start attaching the vertical strips. Stitch each vertical strip along its corresponding row, creating the woven illusion as you progress. Take care to match intersections precisely to maintain the clean, interlocking appearance of the design.
Joining the Quilt Blocks
If you’re making a larger quilt with multiple woven blocks, assemble each block separately and then join them together. This approach helps maintain accuracy and simplifies the stitching process. When joining blocks, ensure that the seams align perfectly for a cohesive, woven look across the entire quilt.
🌟 Join our exclusive Quilt broadcast list on Messenger! Receive the best patterns, tips, and updates directly in your inbox. Our team is ready to send you delightful content that will inspire your projects. Don’t miss this opportunity to stay updated and create amazing pieces. Join now and be part of this passionate quilt community! ✨📩
Finishing Touches: Quilting, Binding, and Care
With the quilt top complete, you’re ready to layer, quilt, and bind your Woven Quilt. These finishing steps enhance the durability and overall look of your quilt.
Choosing a Quilting Design
For a Woven Quilt, consider simple quilting designs that won’t detract from the woven effect. Straight-line quilting along the strips or simple crosshatch patterns can highlight the woven look without overpowering it. Choose a thread color that complements your fabric to keep the focus on the design.
Adding Binding for a Polished Edge
Select a binding that matches or contrasts with your quilt top, depending on your preference. Attach the binding to the quilt edges using a ¼-inch seam allowance. For added durability, consider double-fold binding, which provides a secure and long-lasting edge.
Caring for Your Woven Quilt
To keep your Woven Quilt looking beautiful, wash it on a gentle cycle with cold water. This quilt pattern is durable and ideal for everyday use, but washing with care will help preserve its colors and fabric quality. Store your quilt in a cool, dry place to prevent fading or fabric wear over time.
Bringing the Woven Quilt Pattern to Life
Creating a Woven Quilt is a satisfying and rewarding project, offering a unique design that stands out among traditional quilt patterns. The woven appearance, achieved through careful layout and stitching, adds texture and sophistication to your quilt. Perfect for any home decor, this quilt pattern makes a wonderful gift or a stylish addition to your own collection.
Whether you’re an experienced quilter or a beginner looking for a project with impact, the Woven Quilt pattern is a fantastic choice. Its timeless, versatile design allows for endless creativity and customization, making it a staple in any quilter’s repertoire. With your choice of fabrics and some patience, you’ll bring the beautiful illusion of woven fabric to life in quilt form.


