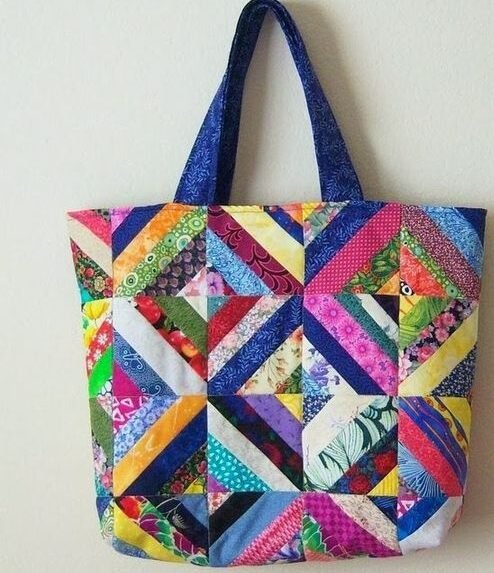
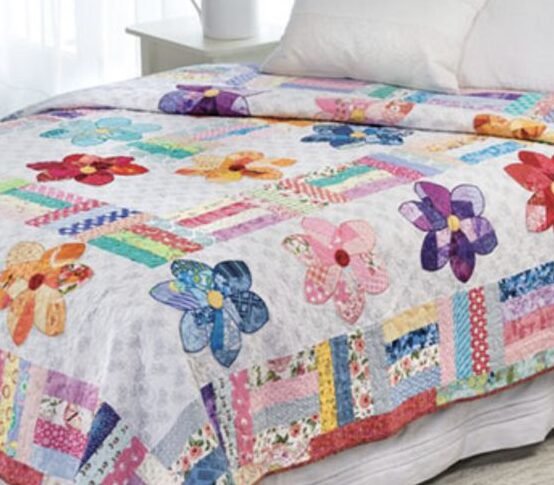
The Twisted Rail Fence Quilt Block is a unique twist on the classic Rail Fence pattern. This quilt block combines the simplicity of straight lines with a visually striking twist that adds movement and dimension to your quilt design. Quilters love this pattern because it’s relatively simple to make, yet produces a stunning effect, perfect for both beginners and advanced quilters.
The Twisted Rail Fence Quilt Block involves sewing strips of fabric at slight angles, creating a wave-like pattern that gives the illusion of a twisted fence. It’s a versatile block that can be used in various layouts to create different looks depending on color choices and block placement. By following this tutorial, you’ll learn how to make this distinctive block, add your personal touches, and bring a unique flair to your quilting projects.
Whether you’re creating a full quilt with twisted rail fence blocks or incorporating them as accent pieces, this pattern is an excellent addition to your quilting repertoire. In this Twisted Rail Fence Quilt Block Tutorial, we’ll guide you through the materials, cutting instructions, step-by-step construction, and finishing touches. Let’s dive in and start creating this eye-catching quilt block!

1. Materials Needed for the Twisted Rail Fence Quilt Block
To begin, you’ll need a few essential materials to complete the Twisted Rail Fence Quilt Block successfully. Having the right supplies on hand will make the quilting process smoother and more enjoyable.
SEE OTHER FACE PATTERNS HERE!
First, select three contrasting fabrics for the twisted rail fence effect. Choosing fabrics with a strong contrast in color or pattern will help the twisted effect stand out more vividly. Fabrics in different shades or tones can add depth and visual interest to the block.
Next, gather your quilting tools, including a rotary cutter, cutting mat, and quilting ruler. Precision is key in this pattern, as the twisted effect relies on accurate cuts and sewing. A rotary cutter will help you achieve clean, straight edges that are essential for assembling the block accurately.
Finally, have your sewing machine ready, along with matching thread and an iron for pressing seams. Pressing your seams as you go will help keep the blocks flat and ensure that your finished quilt block looks crisp and professional. With these materials ready, you’re all set to start the Twisted Rail Fence Quilt Block!
2. Cutting and Preparing Fabric Strips
The Twisted Rail Fence Quilt Block requires careful cutting of fabric strips to create the angled, twisted effect. Follow these steps to cut and prepare your fabric strips.
First, cut each of your three fabrics into strips of equal width. For a standard block, strips measuring 2.5 inches wide work well, but you can adjust this width if you want a larger or smaller block. Consistent strip width is essential to ensure that the twisted effect comes out evenly.
Arrange your strips in a sequence that highlights the contrast between your fabrics. Decide on the order of the fabrics to achieve the desired effect. Place them in a light-to-dark or dark-to-light order, or mix colors that will create a bold twist in your quilt block.
With your strips arranged, trim one end of each strip at a 45-degree angle. This angled cut is the key to creating the twisted look when the strips are sewn together. Make sure all strips are cut at the same angle to ensure that they line up properly during assembly.
3. Sewing the Twisted Rail Fence Block
Now that your strips are cut and angled, it’s time to start sewing the Twisted Rail Fence Quilt Block together. This step is where the magic of the twisted effect comes to life.
Begin by sewing the first two strips together along the angled edge. Align the edges carefully to maintain the 45-degree angle, and use a quarter-inch seam allowance for all seams. Sew slowly and keep the fabric edges even to create a smooth seam.
Press the seam open with an iron to keep the block flat and to make it easier to add additional strips. Repeat this process, adding each strip one by one, until all strips are sewn together into a single block. Make sure to press each seam open as you go.
Once all strips are sewn together, trim the edges to create a clean, square block. The twisted effect should now be visible, with each strip appearing to “twist” in sequence. Check that your seams are aligned and that the block lays flat, making adjustments if necessary.
4. Creating a Quilt with Twisted Rail Fence Blocks
With your Twisted Rail Fence Quilt Block complete, you can use it in various layouts to create different quilt designs. Here’s how to make the most of this unique block in a full quilt.
To make a quilt, start by creating multiple twisted rail fence blocks. The number of blocks needed will depend on the quilt size you’re aiming for. Typically, a throw-size quilt requires around 20-30 blocks, while a full-size quilt may need more.
Experiment with different layouts before sewing the blocks together. Arrange the blocks horizontally for a flowing, wave-like effect, or place them at alternating angles for a zigzag look. Try different placements to see what design appeals to you most.
Once you’re satisfied with your layout, sew the blocks together in rows, joining each row until the entire quilt top is assembled. Press each seam between rows to keep the quilt top flat and well-aligned. You’re now ready to finish your Twisted Rail Fence Quilt with borders, batting, and backing fabric.
🌟Join our exclusive Quilt broadcast list on Messenger! Receive the best patterns, tips, and updates directly in your inbox. Our team is ready to send you delightful content that will inspire your projects. Don’t miss this opportunity to stay updated and create amazing pieces. Join now and be part of this passionate quilt community!✨📩
FAQ: Twisted Rail Fence Quilt Block Tutorial
Q: What fabrics work best for the Twisted Rail Fence Quilt Block?
A: Fabrics with strong contrast in color or print are ideal for this block. The contrast enhances the twisted effect and makes the pattern more visually striking.
Q: Can I make this block in different sizes?
A: Yes, you can adjust the strip width to make smaller or larger blocks. A 2.5-inch strip width is common, but you can modify it to fit your desired block size.
Q: Is the Twisted Rail Fence Quilt Block beginner-friendly?
A: Yes, this block is suitable for beginners with some basic quilting experience. The angled cutting requires attention, but the sewing process is straightforward.
Q: What is the best way to arrange the blocks in a quilt?
A: The arrangement depends on your preference. Laying the blocks horizontally creates a wave effect, while alternating angles produces a zigzag pattern. Experiment with different layouts before finalizing.
Q: Do I need to press each seam open?
A: Yes, pressing seams open or to one side helps keep the block flat and makes assembly easier. Pressing also gives a more professional look to the finished block.
Q: Can I use scraps for the Twisted Rail Fence Quilt Block?
A: Absolutely! This pattern works well with fabric scraps. Just ensure that each strip is cut to the same width for consistency.
The Twisted Rail Fence Quilt Block is a fantastic addition to any quilter’s project list. This tutorial has shown you how to gather materials, cut and prepare fabric strips, and assemble them into a stunning twisted rail fence block. With some creativity and careful attention to detail, you can make a quilt that showcases this unique pattern beautifully.
We hope this guide has been helpful in understanding the steps and techniques for the Twisted Rail Fence Quilt Block. Please feel free to share your thoughts, experiences, and any suggestions for future tutorials. Happy quilting!


