The Eight Pointed Star Quilt Block is a timeless design cherished by quilters of all skill levels. Its elegant symmetry and classic appeal make it a favorite for both traditional and modern quilting projects. Whether you are crafting a family heirloom or adding a statement piece to your collection, mastering this block opens up endless creative possibilities.
In this tutorial, we’ll guide you step-by-step through the process of creating the Eight Pointed Star Quilt Block, covering everything from material selection to assembly. With clear instructions and practical tips, this article ensures that even beginners can achieve stunning results.
Understanding the intricacies of this design and its versatility is key to fully appreciating why it has endured as a quilting classic. Let’s dive into this rewarding project and discover the joy of crafting your own Eight Pointed Star Quilt Block.
1. Understanding the Eight Pointed Star Quilt Block
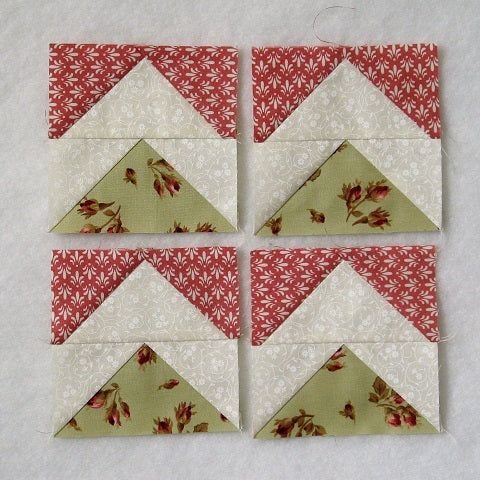
The Eight Pointed Star Quilt Block is a symmetrical pattern featuring eight points radiating from the center, forming a striking star shape. It’s often made using geometric pieces like diamonds and triangles, giving it a crisp, defined look.
SEE OTHER FACE PATTERNS HERE!
- Historical Significance
This design has roots in traditional quilting and is often associated with Americana and folk art. Its timeless appeal continues to inspire modern quilters, making it a staple in quilting circles worldwide. - Materials You’ll Need
To create this block, you’ll need high-quality quilting cotton, a rotary cutter, a cutting mat, and a sewing machine. Choosing fabrics with complementary colors or patterns will make your star truly shine. - Precision Cutting
Accurate cutting is crucial for this block. Each piece must fit perfectly to create sharp points and maintain symmetry. Using templates or pre-cut fabric kits can simplify this process for beginners. - Versatile Applications
The Eight Pointed Star can be the centerpiece of a larger quilt or used repeatedly for a cohesive design. It works beautifully in wall hangings, table runners, and even as standalone blocks for smaller projects. - Tips for Beginners
If you’re new to quilting, start with simpler fabrics and avoid stretchy materials. Practice sewing straight seams and pressing your fabric pieces carefully to achieve a polished finish. - Why Choose This Block?
The Eight Pointed Star Quilt Block is not only visually stunning but also a wonderful way to develop foundational quilting skills like precision cutting and accurate piecing.
2. Step-by-Step Tutorial
Creating your Eight Pointed Star Quilt Block can be broken down into manageable steps, ensuring a smooth and enjoyable experience.
- Cut Your Fabric
Using your chosen fabrics, cut the required pieces: diamonds for the star points, triangles for the corners, and squares for the center. Precision is key for perfect alignment. - Arrange the Pieces
Lay out the cut pieces on a flat surface to form the star pattern. This step helps visualize the final design and ensures proper placement of colors and prints. - Sew the Star Points
Begin by sewing the diamond pieces together to form the star’s points. Use a ¼-inch seam allowance for consistency and press seams open to reduce bulk. - Assemble the Block
Combine the star points with the triangles and squares to complete the block. Work in sections, pressing seams as you go to maintain a flat and professional finish. - Trim and Square the Block
After sewing, trim the edges to ensure the block is square. This step is crucial for assembling the quilt top seamlessly. - Celebrate Your Creation
Step back and admire your completed Eight Pointed Star Quilt Block. This classic design is a testament to your dedication and attention to detail!
3. Common Challenges and How to Overcome Them
Quilting can be challenging, especially for beginners. Here’s how to tackle common issues while creating the Eight Pointed Star Quilt Block.
- Uneven Seams
If your seams are uneven, use a seam guide or sewing foot attachment to maintain a consistent ¼-inch allowance. - Fabric Stretching
Stretching occurs when working with bias edges. Handle pieces gently and use spray starch to stabilize the fabric. - Misaligned Points
Achieving perfect star points can be tricky. Pin pieces carefully before sewing and check alignment before final assembly. - Bulky Seams
Press seams open or to one side to reduce bulk. Using a pressing mat and iron will make this step easier. - Color Imbalance
Choose fabrics with varying tones and patterns to create a balanced and visually appealing design. Lay out pieces before sewing to confirm the arrangement. - Trouble Squaring the Block
Use a quilting ruler to check dimensions and trim excess fabric. This ensures your block fits perfectly with others in your quilt.
4. Creative Variations
Once you’ve mastered the basics, explore creative variations of the Eight Pointed Star Quilt Block.
- Experiment with Fabrics
Try using batiks, solids, or even scraps to add texture and depth to your design. - Play with Colors
Use a monochromatic palette for a modern look or bold contrasts for a traditional feel. - Incorporate Prints
Choose prints that complement the block’s geometric structure for added visual interest. - Resize the Block
Create mini versions for coasters or oversized blocks for quick quilts. - Combine with Other Patterns
Pair the Eight Pointed Star with complementary blocks like pinwheels or log cabins for a dynamic quilt. - Add Embellishments
Enhance your block with embroidery or applique details for a unique personal touch.
🌟Join our exclusive Quilt broadcast list on Messenger! Receive the best patterns, tips, and updates directly in your inbox. Our team is ready to send you delightful content that will inspire your projects. Don’t miss this opportunity to stay updated and create amazing pieces. Join now and be part of this passionate quilt community!✨📩
FAQ
Q1: Can beginners make the Eight Pointed Star Quilt Block?
A: Yes! With patience and attention to detail, beginners can successfully create this block using our tutorial.
Q2: What size should my finished block be?
A: Common sizes range from 12 to 18 inches, but you can customize it to suit your project.
Q3: How do I prevent fabric from stretching?
A: Handle bias edges gently and use spray starch for added stability.
Q4: Can I use scraps for this block?
A: Absolutely! Scraps add a unique touch and make the block more personal.
Q5: How can I achieve perfect star points?
A: Pin carefully, sew slowly, and check alignment before sewing each section.
Q6: What fabrics work best for this design?
A: High-quality quilting cotton with minimal stretch is ideal.
Creating the Eight Pointed Star Quilt Block is a rewarding experience that enhances your quilting skills while adding a timeless design to your collection. This tutorial has covered the essential steps, tips, and variations to inspire your creativity.
We’d love to hear your thoughts! Share your honest opinions and suggestions in the comments below, and let us know how your project turned out. Happy quilting!


