Fabric Origami – Tutorial introduces you to the creative and intricate world of folding fabric to make stunning decorative items. This technique, combining the beauty of traditional origami with fabric, allows you to create everything from elegant decorations to functional items like bags or accessories. Whether you’re an experienced crafter or just starting out, fabric origami provides endless possibilities to explore.
Origami, the Japanese art of paper folding, is known for creating beautiful, geometric designs with just a few simple folds. When applied to fabric, this technique transforms ordinary cloth into something extraordinary. Fabric origami is a versatile craft that can be used to make everything from flowers and animals to home décor and fashion accessories. It offers a wonderful opportunity to combine the rich texture and colors of fabric with the precision and beauty of origami folds.
In this article, we’ll provide you with a detailed Fabric Origami – Tutorial that you can follow to create stunning folded fabric pieces. We’ll walk through the basic techniques, tools required, and some creative ideas to incorporate into your own projects. By the end of this tutorial, you’ll be equipped to make unique fabric creations and explore this enjoyable and rewarding craft.
1. Materials Needed for Fabric Origami
Before diving into your Fabric Origami – Tutorial, it’s essential to gather the right materials. The beauty of this craft is that it can be done with simple tools and fabric, but choosing the right materials can make a big difference in the final product. Here’s what you will need:
SEE OTHER FACE PATTERNS HERE!
- Fabric: Choose fabric that is relatively stiff, as it will hold folds better than softer fabrics like cotton. Silk, taffeta, and linen work well for more elegant projects, while cotton or felt is ideal for beginners.
- Scissors: A sharp pair of scissors will help you cut your fabric into the appropriate shapes and sizes.
- Iron: Pressing your fabric with an iron before folding it helps create crisp edges that hold the origami folds better.
- Needle and Thread: A hand sewing needle and thread are used to secure the folds and stitch your fabric pieces together.
- Fabric Glue: For some projects, fabric glue can be a handy alternative to stitching, especially when working with more intricate folds or small details.
- Measuring Tape: Accuracy is essential in fabric origami, so a measuring tape or ruler will ensure your fabric pieces are cut to the correct size.
Once you have all the materials gathered, you’re ready to begin. Whether you’re making small embellishments for clothing or creating larger pieces like decorative flowers or ornaments, these supplies are the foundation of your craft.
2. Step-by-Step Fabric Origami Tutorial
Now that you’re ready, let’s dive into the Fabric Origami – Tutorial. For beginners, we’ll focus on creating a simple folded flower. This design can easily be turned into other shapes or even used to embellish accessories like bags or hairpieces. Here’s a simple step-by-step guide:
- Cut Your Fabric: Begin by cutting a square piece of fabric. For a small flower, a 6-inch by 6-inch square is a good starting size, but feel free to experiment with larger or smaller pieces based on the project.
- Press the Fabric: Use your iron to press the fabric flat. This helps to eliminate wrinkles and ensures the fabric holds its folds better.
- Make the First Fold: Start by folding the square in half diagonally, corner to corner, to form a triangle. Press the fold gently with your fingers.
- Form the Petals: Fold each corner of the triangle up towards the top point, creating a smaller triangle with flaps. This will begin forming the petals of your flower.
- Tuck and Fold: Continue folding the edges of each flap to the center to create smaller triangles. Each fold should be sharp and neat for the design to hold.
- Secure the Design: Once all the folds are complete, use your needle and thread to sew the folds in place or apply fabric glue. This helps the design stay intact and gives it a finished look.
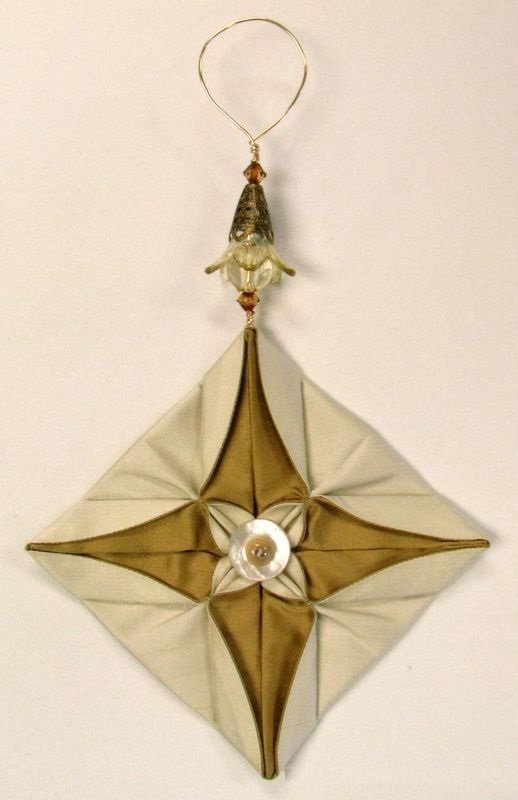
This simple flower design can be repeated and arranged to form larger, more intricate patterns. You can attach a button or bead at the center for added decoration or use the flowers as appliqués for clothing or accessories.
3. Creative Ideas for Using Fabric Origami
Fabric origami isn’t just about making flowers—it offers a world of creative possibilities. Here are some fun ideas for incorporating Fabric Origami into your crafts:
- Fabric Flowers: These are the most common fabric origami designs, perfect for embellishing clothing, hats, bags, or even home décor items like pillowcases and table runners.
- Origami Fabric Coasters: Using fabric origami techniques, you can create unique coasters that not only protect your table but also add an artistic touch to your dining space.
- Origami Jewelry: Craft tiny folded fabric pieces to create earrings, necklaces, or brooches. These accessories can add a personal, handmade touch to your wardrobe.
- Fabric Origami Boxes: A beautiful and functional project, fabric origami can be used to create decorative boxes. These can be used for storage, gift packaging, or just as decorative pieces in your home.
- Origami Fabric Pouches: Make small pouches or bags using fabric origami. These are great for storing jewelry, cosmetics, or even as small gift bags.
- Home Décor: Use larger pieces of folded fabric to create beautiful wall hangings, ornaments, or garlands. These can be used for celebrations or to add a custom touch to your home décor.
Fabric origami gives you the flexibility to turn simple fabric pieces into beautiful, functional items. With just a few folds and creative ideas, you can make personalized gifts, home décor, and accessories that showcase your craft.
4. Tips for Mastering Fabric Origami
As you begin your Fabric Origami – Tutorial, here are a few tips to help you improve your technique and ensure the best results:
- Use Stiff Fabrics: For more defined folds and shapes, choose fabric that is firm yet still soft enough to work with. Stiffer fabrics like linen or taffeta tend to hold their shape better than softer fabrics like cotton.
- Practice Folding Precision: The beauty of fabric origami lies in the precision of the folds. Take your time to make sharp, neat folds, and press them well with your fingers or iron for a professional finish.
- Experiment with Sizes: The beauty of fabric origami is that you can create designs in any size. Start small and work your way up, but remember that larger pieces of fabric may require more folds and patience.
- Choose the Right Thread: When stitching your fabric pieces together, use thread that matches your fabric color or choose a contrasting color for a more decorative effect.
- Secure Folds with Fabric Glue: If you want to avoid sewing, you can use fabric glue to secure the folds. This can be especially helpful when creating small or intricate designs.
- Combine Multiple Pieces: If you’re making a large design, consider combining several smaller pieces of folded fabric to create a larger item like a quilt or a table runner.
These tips will help you refine your fabric origami skills and ensure that your projects come out beautifully. With practice, you’ll be able to create increasingly complex and stunning pieces.
FAQ About Fabric Origami
Q1: Can I use any fabric for fabric origami? A1: While you can use any fabric, it’s best to choose fabrics that are somewhat stiff, like linen, silk, or taffeta. These fabrics hold their shape better than softer ones like cotton.
🌟Join our exclusive Quilt broadcast list on Messenger! Receive the best patterns, tips, and updates directly in your inbox. Our team is ready to send you delightful content that will inspire your projects. Don’t miss this opportunity to stay updated and create amazing pieces. Join now and be part of this passionate quilt community!✨📩
Q2: How do I keep my fabric folds in place? A2: You can secure your fabric folds by stitching them with a needle and thread or by using fabric glue. Both methods work well, depending on the size and complexity of your design.
Q3: What is the best fabric for beginners? A3: For beginners, cotton is a great fabric to start with. It’s easy to handle and holds folds relatively well. You can also try felt or light linen for a bit more structure.
Q4: Can fabric origami be washed? A4: Depending on the fabric you use and how you secure the folds, some fabric origami projects can be machine washed. However, delicate designs may require handwashing or spot cleaning.
Q5: Can I use fabric origami to make clothing items? A5: Yes, fabric origami can be used to embellish clothing. You can add small folded designs to dresses, shirts, or jackets to create unique, one-of-a-kind pieces.
Q6: Are there advanced fabric origami patterns? A6: Yes, there are more advanced patterns available. As you gain confidence with basic folds, you can challenge yourself with more intricate designs like fabric origami flowers or boxes.
In conclusion, Fabric Origami – Tutorial opens up a world of creative possibilities for both beginners and experienced crafters. With just a few simple materials and the right techniques, you can create beautiful, functional fabric pieces that enhance your home décor, fashion accessories, or even gifts. From simple flowers to elaborate creations, the art of fabric origami allows you to combine beauty with functionality in a way that no other craft can.
We hope this guide has inspired you to explore fabric origami and create your own beautiful pieces. Feel free to share your experiences, tips, and suggestions in the comments below! Happy crafting!


