If you love equestrian themes and are looking for a fresh, fun project to bring your love of horses into your quilting, the Horse or Pony Quilt Tutorial is the perfect creative journey for you. This pattern is ideal for horse lovers, young or old, and makes an eye-catching quilt that’s both whimsical and heartwarming.
The Horse or Pony Quilt Tutorial offers a versatile design that can be used in baby quilts, wall hangings, or full-size bedspreads. Whether you’re quilting for a child who adores ponies or decorating a cozy farmhouse, this pattern delivers rustic charm and personality. It’s suitable for confident beginners and seasoned quilters alike.
In this article, we’ll guide you step by step through fabric selection, cutting, piecing, and assembly. We’ll also share tips to personalize your pony quilt and make it uniquely yours. Ready to saddle up and start stitching?
1. Choosing Fabrics and Preparing Your Workspace
Before diving into your Horse or Pony Quilt Tutorial, it’s important to select the right fabrics that will bring your horse-themed design to life.
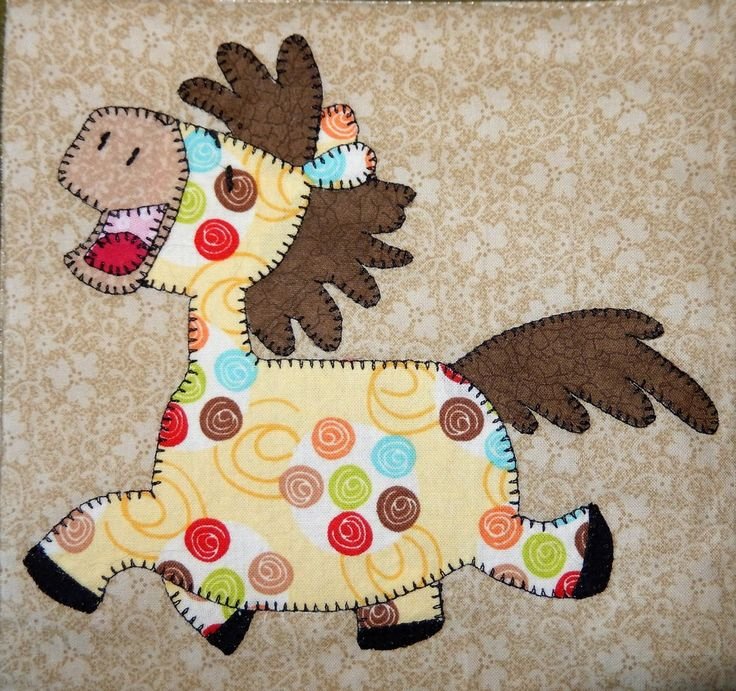
SEE OTHER FACE PATTERNS HERE!
Start with a color palette. Think of earth tones for a realistic horse, pastels for a whimsical pony, or bold contrasts if you’re going for a stylized design. This is your chance to be creative and playful.
Choose high-quality 100% cotton quilting fabric. It handles well, holds its shape, and will make your finished quilt look polished and professional.
You’ll need background fabric (light or neutral), fabric for the horse or pony silhouette, accent fabrics for features like the mane, and optional prints for borders or sashing.
Use fabric stabilizer if your design includes appliqué pieces. This keeps them from stretching or distorting during stitching.
Be sure to pre-wash your fabric if it’s prone to shrinkage. This avoids unwanted puckering after the quilt is completed and washed for the first time.
Set up a clean, well-lit space for cutting, ironing, and sewing. Having everything organized ahead of time saves time and frustration during the quilting process.
2. Cutting and Assembling the Quilt Blocks
With your fabrics selected, the next step in the Horse or Pony Quilt Tutorial is cutting your pieces accurately and assembling the main blocks.
If you’re using an appliqué-style pattern, start by printing and tracing the horse or pony shape onto fusible webbing, then cut it out carefully and press it onto the fabric of your choice.
Use rotary cutters, rulers, and cutting mats to ensure clean, accurate cuts. Precision here is key to aligning your quilt blocks later on.
Cut your background blocks large enough to showcase your pony design. Typically, 10″ to 12″ squares work well, giving you enough space for detail.
For pieced blocks (if the horse is constructed from geometric shapes), follow your pattern closely to cut rectangles, triangles, and squares in the correct dimensions.
Once the pieces are cut, assemble the blocks row by row, or by design section (mane, body, legs). Use a consistent ¼” seam allowance for all pieces.
Press seams flat using a hot iron. This helps the quilt top lay smoothly and makes your finished product look tidy and professional.
3. Stitching the Design and Adding Personality
The magic happens when your Horse or Pony Quilt Tutorial comes to life through stitching, details, and creative choices.
Secure your horse or pony appliqué using a zigzag, satin, or straight stitch. Choose a matching thread for a clean look or a contrasting one for a bold effect.
If your pattern includes multiple horses or ponies, arrange them thoughtfully across the quilt top—consider galloping across rows or running in a circle!
Add detail with embroidery or fabric markers—features like eyes, hooves, tails, and a bridle can all be included with a bit of flair.
Personalize with fun fabric for the mane—consider yarn, fringe, or even raw-edge appliqué for texture and movement.
Borders and sashing help frame the blocks and pull the design together. You can use horse-themed prints like horseshoes, barns, or western motifs to tie it all in.
If you’re quilting by machine, simple straight-line quilting enhances the structure, while free-motion quilting can add clouds, grass, or trails to the scene.
4. Binding and Finishing Your Quilt
Now that your quilt top is complete, let’s walk through the finishing touches in this Horse or Pony Quilt Tutorial to make sure your quilt is both beautiful and durable.
Layer your quilt sandwich: backing fabric (right side down), batting, and quilt top (right side up). Smooth out wrinkles and baste using pins or spray adhesive.
Quilt your layers together using your chosen method. Whether it’s hand quilting, machine quilting, or long-arm quilting, keep your stitches even and consistent.
Trim the edges of your quilt sandwich so all layers are even. This step ensures a clean, professional finish when you bind the quilt.
Choose a binding fabric that complements your design. Fold it over the edges and sew it on carefully—this is your quilt’s final touch and should be neat and sturdy.
Add a custom label to the back with the quilt’s name, your name, and the date. This adds a personal touch and turns your project into a keepsake.
Give your finished quilt a light press and photograph it! Whether you’re gifting it or keeping it, it’s a special piece of craftsmanship to be proud of.
🌟Join our exclusive Quilt broadcast list on Messenger! Receive the best patterns, tips, and updates directly in your inbox. Our team is ready to send you delightful content that will inspire your projects. Don’t miss this opportunity to stay updated and create amazing pieces. Join now and be part of this passionate quilt community!✨📩
FAQ – Horse or Pony Quilt Tutorial
Is this pattern good for beginners?
Yes! While some versions are more complex, many Horse or Pony Quilt patterns use simple appliqué or pieced blocks, making them great for beginners with basic sewing skills.
What size quilt does this pattern make?
It varies, but the average size is about 40″x60″ for a throw. You can easily scale the blocks up or down to create baby quilts, wall hangings, or bed-sized quilts.
Can I machine wash this quilt?
Absolutely, as long as you’ve used washable fabric and batting. Use gentle cycle and mild detergent, and always air dry or tumble dry on low.
What’s the best fabric for the horse or pony shape?
Quilting cotton is ideal. If you want texture, consider using felt, flannel, or textured cotton for the mane or tail.
Can I customize the horse design?
Yes! Many crafters add fun touches like patterned fabrics for the body, different mane styles, or even themed accessories like saddles or cowboy hats.
Is this a good gift idea?
Definitely. A horse-themed quilt is perfect for baby showers, birthdays, or anyone who loves horses. Personalized details make it even more special.
Conclusion
The Horse or Pony Quilt Tutorial is more than just a sewing project—it’s a creative experience that celebrates your love for animals and your passion for quilting. From fabric selection to the final binding, each step is an opportunity to infuse your project with personality and care. Whether you’re gifting it or enjoying it yourself, this quilt is sure to bring joy for years to come.
We’d love to hear how your quilt turned out! Leave a sincere comment below and let us know if you added any unique touches or have ideas for future quilting tutorials. Happy quilting! 🧵🐴


