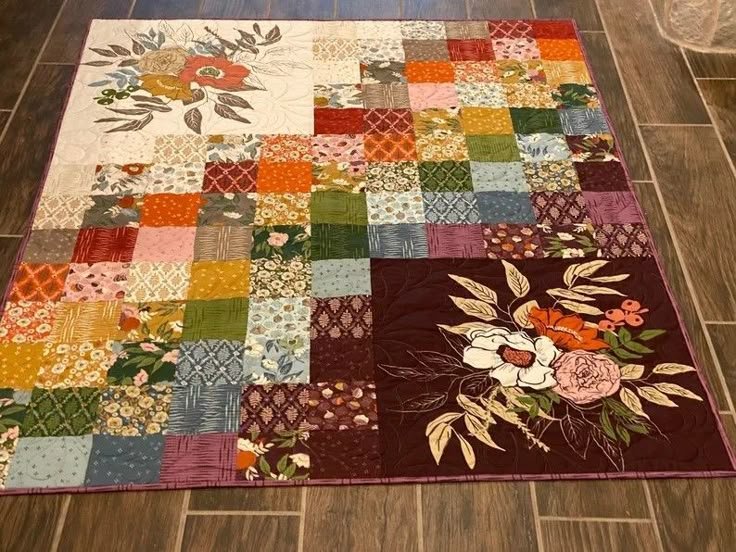
The Color Patch Cascade Quilt – TUTORIAL is an exciting and visually stunning quilting project that perfectly blends vibrant color placement with a dynamic, flowing design. If you’re looking for a quilt pattern that feels both modern and timeless, this cascade-style pattern is an ideal choice. Its unique arrangement of fabric patches creates the illusion of movement, making it a favorite among quilters who want their work to stand out.
Whether you’re a beginner quilter eager to expand your skills or a seasoned expert looking for a bold new project, the Color Patch Cascade Quilt – TUTORIAL offers creative freedom and satisfaction. From selecting your color palette to arranging the pieces in just the right flow, each step of this tutorial is both engaging and rewarding.
In this detailed guide, we will explore everything you need to know to bring this eye-catching quilt to life. From choosing fabrics and cutting techniques to assembling your blocks and quilting tips, this tutorial covers it all to ensure success at every stage.
1. Understanding the Color Patch Cascade Concept
The Color Patch Cascade Quilt is built around the idea of a “cascade” — a visual flow of color that moves across the quilt top. This effect is created by organizing small fabric patches in a way that transitions smoothly or dramatically from one color to another.
SEE OTHER FACE PATTERNS HERE!
To achieve the cascading look, you can choose fabrics in varying shades of one color (monochromatic), blend complementary tones, or go for a rainbow effect. The magic lies in the placement and sequencing of the patches.
Most layouts follow a loose diagonal or vertical flow, but you can adjust the direction to suit your personal design. The cascading effect gives the illusion of movement, adding energy and depth to your finished quilt.
The patch sizes can vary, but squares and rectangles are most commonly used for simplicity and visual balance. The standard block is often made of 2.5-inch squares or strips, allowing you to use precuts like jelly rolls or charm packs.
This pattern is especially great for using up scraps or leftover fabrics. Because the magic lies in the placement, even small pieces of fabric can contribute to the overall design.
Whether you want a calm and subtle cascade or a bold and bright explosion of color, this pattern is adaptable to your creative vision.
2. Materials and Color Planning
To begin your Color Patch Cascade Quilt – TUTORIAL, you’ll need basic quilting tools and a thoughtful selection of fabrics. Start with high-quality cotton quilting fabric in a range of hues, focusing on color variation and tone.
Plan your color palette ahead of time. Lay out your fabrics in gradient order to ensure smooth transitions. You might want to go from dark to light, cool to warm, or even blend two different color stories across the quilt.
Use graph paper or digital quilt design software to sketch your layout. Planning in advance helps you avoid repeating patches and ensures a balanced design from top to bottom.
For a throw-size quilt, you’ll typically need around 2–3 yards of assorted fabrics for the top, depending on your patch size and layout. Add extra for borders or backing if desired.
Make sure to have sharp rotary cutters, a cutting mat, quilting rulers, pins, a sewing machine, thread, and an iron ready to go. Precision is key in a cascade quilt—accurate cutting and pressing will make joining blocks much easier.
Organize your fabric pieces in labeled rows or piles to keep track of the cascading flow while you sew. This is especially important if you’re using a wide range of colors.
3. Cutting and Piecing the Quilt Top
Begin by cutting your fabrics into uniform pieces. For the Color Patch Cascade Quilt, standard squares or strips—such as 2.5″ x 2.5″ or 2.5″ x 5″—work well to maintain consistency in piecing.
Group your fabric cuts according to their position in the cascade. This helps maintain a visual flow and makes it easier to chain-piece efficiently as you sew row by row.
Lay out your quilt top on a design wall or floor space before stitching. This step helps you catch any color clashing or breaks in the flow before you commit to sewing.
Sew the pieces together into horizontal rows, carefully following the order of your layout. Press the seams after each row is completed to reduce bulk and help seams nest when joined.
Once your rows are complete, join them vertically to build the quilt top. Align your seams carefully for a clean and polished finish.
After the top is pieced, trim the edges if needed and prepare for the quilting stage. Take time to admire your colorful cascade—each patch contributes to the overall harmony of the design.
4. Quilting and Finishing Touches
Now that the quilt top is complete, it’s time to layer and quilt your Color Patch Cascade Quilt. Choose a backing fabric that complements your top—solid or patterned, depending on your style.
Create your quilt sandwich by layering the backing (right side down), batting, and quilt top (right side up). Use safety pins or temporary adhesive spray to secure the layers before quilting.
For quilting, consider simple straight-line stitching that follows the cascade flow to emphasize the movement. Diagonal or echo quilting also enhances the sense of motion in the design.
Use a walking foot for even feed during quilting, especially if you’re doing straight lines or grid quilting. Choose thread colors that either blend into the patches or stand out as part of the design.
After quilting, trim the excess batting and backing, then bind the quilt with a complementary fabric. A solid binding color can help frame the cascade, while a print adds a playful touch.
Label your quilt if desired, and give it a gentle wash to soften it. Now you have a stunning, handmade Color Patch Cascade Quilt ready to display or gift with pride.
🌟Join our exclusive Quilt broadcast list on Messenger! Receive the best patterns, tips, and updates directly in your inbox. Our team is ready to send you delightful content that will inspire your projects. Don’t miss this opportunity to stay updated and create amazing pieces. Join now and be part of this passionate quilt community!✨📩
FAQ
Is the Color Patch Cascade Quilt Pattern beginner-friendly?
Yes! The simple shapes and repeated piecing make it a great choice for beginners who want to practice color placement and cutting accuracy.
Can I use precut fabric for this pattern?
Absolutely. Jelly rolls and charm packs are perfect for this quilt, especially if you want a variety of coordinated colors without buying yardage.
What’s the best way to plan my color flow?
Use a design wall or arrange your patches on the floor first. Group similar tones together and transition slowly to create a cascading effect.
How long does it take to finish?
Depending on size and complexity, the quilt can take anywhere from a weekend to a few weeks. Chain-piecing speeds up the process.
Can I make this quilt in custom sizes?
Yes! Just adjust the number of blocks or patch sizes to fit your desired dimensions. The pattern is very flexible.
What quilting design works best?
Straight-line or echo quilting highlights the cascade beautifully, but free-motion quilting works too if you want a more artistic finish.
Conclusion
The Color Patch Cascade Quilt – TUTORIAL opens the door to a truly creative and visually exciting quilting journey. From carefully selecting your fabrics to stitching the final seam, this pattern offers a satisfying experience that results in a beautiful, eye-catching quilt full of motion and color.
PATTERN VIDEO:
If you’ve enjoyed this tutorial, we’d love to hear from you! Share your finished quilt photos, leave a sincere comment with your feedback, or let us know how you customized your cascade. Your voice and ideas inspire us all in the quilting community!


