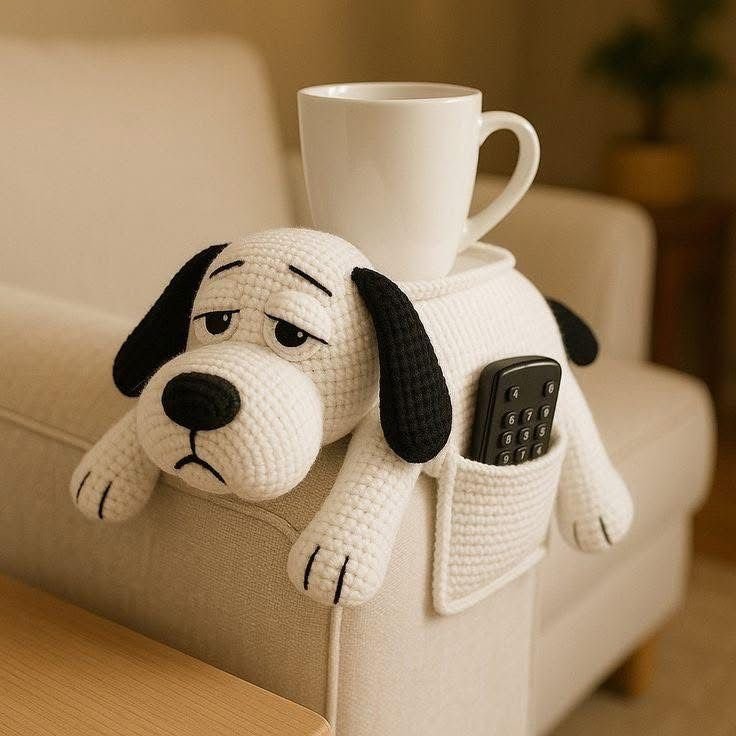
Starting a fun project like the Crochet Dog Coaster – TUTORIAL is a perfect way to combine creativity and practicality. Crochet coasters are not only adorable but also useful for protecting tables from scratches and stains. Adding a dog-themed design makes them even more charming, especially for animal lovers or as a handmade gift idea. This tutorial is tailored for both beginners and experienced crocheters, giving you easy-to-follow steps and techniques.
The best part about a crochet dog coaster pattern is its versatility. You can use yarn scraps, choose colors that represent your favorite dog breed, or make a set as a thoughtful present. Since it’s a small project, it doesn’t require much time, making it ideal for quick crafting sessions or practicing new stitches. With just a little effort, you can turn yarn into something unique and full of personality.
If you’re looking for a project that is relaxing, fun, and creative, the Crochet Dog Coaster – TUTORIAL is exactly what you need. This guide will help you through the process step by step, from materials to finishing touches. By the end, you’ll have not only a coaster but also a piece of handmade art that reflects your love for crochet and dogs.
1. Materials and Tools Needed
To begin this crochet dog coaster pattern, you’ll need just a few basic materials. Most of them are items you probably already have in your crafting kit. A medium-weight cotton yarn works best, as it provides durability and easy washing. Choose neutral tones for a realistic look or bright shades for a playful effect.
DISCOVER MORE FREE PATTERNS HERE!
The crochet hook size can vary depending on the yarn you select, but a 4mm or 4.5mm hook is a common choice. Having a pair of sharp scissors and a yarn needle will also be essential for cutting and weaving in ends neatly. These small tools make finishing your project professional and tidy.
Optional embellishments like small buttons or embroidery thread can be used to add details such as eyes, a nose, or even a collar. These finishing touches will give your crochet dog coaster personality and style. However, if you prefer simplicity, a plain coaster without extra details works beautifully too.
A stitch marker can help beginners keep track of their rounds. This is especially helpful when working in continuous circles, which is the foundation for many coaster patterns. Keeping count ensures a consistent shape and size.
The best part is that you don’t need a large investment for this project. Using leftover yarn scraps makes it both eco-friendly and budget-friendly. It’s a fantastic way to turn small pieces of yarn into something adorable and useful.
With just these simple materials, you’re ready to start creating a coaster that will brighten up any home while showing off your love for crochet and pets.
2. Step-by-Step Instructions
To make the base of the crochet dog coaster, start by creating a magic ring and working in rounds. This will give you a solid circular foundation. Typically, you’ll begin with single crochets or double crochets, depending on the pattern style. This forms the main body of the coaster.
As you expand, continue working in rounds, adding stitches evenly to keep the circle flat. Stitch increases are placed strategically to avoid curling or rippling edges. Once the circle is large enough, it will form the base where the dog’s face details can later be added.
The ears are often created separately and sewn on afterward. You can make them floppy or pointy, depending on the dog breed you want to represent. Simple triangle or oval-shaped ears work best for beginners.
Adding details like a snout, nose, or eyes can be done through embroidery or by crocheting small pieces to attach. These features bring character to the coaster and transform a plain circle into a recognizable dog design.
After assembling all the parts, make sure to weave in loose ends securely. This ensures durability, especially if the coaster will be washed frequently. Neat finishing makes your handmade piece last longer and look polished.
By following these steps, you’ll quickly see how easy and rewarding it is to bring a crochet dog coaster pattern to life, turning yarn into a functional and decorative item.
3. Creative Variations and Ideas
One of the joys of the Crochet Dog Coaster – TUTORIAL is its flexibility. You can adapt the pattern to represent different dog breeds simply by adjusting colors or ear shapes. For example, black yarn with pointed ears can resemble a German Shepherd, while beige with floppy ears might look like a Labrador.
Adding a small bow or collar detail can personalize each coaster even more. These small touches make great gifts for pet owners, adding a thoughtful and customized element to your handmade creation.
You can also experiment with textured stitches. Instead of plain single crochet, try puff stitches or bobbles to give the dog’s face more dimension. This makes the coaster stand out and look even more unique.
If you enjoy making sets, consider creating a collection of different breeds. A full set of crochet dog coasters can make a wonderful housewarming gift or even something to sell at craft fairs. Handmade sets are always a hit with animal lovers.
Another idea is to scale up the pattern by using thicker yarn and a larger hook. This way, the coaster becomes a small placemat or decorative doily, perfect for pet-themed spaces. The adaptability of this pattern makes it exciting for crafters of all levels.
With so many options for personalization, each coaster you make can be one of a kind, reflecting your creativity and love for dogs.
4. Tips for Beginners and Best Practices
If you’re new to crochet, this dog coaster pattern is a fantastic way to practice working in the round. It teaches you how to increase stitches evenly, which is a skill you’ll use in many other projects. Don’t rush; take your time with each round.
Keep your tension consistent so that your coaster lays flat. Uneven tension can cause rippling or curling, but with a little practice, you’ll achieve smooth results. This is an excellent project to build your confidence with maintaining stitch consistency.
Use stitch markers to avoid losing your place when working in continuous rounds. This simple tool prevents mistakes and saves time when counting stitches. Beginners often find this especially helpful.
When adding details like eyes or a nose, embroider them securely so they don’t come loose. If giving the coaster to a household with small children or pets, avoid small detachable embellishments for safety reasons.
Don’t be afraid to experiment with colors. A bright and playful palette can make your coaster fun and whimsical, while natural tones keep it classic. Crocheting should be enjoyable, and your choices make the project truly yours.
Lastly, remember that practice makes perfect. Your first crochet dog coaster might not look exactly how you imagined, but each attempt improves your skills. Enjoy the process and celebrate your progress.
FAQ about Crochet Dog Coaster – TUTORIAL
What type of yarn is best for a crochet dog coaster?
Cotton yarn is ideal because it is absorbent, durable, and machine washable.
How long does it take to make one dog coaster?
Most people can complete one in about 1 to 2 hours, depending on their crochet speed and detailing.
Can beginners follow this pattern easily?
Yes, the Crochet Dog Coaster – TUTORIAL is beginner-friendly, focusing on basic stitches and simple assembly.
Do I need special tools for this project?
No, just a crochet hook, yarn, scissors, and a yarn needle are enough to complete the project.
Is it possible to make other animals with the same base pattern?
Absolutely. By changing ear shapes and colors, you can create coasters resembling cats, bears, or other animals.
Can I wash the crochet dog coaster in the machine?
Yes, if made with cotton yarn, it can usually be washed in the machine. Just lay flat to dry to maintain its shape.
Conclusion
The Crochet Dog Coaster – TUTORIAL is a delightful project that combines creativity, functionality, and personalization. With simple materials, easy steps, and endless customization options, you can create charming coasters that reflect your love for crochet and dogs.
We’ve explored materials, step-by-step instructions, creative variations, and tips to ensure success. Now it’s your turn to try this fun project and enjoy the satisfaction of making something useful and beautiful.
PATTERN VIDEO:
Have you tried making a crochet coaster before? Share your opinion, experiences, and suggestions—I’d love to hear your thoughts!