The holiday season is the perfect time to bring creativity and sustainability together, and one of the most charming ways to do so is through Christmas Tree Decorations Made from Fabric Scraps – Pattern. This delightful project not only helps you reduce waste but also adds a personalized, handmade touch to your festive décor. Whether you are an experienced quilter or a beginner looking for a simple yet satisfying Christmas craft, this pattern will inspire you to turn leftover fabrics into beautiful ornaments that bring warmth and nostalgia to your home.
Using fabric scraps for Christmas tree decorations is an eco-friendly and budget-conscious approach that allows you to showcase your sewing skills while celebrating the joy of handmade creations. Each piece can be unique, reflecting your favorite colors, patterns, and textures. From classic reds and greens to modern golds and silvers, you can create a collection of decorations that perfectly match your style and holiday theme.
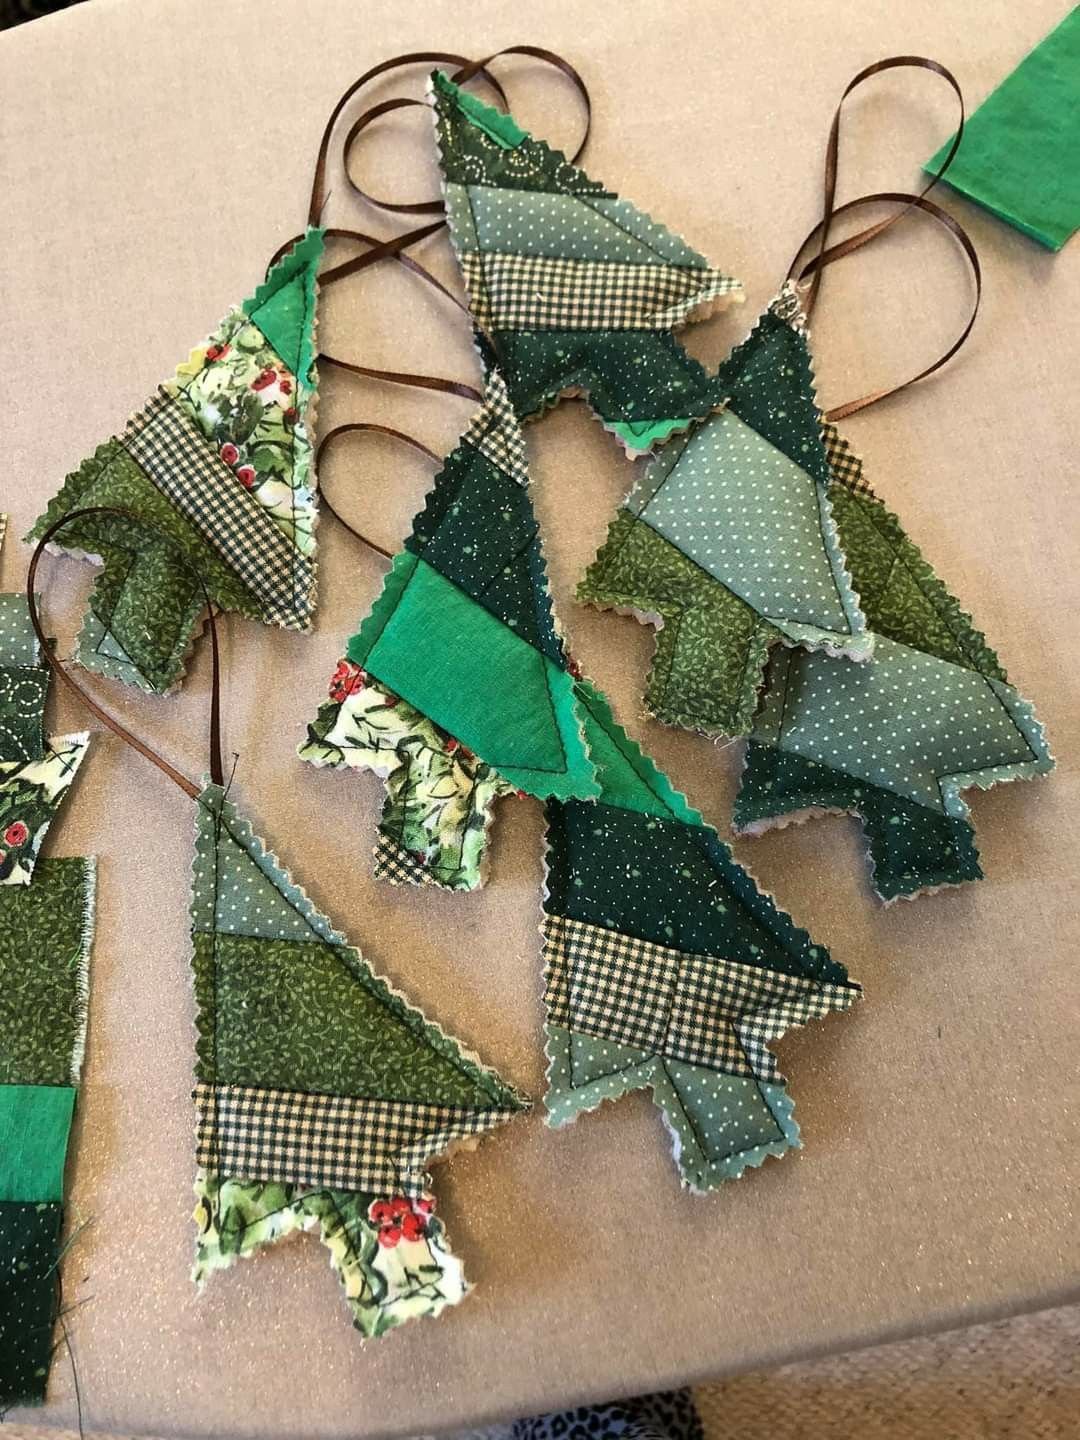
The Christmas Tree Decorations Made from Fabric Scraps – Pattern is versatile and easy to adapt. You can make small stars, hearts, or even miniature trees that hang beautifully on your Christmas tree. Adding buttons, beads, or ribbons enhances their charm, giving each ornament its own personality. This creative project is also a wonderful activity to do with family or friends, turning crafting into a shared seasonal tradition full of laughter and joy.
1. Choosing the Right Fabric Scraps
The success of your Christmas Tree Decorations Made from Fabric Scraps – Pattern starts with selecting the right materials. Look through your fabric box and gather pieces with holiday colors or patterns. Cotton fabrics are ideal because they are easy to sew and hold their shape well. Mixing prints, such as plaids, florals, and solids, can make your ornaments look more festive and lively.
SEE OTHER FACE PATTERNS HERE!
When selecting fabrics, consider using contrasting textures for visual appeal. Combining denim, linen, velvet, or even felt can give depth to your decorations. The more variety you include, the more dynamic your tree will look. Remember, these ornaments don’t need to match perfectly; part of their charm lies in their uniqueness.
Make sure your fabric scraps are clean and pressed before cutting. Ironing them helps remove wrinkles, making it easier to handle and ensuring cleaner stitching. If your scraps are frayed, trim the edges neatly before starting. This preparation step may seem small, but it makes a big difference in the final result.
You can also recycle old clothing or bedding that carries sentimental value. Transforming an old shirt, dress, or curtain into a Christmas decoration gives your project emotional depth. Each piece tells a story and adds a layer of nostalgia to your tree.
If you want a cohesive look, try sticking to a color palette. For example, shades of red and white can create a Scandinavian-style Christmas theme, while metallic tones can make your tree look elegant and modern. Choose colors that reflect your home’s festive atmosphere.
Lastly, don’t forget to prepare some additional decorative elements. Buttons, lace, sequins, or small bells can enhance your handmade ornaments, giving them a professional finish while still preserving their rustic charm.
2. Cutting and Assembling the Decorations
Once your fabrics are ready, it’s time to bring the Christmas Tree Decorations Made from Fabric Scraps – Pattern to life. Begin by selecting simple shapes that are easy to cut and sew. Stars, trees, hearts, and snowflakes are all great choices for beginners. Use paper templates or cookie cutters as guides to trace shapes onto your fabric.
Cut out two identical shapes for each ornament, as you’ll be stitching them together to create a front and back. This method makes your decorations sturdy and allows you to add light stuffing for volume. Keep your cuts clean and even, as this will help ensure a polished finish once sewn.
Next, place the fabric pieces right sides together and sew around the edges, leaving a small opening for turning. Use a small stitch length to keep the fabric secure. If you prefer a rustic look, you can hand-stitch using embroidery floss and a blanket stitch. Both methods work beautifully depending on your desired style.
After sewing, carefully turn your decoration right side out and fill it lightly with stuffing or fabric scraps. This step gives your ornaments a soft, plush appearance that feels cozy and handmade. Be sure not to overfill, as this can distort the shape.
Once stuffed, close the opening using an invisible stitch or a decorative top stitch. You can also add a loop made of ribbon, yarn, or twine at the top for hanging. This final touch completes the shape and makes it ready to adorn your Christmas tree.
To give your decorations an extra festive flair, consider adding hand-embroidered details such as snowflakes, initials, or small holiday messages. These tiny embellishments make your creations truly one-of-a-kind.
3. Adding Decorative Details and Personal Touches
Now comes the fun part—decorating your Christmas Tree Decorations Made from Fabric Scraps – Pattern. Adding embellishments allows you to express your creativity and make each piece special. Beads, sequins, ribbons, and buttons are popular choices that can make your ornaments sparkle under the tree lights.
If you enjoy embroidery, you can stitch small motifs like stars, snowflakes, or holly leaves. This not only enhances the visual appeal but also adds texture to your design. You can even personalize each decoration with initials or the year, creating meaningful keepsakes for family and friends.
Consider using natural materials for a rustic look. Twine, jute string, and wooden buttons blend perfectly with the fabric, giving your decorations a warm, cozy aesthetic. These materials are not only sustainable but also timeless in their beauty.
You can also experiment with layering different fabrics or adding lace trims for a vintage touch. Mixing modern and traditional details can create a charming contrast that suits both classic and contemporary homes.
If you’re gifting these decorations, you can package them beautifully in small fabric pouches or boxes. Handmade gifts like these show thoughtfulness and love, making them cherished by the recipient.
Finally, don’t be afraid to let your imagination run wild. The more personal details you include, the more special your Christmas Tree Decorations Made from Fabric Scraps – Pattern will become.
4. Displaying and Preserving Your Handmade Decorations
After creating your beautiful Christmas Tree Decorations Made from Fabric Scraps – Pattern, it’s time to display them proudly. Hang them on your Christmas tree, or use them as garlands, wreath accents, or even as festive gift tags. Their versatility makes them perfect for various holiday décor ideas.
If you want to create a cohesive display, group similar colors or shapes together on the tree. You can alternate them with fairy lights or other ornaments for a balanced, harmonious look. These handmade pieces stand out beautifully against green pine branches, bringing warmth and texture to your tree.
You can also use your fabric decorations as table centerpieces, napkin holders, or wall hangings. With a little creativity, they can become part of your entire holiday aesthetic, adding a handmade touch throughout your home.
When the holidays are over, it’s important to store your decorations properly. Place them in a box lined with tissue paper to protect them from dust and moisture. Avoid compressing them too much to maintain their shape for the next season.
If any decorations get wrinkled, you can lightly press them with an iron on low heat before displaying them again. Proper care ensures your creations will last for many Christmases to come.
Lastly, keep adding to your collection each year. Over time, you’ll have a variety of handmade ornaments that tell the story of your creative journey, making your Christmas tree even more meaningful.
FAQ – Christmas Tree Decorations Made from Fabric Scraps – Pattern
Q1: What type of fabric works best for these decorations?
Cotton, linen, and felt are ideal because they are easy to sew and hold their shape well. Mixing textures adds charm and depth.
Q2: Can beginners make these fabric scrap decorations?
Yes! This project is perfect for beginners since it uses simple shapes and basic stitching.
Q3: How can I make the decorations more durable?
Double-stitching and using interfacing can help reinforce your ornaments, making them stronger and longer-lasting.
Q4: Are these decorations washable?
Yes, but hand-washing is recommended to preserve embellishments and prevent fraying.
Q5: Can I use old clothes for this project?
Absolutely! Repurposing old shirts, jeans, or pillowcases makes the decorations even more meaningful and sustainable.
Q6: How do I prevent frayed edges?
Use pinking shears or a small zigzag stitch around the edges to prevent fraying and keep your ornaments neat.
Conclusion
Creating Christmas Tree Decorations Made from Fabric Scraps – Pattern is a joyful and rewarding way to celebrate the holidays. You’ve learned how to choose the right fabrics, cut and assemble your ornaments, decorate them creatively, and store them for future use. This project combines sustainability, creativity, and holiday spirit in one delightful activity.
PATTERN VIDEO:
We hope this tutorial inspires you to craft your own unique decorations and make your Christmas truly special. Don’t forget to share your creations and leave a sincere opinion or suggestion—we’d love to hear how your handmade holiday turned out!