If you love sewing small, charming projects that blend beauty and practicality, this Strawberry Quilted Coin Purse – Tutorial is perfect for you! This adorable project combines quilting techniques with a touch of creativity to create a cute, strawberry-shaped coin purse that’s both functional and fun to make. Whether you’re new to quilting or an experienced sewer looking for a quick handmade gift, this Strawberry Quilted Coin Purse – Tutorial will guide you through each step to help you craft something truly sweet.
The best part about this project is how versatile it is. You can choose fabrics in bright reds and greens for a traditional strawberry look or go for pastel tones for a softer, whimsical vibe. With this Strawberry Quilted Coin Purse – Tutorial, you’ll learn how to quilt the fabric, assemble the purse, and add the finishing details that make it look professional. It’s a delightful way to use your fabric scraps and bring a little handmade charm into your daily life.
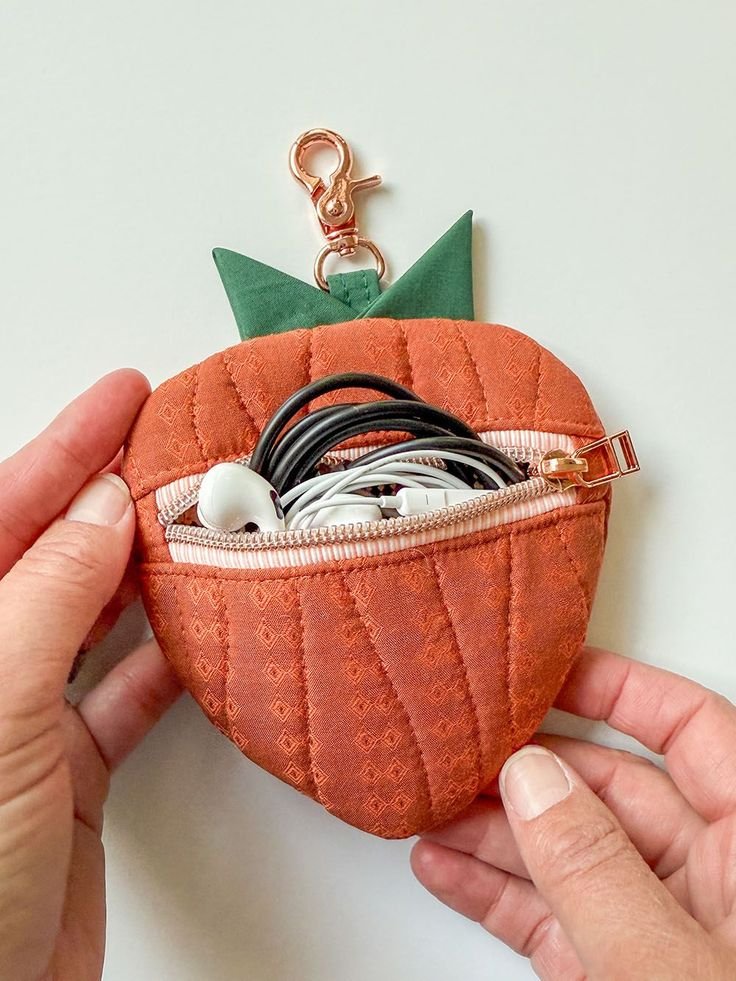
This project is quick, rewarding, and a great way to practice quilting on a small scale. By the end of this Strawberry Quilted Coin Purse – Tutorial, you’ll have a practical accessory that keeps your coins, keys, or tiny treasures safe — all while looking irresistibly cute!
1. Gathering Materials and Tools
Before you start stitching, let’s prepare everything you’ll need for your Strawberry Quilted Coin Purse – Tutorial. Since this is a small project, it requires only minimal materials — perfect for using leftover quilting supplies.
SEE OTHER FACE PATTERNS HERE!
You’ll need two coordinating fabrics: one for the strawberry body (red or pink) and one for the leaves (green). Cotton quilting fabric works best because it’s easy to handle and holds the quilted texture beautifully. You’ll also need batting or fusible fleece to give the purse its soft, padded look.
A small zipper (about 6 inches) will be the main closure for your purse. Choose a color that matches your fabric or opt for a contrasting shade to add character. You’ll also need thread, scissors, pins or clips, a needle, and a sewing machine.
If you want to give your purse extra structure, you can use interfacing. Lightweight interfacing keeps your fabric firm while still flexible enough to sew easily.
For decoration, consider adding small buttons, embroidery stitches, or even tiny seed bead “seeds” to mimic the strawberry’s texture. These little details bring the piece to life and make it uniquely yours.
Lastly, prepare a paper pattern for the strawberry shape. You can draw a heart-like outline with a rounded bottom and pointed top, then adjust it until it looks like a plump strawberry. This will serve as your cutting template.
2. Cutting and Quilting the Fabric
Now that your materials are ready, it’s time to cut and quilt the pieces for your Strawberry Quilted Coin Purse – Tutorial. Start by tracing your strawberry template onto your main fabric and cutting two identical pieces — one for the front and one for the back. Do the same with your batting and lining fabric.
Next, layer your pieces: place the batting in the middle, the main fabric on top, and the lining fabric beneath. Pin the layers together carefully to keep them from shifting while sewing.
Using your sewing machine, quilt through all the layers with your chosen design. For a strawberry look, diagonal lines or crisscross stitching works beautifully. You can also experiment with free-motion quilting if you want a more organic pattern.
After quilting, trim any excess batting or fabric around the edges to keep the layers even. This helps the final shape look neat and symmetrical.
Once both front and back pieces are quilted, press them gently with an iron to flatten any wrinkles. Be careful not to melt synthetic batting — use a low heat setting.
If you want to add decorative stitching or small embroidered seeds, now is the best time to do it. A few hand-sewn details make your purse even more charming and give it that special handmade touch.
3. Sewing the Zipper and Assembling the Purse
In this section of the Strawberry Quilted Coin Purse – Tutorial, you’ll learn how to attach the zipper and put all the pieces together. While zippers can seem intimidating, they’re easy to manage with a little patience.
Lay one quilted strawberry piece right side up, then place the zipper face down along the top edge. Next, position the lining fabric face down on top of the zipper, creating a “fabric sandwich.” Pin or clip everything securely in place.
Using a zipper foot on your sewing machine, stitch along the edge slowly and evenly. Once done, fold both fabrics away from the zipper and press them flat. Repeat the process with the second strawberry piece on the other side of the zipper.
When both sides are attached, open the zipper halfway — this step is important so you can turn the purse right side out later. Then, align the quilted pieces right sides together and pin around the edges.
Sew all around the strawberry shape, leaving a small seam allowance. Make sure to backstitch at the start and end to secure your stitches. Trim excess fabric from the seams, especially around curves, to help the purse turn smoothly.
Carefully turn the purse right side out through the zipper opening. Use a blunt tool, like a crochet hook or the back of a pencil, to push out the corners and curves. Finally, press the entire piece gently to give it a crisp, finished look.
4. Adding the Green Leaves and Finishing Touches
Now it’s time for the fun part of the Strawberry Quilted Coin Purse – Tutorial — creating the leafy top that gives your purse its signature look. Cut a few leaf shapes from green fabric or felt, making sure they’re proportional to your strawberry.
You can add batting to the leaves for a puffy look or keep them flat for a sleek design. Stitch veins into each leaf using straight or decorative stitches to give them a realistic appearance.
Arrange the leaves around the zipper area so they look like they’re sprouting from the top of the strawberry. Hand-stitch or machine-sew them securely in place. If you’re using felt, you can glue them on as well, but sewing is usually more durable.
To give your coin purse a polished look, you can sew a small fabric loop or keyring tab onto one side. This lets you attach it to your bag, backpack, or keychain for convenience.
If you want to take it a step further, add small embellishments like a charm, a bow, or even a mini tag with your initials. These tiny details transform your purse from cute to truly custom.
Finally, test your zipper and make sure the inside seams are smooth. Your Strawberry Quilted Coin Purse – Tutorial project is now complete — a delightful mix of quilting art and everyday practicality!
FAQ
1. What kind of fabric works best for a quilted coin purse?
Cotton quilting fabric is ideal because it’s sturdy, easy to sew, and available in countless colors and patterns.
2. Can I make the purse larger or smaller?
Absolutely! Simply adjust the size of your paper pattern to fit your needs. The steps remain the same.
3. Do I need a special needle to sew through the layers?
A universal sewing needle works fine, but if your batting is thick, use a quilting or denim needle for extra strength.
4. Is this project beginner-friendly?
Yes! This Strawberry Quilted Coin Purse – Tutorial is great for beginners who want to practice quilting and zipper installation.
5. Can I use felt instead of fabric for the leaves?
Yes, felt works wonderfully for the leaf details because it doesn’t fray and holds its shape well.
6. How can I clean my quilted coin purse?
Gently hand wash it with mild soap and let it air dry. Avoid machine washing to preserve the quilting and shape.
Conclusion
Creating your own Strawberry Quilted Coin Purse – Tutorial project is a fun and rewarding way to express your love for quilting while making something practical and adorable. You’ve learned how to prepare materials, quilt your fabric, sew the zipper, and add those charming finishing details.
This cute little purse makes a perfect handmade gift or a cheerful addition to your own collection. If you enjoyed this tutorial, please share your honest opinion and suggestions — your feedback helps inspire even more creative quilting projects for makers everywhere!