If you love creating cozy and stylish crochet pieces, this Poncho for Girls – Tutorial is perfect for you. This guide will teach you how to crochet a beautiful poncho that’s warm, lightweight, and fashionable—ideal for every season. Whether you’re crafting for your daughter, granddaughter, or a special little one, this pattern blends comfort with creativity, making it a fun and rewarding crochet project for all skill levels. The best part? You’ll learn how to design and customize your poncho using colors and yarn textures that match any personality.
A Poncho for Girls – Tutorial like this one is an excellent way to practice basic crochet stitches while creating something truly wearable. It’s a wonderful introduction for beginners and a relaxing project for experienced crocheters. With simple step-by-step instructions, you’ll quickly see your poncho come to life, row by row. Each stitch adds a touch of warmth and charm, making this handmade piece an instant favorite in any wardrobe.
Before diving into the tutorial, make sure you have your yarn, hook, and measurements ready. This guide focuses on helping you understand the structure of the poncho while offering creative ideas for decoration and finishing touches. Get ready to explore your artistic side with this fun and easy Poncho for Girls – Tutorial that celebrates craftsmanship and comfort in every loop.
1. Materials and Tools You’ll Need
To begin your Poncho for Girls – Tutorial, you’ll need a few basic materials and tools that are easy to find. Choose soft and durable yarn suitable for children’s wear. Acrylic or cotton yarns are both great options as they’re gentle on the skin and easy to wash. Select a color combination that suits your little one’s personality—bright hues for a playful look or pastel tones for a delicate feel.
DISCOVER MORE FREE PATTERNS HERE!
You’ll also need a crochet hook that matches your yarn weight. Typically, a 4.0 mm to 5.0 mm hook works well for most poncho yarns. Don’t forget to have scissors, a yarn needle, and stitch markers handy to make your work neat and organized.
Measuring your child’s shoulders and preferred length is essential before starting the project. Ponchos can be made shorter for a trendy style or longer for added warmth. Measuring ensures the poncho fits comfortably and looks perfectly balanced.
If you’d like to add decorative details like tassels, pom-poms, or a fringe, keep those extra materials ready. They’re simple additions that make your project even more special.
Finally, find a comfortable and well-lit space to work in. Crochet is not only creative but also relaxing, and the right environment helps you enjoy the process from start to finish.
Now that your tools are ready, you can move on to the actual creation of your Poncho for Girls – Tutorial, where the fun truly begins.
2. Step-by-Step Crochet Instructions
Start your Poncho for Girls – Tutorial by creating the neckline foundation. Begin with a chain long enough to fit comfortably over the child’s head. Join the chain in a loop with a slip stitch to form the base of your poncho.
Next, you’ll work in rounds to create the body. Use simple stitches like double crochet or half double crochet, depending on your preferred texture. For a classic look, alternating rows of double crochet stitches creates a nice drape and open weave.
After establishing the base rows, increase gradually at the shoulders to allow the poncho to widen as it extends downward. This step ensures a natural flare that gives the garment its iconic shape. Use stitch markers to help maintain symmetry.
As you continue crocheting, experiment with colors to make the poncho vibrant and fun. Striped patterns or alternating color bands look particularly adorable for young girls.
For the edges, consider adding a decorative border such as a scalloped edge or shell stitch. This finishing detail adds charm and makes your handmade poncho look professional.
Finally, weave in all loose ends with your yarn needle, and admire the beautiful work you’ve created. The simplicity of this Poncho for Girls – Tutorial ensures you’ll finish with a piece both pretty and practical.
3. Design Ideas and Personalization
What makes a Poncho for Girls – Tutorial truly special is how customizable it can be. You can adjust colors, lengths, and decorative details to create unique versions each time you make one.
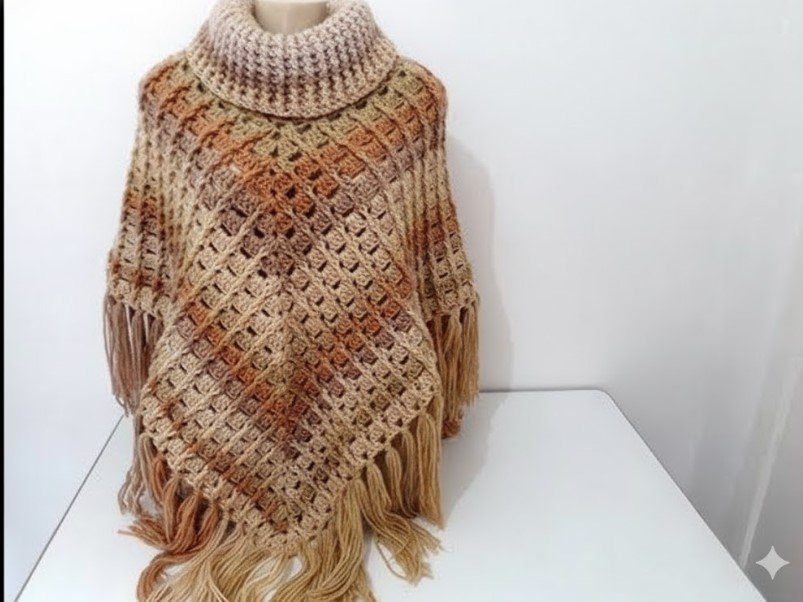
For a winter poncho, use chunky yarn in soft shades of pink, blue, or lavender. Add a turtleneck collar or hood for extra warmth and style. For warmer seasons, lighter cotton yarns with airy stitch patterns make the poncho breathable and comfortable.
Another fun idea is to incorporate themed elements—such as adding flower appliqués, lace trims, or cute buttons. These details turn a simple poncho into a fashionable statement piece.
You can also crochet matching accessories like a small bag, hat, or mittens to create a coordinated set. This makes for a lovely handmade gift for birthdays or holidays.
If you’re making this poncho as a family project, let the child help choose the colors or decorations. It adds sentimental value and makes the finished piece even more meaningful.
With a little creativity, every Poncho for Girls – Tutorial becomes an opportunity to express your artistic flair and love for handmade fashion.
4. Tips for Perfecting Your Crochet Poncho
Even though this Poncho for Girls – Tutorial is beginner-friendly, a few tips can help make your results even better. Always start with a gauge swatch to ensure the stitches and measurements will match the intended size. This saves time and frustration later.
Maintain even tension throughout your work. Inconsistent tension can affect the drape and fit of the poncho. Relax your hands and wrists, and take breaks if you’re crocheting for long periods.
When changing colors, weave in ends securely to prevent unraveling during washing or wearing. Clean finishing makes a big difference in how polished your poncho looks.
Blocking your finished piece can also enhance its appearance. Simply dampen the poncho, shape it on a flat surface, and let it dry completely. This step smooths out wrinkles and helps the stitches settle beautifully.
Don’t rush the process. Crocheting should be enjoyable, not stressful. Focus on the rhythm of the stitches and appreciate the creative journey.
Lastly, be proud of your accomplishment! Completing this Poncho for Girls – Tutorial means you’ve created something that’s not only beautiful but also filled with love and care.
FAQ about Poncho for Girls – Tutorial
Q: What type of yarn works best for a crochet poncho?
A: Soft acrylic or cotton yarns are ideal since they are durable, comfortable, and easy to care for.
Q: Can beginners make this poncho?
A: Absolutely! The Poncho for Girls – Tutorial uses basic stitches and simple shaping, perfect for beginners.
Q: How can I make the poncho larger or smaller?
A: Adjust the starting chain and number of rows to customize the size according to the child’s measurements.
Q: Can I use multiple colors for this pattern?
A: Yes! Mixing colors adds charm and personality. Stripes or ombré effects are great options.
Q: How do I wash a handmade crochet poncho?
A: Gently hand wash in cool water and lay flat to dry to maintain the shape and softness.
Q: Can I sell ponchos made from this pattern?
A: Yes, as long as you credit the design source, you can sell your finished handmade ponchos.
Conclusion
Creating a Poncho for Girls – Tutorial is an inspiring and enjoyable crochet experience that blends creativity, comfort, and style. You’ve learned how to choose materials, crochet the structure, and personalize your design. Whether it’s a colorful poncho for everyday wear or a cozy winter piece, your handmade creation will be cherished and admired.
PATTERN VIDEO:
We hope this tutorial inspires you to keep exploring your crochet skills and creating more lovely pieces. If you enjoyed this guide, please share your thoughts, ideas, and suggestions in the comments—we’d love to hear your honest opinion and see how your poncho turned out!