The Bear’s Paw quilt block is one of the most iconic and enduring patterns in the world of quilting. Loved by beginners and advanced quilters alike, this traditional design combines geometric precision with deep symbolism rooted in history. The bold, angular “paw” shapes have stood the test of time, representing both nature and strength, and continue to be a favorite for those who enjoy classic patchwork with a touch of storytelling.
Learning how to make a Bear’s Paw quilt block allows you to connect with generations of quilters who have cherished this design for its beauty and meaning. Whether you’re sewing it for a rustic cabin quilt, a modern minimalist blanket, or a decorative wall hanging, this block offers endless creative opportunities. Its balanced symmetry and striking contrast make it a versatile foundation for all types of quilting projects.
This guide will teach you everything you need to know about the Bear’s Paw quilt block, from its history and symbolism to practical steps and creative customization ideas. Using these insights, you can craft your own version of this timeless pattern while improving your quilting skills and personal style.

1. The History and Meaning of the Bear’s Paw Quilt Block
The Bear’s Paw quilt block traces its origins back to the early 19th century and is often linked to frontier life in North America. During this time, quilts were not only functional but also symbolic, reflecting aspects of daily life and survival. Many historians believe the design represents the tracks of a bear, symbolizing strength, courage, and the connection between humans and nature.
SEE OTHER FACE PATTERNS HERE!
In some stories, the Bear’s Paw quilt block was said to have guided people traveling through rugged terrain, serving as a metaphor for following one’s path through challenges. This interpretation gave the design a deeper meaning beyond its beauty, turning it into a message of resilience and guidance.
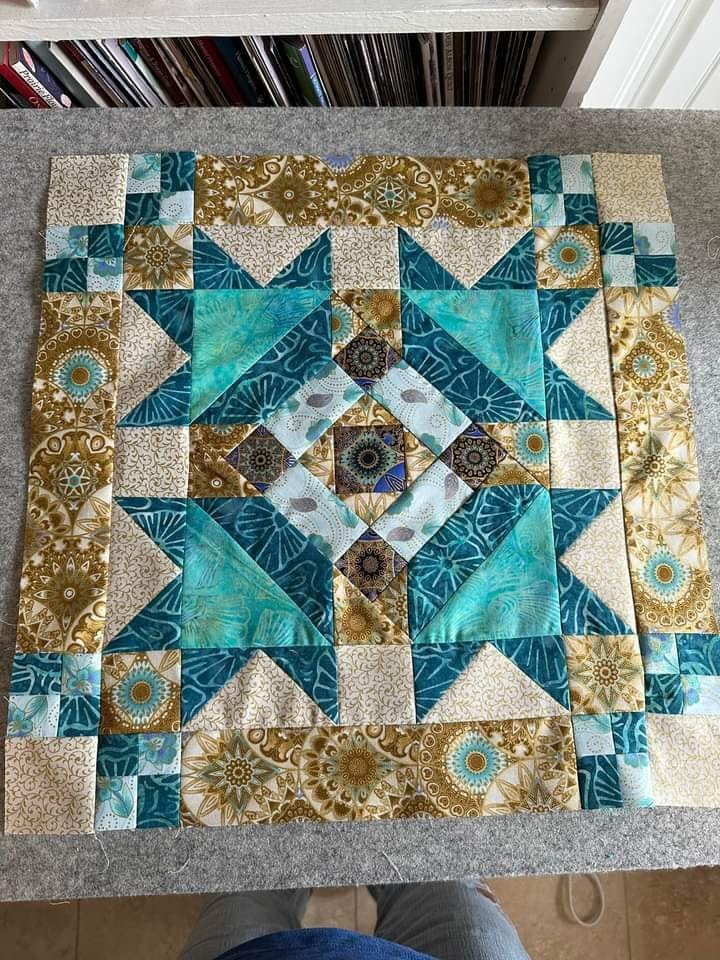
Over time, this pattern became a staple in quilting communities, admired for both its simplicity and sophistication. The bold geometric shapes — typically consisting of squares and triangles — create a striking “paw” motif that looks intricate but is surprisingly approachable for beginners.
Today, quilters love using the Bear’s Paw quilt block as a central motif in bed quilts, table runners, and decorative pieces. It’s also a popular choice for sampler quilts, where each block showcases a different traditional design. Whether you stick to vintage fabrics or experiment with modern prints, this block remains a meaningful and elegant choice.
The Bear’s Paw quilt block continues to inspire creativity and connection among quilters, reminding us that even traditional designs can evolve with modern color palettes and fabric styles. It’s not just a pattern — it’s a symbol of endurance, creativity, and community.
If you’re drawn to quilt patterns that combine history, beauty, and craftsmanship, this block offers all that and more. It’s the perfect blend of old-world charm and timeless appeal.
2. Materials and Tools You’ll Need
Before you begin sewing your Bear’s Paw quilt block, gathering the right materials will make your project easier and more enjoyable. Having quality tools and well-coordinated fabrics ensures your finished block looks professional and polished.
Start by choosing fabrics that have a clear contrast between light and dark tones. The Bear’s Paw quilt block relies on strong visual contrast to highlight its sharp angles and paw-like shapes. Traditional quilters often choose earthy tones such as brown, green, cream, or tan to reflect the natural inspiration behind the design. Modern quilters, on the other hand, experiment with bright colors, florals, or even minimalist monochrome palettes.
You’ll need basic quilting tools such as a rotary cutter, cutting mat, ruler, sewing machine, and matching thread. Using a sharp rotary cutter and a non-slip ruler helps you cut clean, accurate pieces — a crucial step in keeping your quilt block balanced.
For beginners, pre-cut fabric bundles known as “fat quarters” are a great option. These pre-measured pieces save time and minimize fabric waste while offering plenty of design flexibility. Always press your fabrics before cutting to remove wrinkles and achieve precise shapes.
Batting and backing fabrics will come later if you decide to turn your Bear’s Paw quilt block into a complete quilt or pillow. But for now, focus on mastering the construction of a single, neat block.
Having an iron nearby for pressing seams after every step is essential. Pressing, rather than ironing back and forth, keeps your seams flat without stretching the fabric. This ensures your Bear’s Paw quilt block lies perfectly smooth and ready for assembly.
3. Step-by-Step Guide to Sewing the Bear’s Paw Quilt Block
Creating the Bear’s Paw quilt block involves a combination of squares and half-square triangles (HSTs). Once you understand how the pieces fit together, you’ll find it both fun and rewarding.
Start by cutting your fabrics according to your desired block size. Each “paw” typically consists of four HSTs and one square, with a larger square forming the center. Accuracy in cutting will make your final assembly much smoother.
To make your half-square triangles, place two squares right sides together. Draw a diagonal line from corner to corner, sew a quarter inch away from both sides of the line, then cut along it. Open and press to reveal two perfect HSTs. Repeat this process until you have enough for your block.
Arrange your HSTs and squares to form the distinct bear paw shape. Each paw should face outward, creating a dynamic, balanced look. Once all the paws are assembled, join them around the center square.
Sew your rows together carefully, ensuring that all seams align. Press after every row for a crisp, professional finish. Once complete, you’ll have a stunning Bear’s Paw quilt block that you can use individually or as part of a larger quilt.
For best results, measure your finished block to ensure it’s square. Slight adjustments in seam allowance can help fine-tune your accuracy. This attention to detail will make your entire quilt look seamless and cohesive.
4. Design Variations and Creative Ideas
One of the most exciting aspects of the Bear’s Paw quilt block is how adaptable it is to different styles and themes. You can create a traditional rustic quilt or go for a modern, minimalist interpretation simply by adjusting your color scheme and layout.
For a classic look, use warm, earthy tones and small-scale prints. To modernize the pattern, try solid colors or high-contrast fabrics like black and white. The Bear’s Paw quilt block also looks stunning when each paw is made from a different fabric, giving it a scrappy, eclectic charm.
Consider experimenting with the scale of your blocks. Oversized blocks make bold statement quilts, while smaller ones are perfect for intricate designs or borders. You can even alternate Bear’s Paw quilt blocks with simpler blocks to balance visual complexity.
Adding sashing or cornerstones between blocks creates a clean, framed look. This method helps highlight the design and gives your quilt more structure. You can also incorporate applique, embroidery, or hand quilting to enhance the texture and personalize your creation.
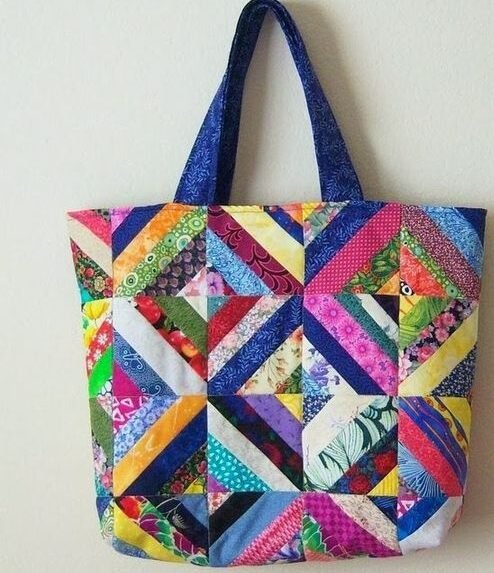
Try using the Bear’s Paw quilt block in other creative projects, such as tote bags, wall hangings, or table runners. It’s a versatile design that adapts beautifully to both small and large-scale crafts.
The possibilities are endless, making the Bear’s Paw quilt block an ideal project for quilters who love combining tradition with innovation. Every version tells a new story through fabric and color.
FAQ About the Bear’s Paw Quilt Block
1. Is the Bear’s Paw quilt block beginner-friendly?
Yes, it’s suitable for beginners who have basic sewing and cutting skills. The pattern uses simple shapes and repetition, making it an excellent project for learning precision and block assembly.
2. What size should I make my Bear’s Paw quilt block?
You can customize the size to fit your project. Common block sizes range from 8 to 12 inches, but you can enlarge or shrink the design depending on your quilt’s layout.
3. How many fabrics do I need for one block?
Typically, you’ll need at least two contrasting fabrics: one for the background and one for the paws. Adding a third fabric for the center square can create additional visual interest.
4. Can I make a whole quilt with only Bear’s Paw blocks?
Absolutely! A full Bear’s Paw quilt made entirely from this block looks stunning, especially when arranged in alternating directions or varying colors.
5. What type of fabric works best for this pattern?
High-quality quilting cotton is recommended because it’s easy to work with, durable, and presses well. Avoid stretchy or slippery fabrics when learning.
6. How do I ensure my block stays square?
Accurate cutting, consistent seam allowances, and careful pressing are key. Measuring your block at every step will help maintain even proportions.
Conclusion
The Bear’s Paw quilt block is a timeless design that bridges traditional and modern quilting styles. With its bold geometry and deep symbolic roots, it allows quilters to express both creativity and heritage in one project. From learning the history to experimenting with fabrics and colors, every step in making this block is a rewarding journey.
Now that you’ve learned how to create your own Bear’s Paw quilt block, it’s time to bring your version to life. Try new color combinations, layouts, and textures to make it uniquely yours. And once you finish, share your thoughts and suggestions — your feedback helps keep the quilting community inspired and creative!


