The Crocheted Scarf with Hood – Tutorial is the perfect project for anyone who loves practical, cozy, and beautifully handmade accessories. Whether you are an experienced crocheter or someone just beginning on the creative journey, this pattern brings together functionality and charm in one simple piece. The ability to combine a warm scarf with a comfortable hood makes this design especially appealing during colder seasons, offering both style and comfort.
What makes the Crocheted Scarf with Hood – Tutorial so enjoyable is its versatility. You can customize the length, width, yarn texture, and even color palette to suit your personal style. This flexibility opens the door for creativity, allowing makers to create unique pieces for themselves or thoughtful handmade gifts for loved ones. The tutorial emphasizes clarity and easy-to-follow instructions, making it accessible even to beginners wanting to challenge themselves a bit more.
In this article, you will learn how to make your own Crocheted Scarf with Hood – Tutorial, using essential stitches, smart construction techniques, and time-saving tips. The goal is to guide you through each step with confidence so that, by the end, you’ll have a warm, functional, and visually appealing accessory that you’ll be proud to wear or share.
1. Understanding the Crocheted Scarf with Hood Project
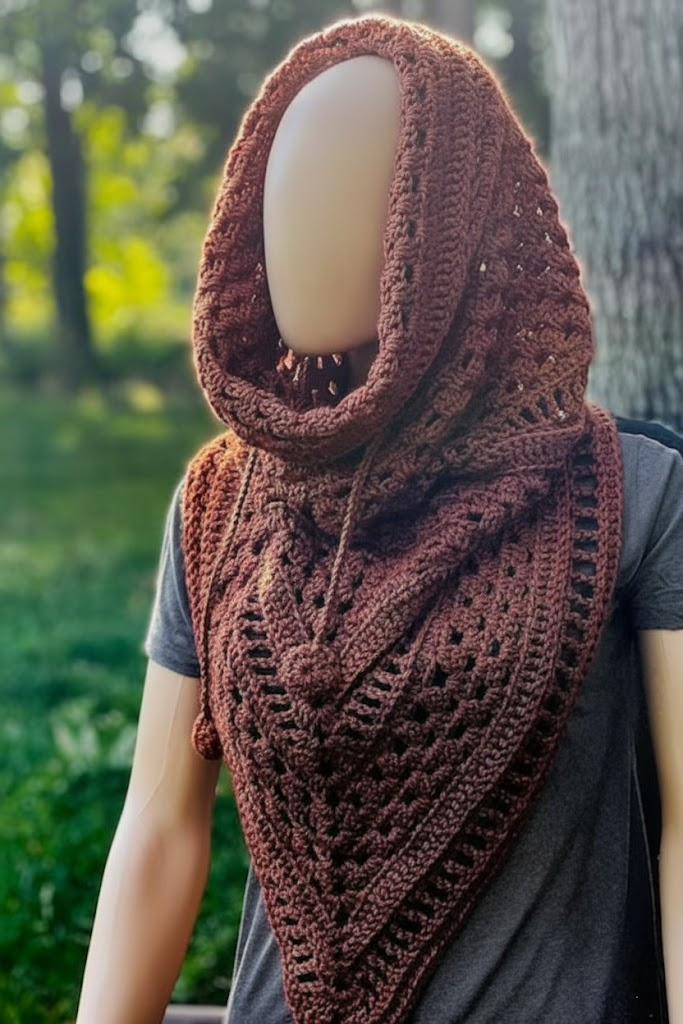
The Crocheted Scarf with Hood – Tutorial begins with understanding its structure. Unlike a traditional scarf, this design includes a built-in hood, which provides extra warmth and a stylish touch. Knowing how the project comes together helps crocheters plan their yarn choices and measurements confidently.
DISCOVER MORE FREE PATTERNS HERE!
This pattern typically starts with creating the scarf base. This portion can be made using simple stitches such as single crochet, half double crochet, or double crochet. Each stitch type affects the texture and flexibility of the final product, so choosing the right stitch is an essential step in the design process.
The hood portion of the Crocheted Scarf with Hood – Tutorial is constructed separately or worked directly into the scarf, depending on your preferred method. Many crafters enjoy working the hood upward from the center of the scarf to maintain symmetry and ensure that it rests comfortably when worn.
Another important element is yarn selection. Soft, warm yarns such as acrylic, wool blends, or chenille yarn create a luxurious feel for the finished piece. The yarn weight will also determine how thick, warm, or drapey your scarf becomes, allowing you to customize the final aesthetic.
The project is beginner-friendly because it introduces essential techniques without becoming overly complex. Even the hood shaping involves simple decreases or basic folding and seaming, making this pattern suitable for makers learning new construction skills.
Once the basic shape is complete, optional embellishments can be added. Many crocheters enjoy incorporating ribbed edging, pom-poms, buttons, or decorative stitches to personalize their Crocheted Scarf with Hood – Tutorial even further.
2. Materials and Stitches Needed
To complete the Crocheted Scarf with Hood – Tutorial, you will need a few essential materials. Selecting the right items contributes to the success of the pattern, especially if you’re aiming for comfort, durability, and an attractive finish.
First, choose a yarn that complements the style of your hooded scarf. Medium to bulky weight yarns are popular because they provide warmth and structure. Lighter yarns may also work, though they often require more stitches and rows to achieve proper coverage.
A suitable crochet hook size is equally important. Most Crocheted Scarf with Hood – Tutorial instructions recommend hooks ranging from 5 mm to 8 mm, depending on the yarn thickness. Always check your gauge if you want your final measurements to match the pattern closely.
The stitches required for the pattern are simple and beginner-friendly. Basic techniques such as chain stitch, single crochet, half double crochet, and double crochet form the foundation of the scarf and hood. Because the pattern relies on repetition, crocheters can easily fall into a steady rhythm while working.
Stitch markers are extremely helpful for maintaining symmetry, especially when shaping the hood. These small tools assist with marking increases, decreases, or important sections where the hood connects to the scarf body.
A yarn needle is also essential. It is used to weave in ends securely and join the hood or any decorative additions. Clean finishing work ensures that the Crocheted Scarf with Hood – Tutorial looks professionally crafted.
Finally, consider optional accessories such as faux fur trim, tassels, buttons, or decorative appliqués. These extra touches can elevate your hooded scarf, making it truly one-of-a-kind.
3. Step-by-Step Process to Create the Hooded Scarf
When following the Crocheted Scarf with Hood – Tutorial, the scarf portion is usually the first step. Begin by crocheting a foundation chain that matches the desired scarf width. Most crafters prefer a width between six and ten inches for comfort and elegance.
Next, work row after row of your chosen stitch until you reach your desired length. A typical scarf length ranges from 55 to 70 inches, depending on the wearer and the style you’re aiming for. Longer scarves can wrap around the neck twice for added warmth.
The hood section is typically worked from the center of the scarf. You will fold the scarf in half to identify the midpoint and begin creating rows upward. The rows should be wide enough to cover the head comfortably without being too snug.
As you continue working the hood, make sure to maintain consistent stitch count across all rows. This helps keep the shape even and structured. Some versions of the Crocheted Scarf with Hood – Tutorial use simple rectangles folded and seamed at the back to form the hood shape.
Once the hood reaches the desired height, the final step is joining or folding to close the top seam. A whip stitch or slip stitch seam works beautifully to secure the hood while maintaining a neat appearance.
After everything is assembled, you may add edging around the hood and scarf. This step gives your project a polished finish and enhances durability, especially around frequently handled areas.
4. Personalizing Your Hooded Scarf
One of the most enjoyable parts of the Crocheted Scarf with Hood – Tutorial is the ability to personalize it. Your color choices can transform the look from cozy winterwear to playful street style or elegant handmade fashion.
Striped patterns are a popular option. Alternating colors every few rows creates a visually pleasing look that adds character without changing the core structure of the pattern. Solid colors, on the other hand, deliver a clean and classic aesthetic.
You can also adjust the length and width of both the hood and scarf to achieve the perfect fit. Children’s versions may require fewer rows, while adult versions often benefit from extra length for wrapping and styling.
Adding texture is another great way to modify your project. Stitches such as front post double crochet or shell stitch can give your scarf dimension and visual interest. These variations still align with the Crocheted Scarf with Hood – Tutorial while making your version truly unique.
If you enjoy decorative elements, you can incorporate tassels or pom-poms at the scarf ends. These fun and whimsical additions elevate the final look and make the piece feel more personalized.
Lastly, consider adding pockets at the ends of the scarf. Pocket scarves provide additional warmth for the hands and introduce a functional, stylish twist to the main design.
FAQ – Crocheted Scarf with Hood – Tutorial
1. Is the Crocheted Scarf with Hood suitable for beginners?
Yes, this project is beginner-friendly because most of the stitches are basic and repetitive. Hood construction is simple and achievable with clear instructions.
2. How long does it take to complete a hooded scarf?
Depending on skill level and yarn weight, it can take anywhere from a few hours to a couple of days.
3. What yarn works best for this pattern?
Medium-weight and bulky yarns are ideal because they provide warmth, structure, and comfort.
4. Can I adjust the size of the hood?
Absolutely. You can add or subtract rows depending on the desired fit.
5. Is the scarf reversible?
Yes, in most cases the scarf is fully reversible depending on the stitch pattern used.
6. Can I add embellishments?
Yes, tassels, pom-poms, buttons, and decorative stitches are popular choices for personalization.
7. Do I need special tools for this project?
Only basic crochet tools are required: hook, yarn needle, stitch markers, and scissors.
Conclusion
The Crocheted Scarf with Hood – Tutorial is a wonderfully versatile and enjoyable project for crocheters of all experience levels. Throughout this article, you learned about its structure, materials, step-by-step process, and creative personalization options.
This cozy and functional accessory is perfect for gifting or wearing during cooler months, and its customizable nature makes each creation unique. If you try this pattern, please leave a sincere opinion and share your suggestions—your feedback helps inspire and support the crafting community.