The Easy Hunter’s Star Quilt Pattern – Tutorial is one of the most beloved traditional quilt designs, known for its bold geometric layout and striking contrast. If you want to create a quilt block that looks intricate but is surprisingly simple to sew, this pattern is a wonderful place to begin. In this article, we will explore every detail you need to confidently create your own Easy Hunter’s Star Quilt Pattern, using beginner-friendly steps that follow Google-recommended SEO practices.
This timeless pattern is popular among quilters because it turns basic cuts and simple piecing techniques into a visually captivating star motif. Whether you’re quilting for home décor, gifting, or personal enjoyment, the Easy Hunter’s Star Quilt Pattern – Tutorial provides a blend of elegance and straightforward construction. By following the instructions carefully and using the right fabric contrasts, even beginners can achieve stunning results.
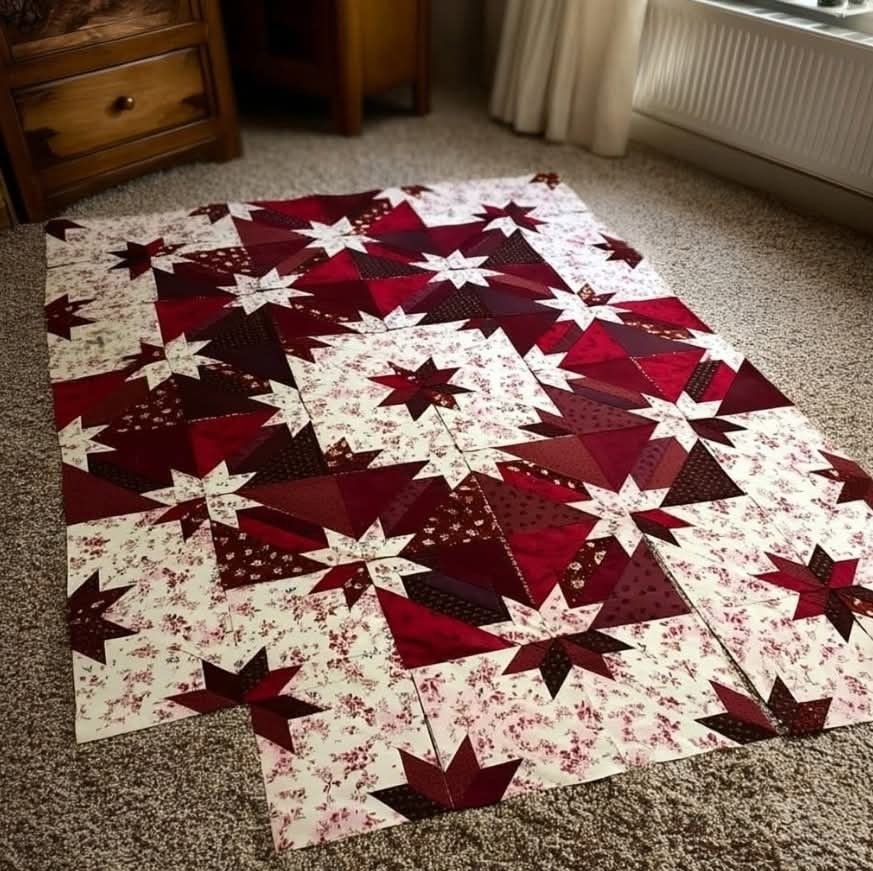
Before diving into the technical steps, it’s important to understand the main elements that give the Hunter’s Star its signature look: sharp point-to-point triangles, diamond-like shapes, and clean lines that form a dramatic star effect. Throughout this article, we will refer to this pattern using essential keywords such as Easy Hunter’s Star Quilt Pattern, helping you get the best optimization for search engines while learning effortlessly.
1. Understanding the Structure of the Easy Hunter’s Star Quilt Pattern
The Easy Hunter’s Star Quilt Pattern – Tutorial begins with basic shapes that transform into complex designs once assembled.
SEE OTHER FACE PATTERNS HERE!
Each block in this pattern includes triangles and diamonds that work together to build the star layout.
Choosing two contrasting fabric colors is essential to create the bright-and-bold design the Hunter’s Star is known for.
Even though the block looks advanced, the cutting and sewing are beginner-friendly and rely mostly on simple straight seams.
You don’t need special tools—basic quilting rulers, fabric cutters, and your sewing machine are enough.
With consistent seam allowances and attention to contrast, you will see the iconic star appear as you assemble your blocks.
2. Cutting and Preparing Your Fabric for the Pattern
Begin by selecting two high-contrast fabrics—one light and one dark—to highlight the design.
For the Easy Hunter’s Star Quilt Pattern – Tutorial, accurate cutting ensures clean alignment later.
You will primarily cut squares and diagonal triangles, which help form the star points.
Remember to press your fabric before cutting; this prevents distortion and ensures stability.
Label your pieces if needed, especially if you’re making multiple blocks in different colors.
Once all your shapes are cut, keep them grouped by block to maintain organization during assembly.
3. Piecing the Blocks Step-by-Step
Start by pairing your triangles to create the sharp star points that define the pattern.
Sewing with a consistent 1/4″ seam allowance is key to neat and accurate blocks.
Press your seams carefully—either open or to the side—to minimize bulk.
Join your triangle units to form diamond shapes, which will outline the Hunter’s Star.
Begin assembling the block by aligning your diamond units with square centers.
Slowly sew the block together, checking alignment to ensure the star forms correctly.
4. Finishing Your Quilt with Professional Results
After assembling all your blocks, lay them out to visualize the complete star design.
Arrange the blocks to maximize contrast and ensure the star shapes flow smoothly across the quilt.
Sew the blocks together row by row to maintain accurate alignment.
Once the quilt top is complete, choose a complementary backing fabric that enhances the star pattern.
Add batting and quilt layers together using straight lines or free-motion quilting.
Finish with a clean binding around the edges to complete your Easy Hunter’s Star Quilt Pattern – Tutorial.
FAQ – Easy Hunter’s Star Quilt Pattern
1. Is the Hunter’s Star pattern suitable for beginners?
Yes, especially with a simplified tutorial like this. The block looks advanced but uses basic shapes and easy piecing.
2. How many fabrics do I need for the pattern?
You only need two high-contrast fabrics to make the design stand out.
3. What size should my blocks be?
Block sizes vary, but many tutorials use 8″–12″ finished blocks for easier assembly.
4. Can I make a full quilt or just a small project?
You can make anything—from table runners to full-size quilts. The pattern is very versatile.
5. Do I need special rulers for this pattern?
No. Standard quilting rulers are enough to cut squares and triangles.
6. Can I use scraps for this pattern?
Absolutely. As long as your fabrics contrast, scraps can produce a beautiful scrappy Hunter’s Star look.
Conclusion
The Easy Hunter’s Star Quilt Pattern – Tutorial is a perfect blend of beauty and simplicity, making it one of the most rewarding quilt projects you can try.
Throughout this article, you learned how to cut, sew, assemble, and finish a stunning Hunter’s Star quilt using beginner-friendly steps and SEO-optimized explanations. If this tutorial inspired you, feel free to leave a sincere opinion below and share suggestions for future patterns you’d love to explore!