A Hat with a Jellyfish Tail – Tutorial is a playful and imaginative crochet project that blends creativity, movement, and fun design into a wearable accessory. This unique hat stands out thanks to its flowing jellyfish-inspired tail, making it a favorite among crocheters who enjoy whimsical patterns and statement pieces. The A Hat with a Jellyfish Tail – Tutorial showcases how crochet can go beyond traditional designs and become a form of artistic expression.
This type of hat is especially popular for costumes, themed events, children’s accessories, and creative gifts. With the A Hat with a Jellyfish Tail – Tutorial, crocheters can experiment with textures, colors, and yarn choices to create a dynamic finished piece that moves beautifully when worn.
In this article, you will explore the concept behind A Hat with a Jellyfish Tail – Tutorial, understand its structure, material choices, construction ideas, and learn how to care for and creatively use the final project. This guide is suitable for crocheters who enjoy fun, eye-catching designs with plenty of room for personalization.
1. Understanding A Hat with a Jellyfish Tail – Tutorial
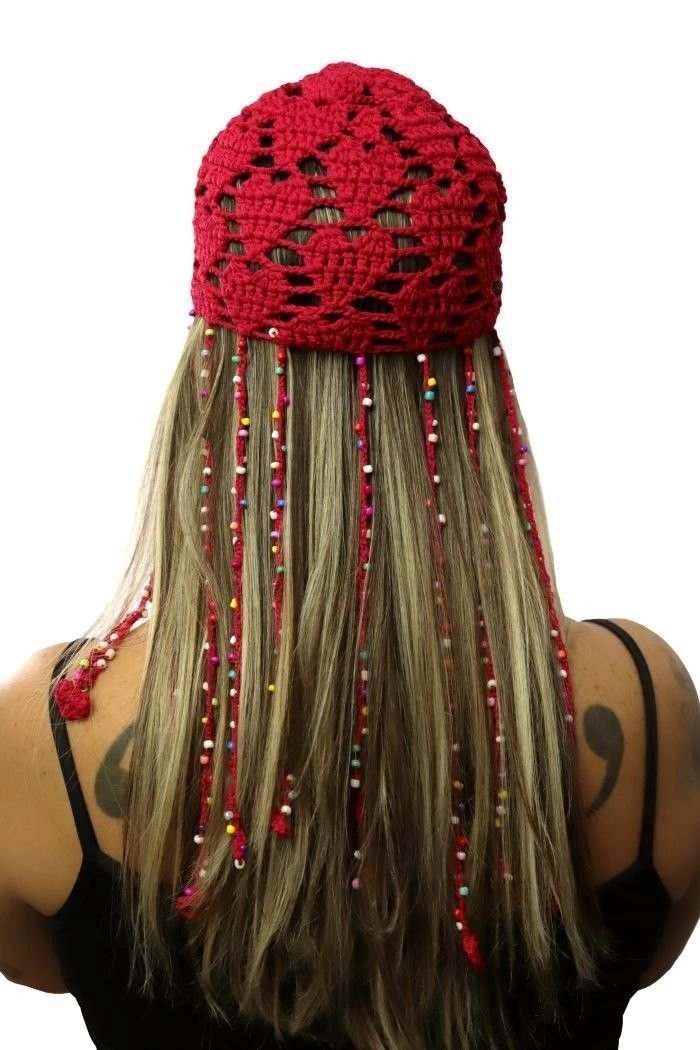
The A Hat with a Jellyfish Tail – Tutorial focuses on creating a crochet hat topped or extended with long, flowing strands that resemble a jellyfish’s tentacles. These tails add motion and visual interest to the hat.
DISCOVER MORE FREE PATTERNS HERE!
Unlike standard hats, this design emphasizes creativity and playfulness. The A Hat with a Jellyfish Tail – Tutorial is often chosen by those looking to create something memorable and unique.
The jellyfish tail can be made using chains, spiral stitches, or textured yarns. Each option highlighted in A Hat with a Jellyfish Tail – Tutorial creates a different visual effect.
This pattern is especially popular for children, cosplay, and festival wear. The A Hat with a Jellyfish Tail – Tutorial allows the maker to adjust length and thickness to suit different ages and preferences.
Another appealing aspect is adaptability. The base hat can follow classic beanie construction while the tail adds a creative twist, as explained in A Hat with a Jellyfish Tail – Tutorial.
Overall, this tutorial represents a joyful crochet project that encourages imagination and fun through handmade design.
2. Yarn and Materials for A Hat with a Jellyfish Tail – Tutorial
Choosing the right yarn is essential for success in A Hat with a Jellyfish Tail – Tutorial. Since movement is a key feature, yarn texture and weight play an important role.
Lightweight yarns are often preferred for the jellyfish tail. In many A Hat with a Jellyfish Tail – Tutorial designs, lighter yarns allow the strands to flow freely.
Acrylic yarn is a popular choice due to its wide color range and affordability. Bright and gradient yarns are frequently recommended in A Hat with a Jellyfish Tail – Tutorial projects.
For the hat base, medium-weight yarn provides structure and comfort. The A Hat with a Jellyfish Tail – Tutorial often combines different yarn weights for contrast.
Crochet hook size should be adjusted depending on yarn type. Testing gauge is encouraged in A Hat with a Jellyfish Tail – Tutorial to ensure a comfortable fit.
Additional materials may include stitch markers, scissors, and yarn needles. Optional embellishments like beads can also be incorporated into A Hat with a Jellyfish Tail – Tutorial designs.
3. Construction and Design Techniques in A Hat with a Jellyfish Tail – Tutorial
The construction of A Hat with a Jellyfish Tail – Tutorial typically begins with the hat base. This can be worked from the top down or bottom up, depending on preference.
Shaping the hat correctly is important for comfort. The A Hat with a Jellyfish Tail – Tutorial emphasizes proper increases and consistent stitch tension.
Once the hat base is complete, attention shifts to the jellyfish tail. These strands are usually attached at the crown or top center, as explained in A Hat with a Jellyfish Tail – Tutorial.
The tails can vary in length and stitch type. Spiral stitches, chains with slip stitches, or textured patterns are commonly used.
Spacing the tails evenly ensures balance and visual appeal. The A Hat with a Jellyfish Tail – Tutorial often suggests planning placement before attaching.
Careful construction ensures the hat is secure, comfortable, and visually striking, fulfilling the creative promise of A Hat with a Jellyfish Tail – Tutorial.
4. Styling, Care, and Creative Uses of A Hat with a Jellyfish Tail – Tutorial
Styling is one of the most enjoyable aspects of A Hat with a Jellyfish Tail – Tutorial. This hat pairs well with costumes, playful outfits, and themed clothing.
Color choices greatly influence the final look. Pastels create a soft, ocean-inspired feel, while bold colors add drama, a flexibility encouraged by A Hat with a Jellyfish Tail – Tutorial.
Caring for the hat depends on yarn choice. Most designs recommend gentle hand washing and air drying to preserve shape and movement.
Durability is achieved through secure attachment of the jellyfish tail. The A Hat with a Jellyfish Tail – Tutorial highlights reinforcing stitches to prevent wear.
Beyond everyday wear, these hats are popular for photo shoots, birthday parties, and handmade gifts. Items inspired by A Hat with a Jellyfish Tail – Tutorial often become cherished keepsakes.
With thoughtful care and creative styling, this hat remains a standout piece for years.
FAQ – A Hat with a Jellyfish Tail – Tutorial
What makes this hat different from regular crochet hats?
The jellyfish tail adds movement, texture, and a playful visual effect.
Is A Hat with a Jellyfish Tail – Tutorial suitable for beginners?
It is best for confident beginners or intermediate crocheters.
What yarn works best for the jellyfish tail?
Lightweight acrylic or soft yarns are commonly recommended.
Can the tail length be adjusted?
Yes, the A Hat with a Jellyfish Tail – Tutorial allows full customization.
Is this hat suitable for children?
Yes, it is very popular for children when securely constructed.
Can this hat be used for costumes?
Absolutely. It is commonly used for costumes, cosplay, and themed events.
Conclusion
The A Hat with a Jellyfish Tail – Tutorial demonstrates how crochet can transform a simple hat into a fun, imaginative accessory. Throughout this article, you learned about the concept behind the design, material choices, construction techniques, and creative uses.
This project is ideal for crocheters who enjoy expressive designs and playful results. Whether created for a child, a costume, or a unique gift, A Hat with a Jellyfish Tail – Tutorial offers endless creative possibilities.
If you enjoyed this article, please leave an honest opinion and share your suggestions. Your feedback is always welcome and helps inspire future crochet tutorials and creative ideas.