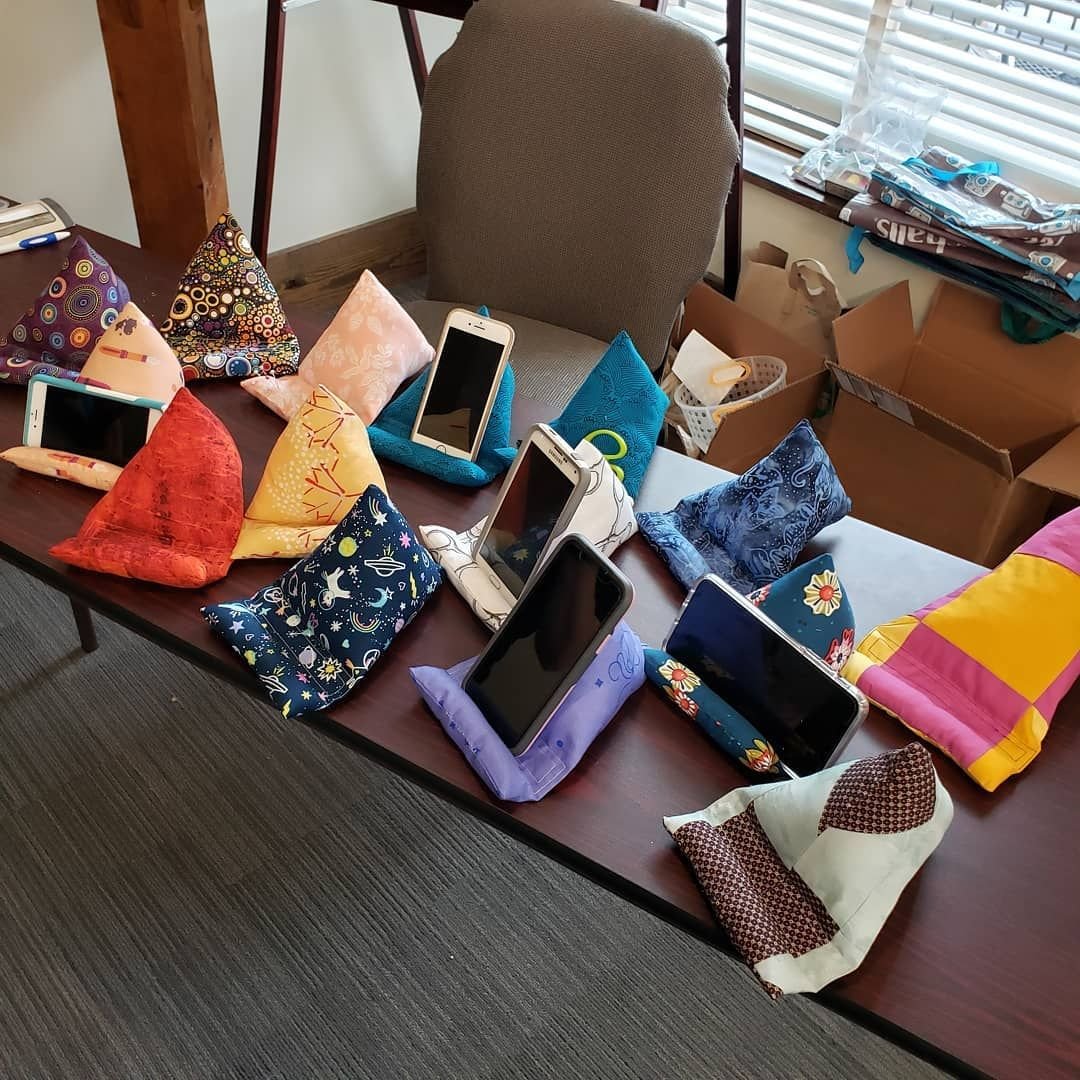
The How to Sew a Cell Phone Holder Pillow – Tutorial is a practical and creative quilting project that blends comfort with modern convenience. Designed to securely hold your phone while you relax, watch videos, read recipes, or attend virtual meetings, this small pillow is both functional and stylish.
Perfect for beginners and experienced quilters alike, this project is quick to complete and makes a thoughtful handmade gift. Whether you’re sewing for yourself, a teen, or a friend who loves cozy accessories, this cell phone holder pillow adds charm and usability to any space.
In this complete guide, you’ll learn how to choose materials, construct the pillow step by step, create a stable phone pocket, and add professional finishing touches.
1. Understanding the Structure of a Cell Phone Holder Pillow
The How to Sew a Cell Phone Holder Pillow – Tutorial typically includes three main components:
DISCOVER MORE FREE PATTERNS HERE!
Pillow base
Front pocket or angled slot
Back panel
The defining feature of this project is the front pocket designed to hold a phone upright. Some designs include a straight pocket, while others feature a slightly angled slot for better viewing.
Common finished sizes range from:
6” x 6”
7” x 7”
8” x 8”
The pillow is small enough to rest comfortably on your lap, desk, or nightstand, yet sturdy enough to support a smartphone.
The front panel may be quilted for added texture and structure. The pocket is sewn onto the lower half of the pillow front, with reinforced stitching at the sides to handle daily use.
Some versions also include a weighted base using rice or poly pellets to improve stability.
Understanding how these elements work together ensures your finished pillow is both secure and visually appealing.
2. Choosing Fabrics and Materials for Stability
Since this pillow needs to support a device, selecting durable materials is important.
Fabric Choice
100% cotton quilting fabric is ideal for both the front and back. It’s easy to sew, durable, and maintains structure.
For a modern look, choose:
Solid fabrics
Minimalist prints
Neutral tones
For a playful style, try:
Floral prints
Geometric patterns
Seasonal fabrics
Batting
Lightweight cotton batting adds gentle structure without bulk. For extra firmness, you can use fusible fleece.
Interfacing
Adding fusible interfacing behind the pocket fabric strengthens it and prevents sagging.
Stuffing
Polyester fiberfill works well for softness.
For added weight, consider adding a small fabric pouch filled with rice or pellets at the bottom.
Thread
Use strong, high-quality thread, especially when attaching the pocket.
Choosing structured materials ensures the How to Sew a Cell Phone Holder Pillow – Tutorial results in a durable, everyday accessory.
3. Step-by-Step Construction Guide
Breaking the project into clear steps makes it simple to follow.
Step 1: Cut Your Pieces
Cut one square for the front panel and one for the back panel.
Cut one rectangle for the phone pocket (wide enough to hold your device comfortably).
Step 2: Quilt the Front (Optional)
Layer the front fabric with batting and backing. Quilt with straight lines or a simple grid pattern. Trim to final size.
Step 3: Prepare the Pocket
Hem the top edge of the pocket by folding and stitching twice for a clean finish.
Add interfacing if needed for reinforcement.
Step 4: Attach the Pocket
Position the pocket on the lower half of the front panel.
Pin carefully and stitch along the sides and bottom, reinforcing corners.
Optional: Add a vertical stitch line in the center to create two compartments.
Step 5: Assemble the Pillow
Place the front and back panels right sides together.
Stitch around the edges, leaving a small opening for turning.
Step 6: Turn and Stuff
Turn the pillow right side out.
Add stuffing evenly, making sure the base is firm.
If using weighted filling, insert it at the bottom before adding fiberfill.
Step 7: Close the Opening
Hand-stitch the opening closed using an invisible ladder stitch.
Careful attention to pocket placement and reinforcement ensures the phone remains stable when in use.
4. Creative Variations and Professional Tips
Once you’ve mastered the basic How to Sew a Cell Phone Holder Pillow – Tutorial, you can personalize it in many ways.
Angled Pocket Design
Sew the pocket slightly tilted for better screen viewing.
Patchwork Front
Piece together quilt blocks for a decorative look.
Embroidered Details
Add initials or decorative stitching above the pocket.
Travel Version
Create a compact size for airplane or car use.
Tablet Holder Variation
Increase the size to accommodate small tablets or e-readers.
Professional Tips:
Use a walking foot when quilting
Reinforce pocket stitching with backstitching
Press seams carefully for crisp edges
Ensure pocket depth matches your phone size
Testing the pillow with your device before final stitching can help you adjust pocket placement for the best viewing angle.
Frequently Asked Questions (FAQ)
Is this project beginner-friendly?
Yes. It uses basic straight seams and simple construction techniques.
What size pocket should I make?
Measure your phone and add about ½ inch to the width for easy insertion.
Can I wash the pillow?
Yes, if made with cotton fabrics and removable weighted insert.
How do I prevent the pillow from tipping?
Add extra stuffing or a small weighted insert at the base.
Can I make it without quilting the front?
Absolutely. Quilting adds texture but is optional.
Conclusion
The How to Sew a Cell Phone Holder Pillow – Tutorial is a smart and creative sewing project that combines comfort with everyday practicality. Quick to complete and easy to customize, it makes a wonderful gift or personal accessory.
With thoughtful fabric selection, sturdy construction, and a few personalized details, you can create a phone holder pillow that is both stylish and functional.
Have you made functional quilted accessories before? Share your ideas or favorite fabric themes in the comments. Your creativity might inspire someone else to sew their own cozy tech companion.