If you love quick, adorable, and practical crochet projects, the Crocheted Fish Keychain is the perfect pattern to try next. Small enough to finish in a single afternoon and charming enough to make in multiple colors, this creative accessory is ideal for gifts, craft fairs, party favors, or simply adding personality to your keys or bags.
In this complete guide, you’ll learn everything you need to know about making a Crocheted Fish Keychain, from materials and stitches to customization ideas and finishing techniques.
Whether you’re a beginner exploring amigurumi for the first time or an experienced crocheter searching for profitable small projects, this tutorial will guide you step by step.Let’s dive into this creative ocean-inspired project.
1. Why the Crocheted Fish Keychain Is a Must-Make Project
The Crocheted Fish Keychain stands out because it combines simplicity, speed, and personality in one compact design. It is the kind of project that delivers quick satisfaction while still allowing room for creativity.
DISCOVER MORE FREE PATTERNS HERE!
For beginners, this pattern is an excellent introduction to working in the round. You will practice essential techniques such as the magic ring, single crochet, increases, decreases, and slip stitches. Because the project is small, you can see progress quickly, which helps build confidence and maintain motivation.
For experienced crocheters, the appeal lies in versatility. Small accessories like keychains are popular at craft fairs and online shops because they are affordable, lightweight, and easy to ship. A handmade Crocheted Fish Keychain can become an impulse purchase item that attracts customers looking for cute and practical gifts.
Another great advantage of this project is that it is perfect for using leftover yarn. Small scraps of cotton or acrylic yarn can easily be transformed into colorful mini fish. Instead of storing partial skeins, you can turn them into creative pieces that add value and charm.
2. Materials and Basic Construction
Before starting your Crocheted Fish Keychain, gather the necessary supplies. Choosing the right materials will make a big difference in the final result.
You will need lightweight yarn, such as sport or DK weight, a crochet hook that matches your yarn size, polyester fiberfill stuffing, safety eyes or black embroidery thread for the eyes, a yarn needle, scissors, and a keychain ring or lobster clasp. Cotton yarn is highly recommended because it holds its shape well and offers durability, especially for items handled frequently.
The construction of the fish is usually simple and intuitive. Most patterns begin with a magic ring and are worked in continuous rounds. The body gradually increases to form a rounded shape and then continues evenly to build length. Later, decreases are used to shape and close the body.
Tight stitches are important in amigurumi projects. Using a slightly smaller hook than recommended for your yarn helps prevent gaps between stitches and keeps the stuffing from showing. Maintaining consistent tension throughout the project ensures a smooth and professional finish.
To achieve a realistic yet cute fish appearance, increases should be evenly spaced to create a soft oval body. Gentle decreases help form a rounded head and tapered back. Slightly flattening the piece before closing can enhance the traditional fish silhouette. Small embroidered details can suggest scales or gills without complicating the design.
3. Step-by-Step Tutorial for Crocheted Fish Keychain
To begin the body of your Crocheted Fish Keychain, start with a magic ring and work six single crochet stitches into it. In the following rounds, increase evenly until you reach the desired width, which is typically between eighteen and twenty-four stitches around, depending on the size you prefer.
Once the body reaches its width, continue crocheting even rounds without increases to build the length of the fish. This creates the main oval shape. The number of rounds will depend on how elongated you want your fish to look.
Before the opening becomes too small, attach the safety eyes. They are usually placed a few rounds below the top and evenly spaced from the center. Positioning them slightly forward gives the fish a cute and friendly expression. If the keychain is intended for small children, embroidering the eyes is a safer option.
After placing the eyes, begin stuffing the body with polyester fiberfill. Add small amounts at a time to maintain an even shape. Avoid overstuffing, as too much filling can stretch the stitches and distort the design.
When the body is properly shaped and stuffed, start decreasing evenly in each round until the opening becomes small. Before completely closing the piece, gently flatten it to prepare for shaping the tail area. Some patterns close the body and create the tail separately, while others incorporate the tail directly at the end by crocheting through both layers.
The tail can be formed by chaining a small number of stitches and working slip stitches or half double crochets to create a fan shape. Another option is to crochet a small triangle separately and sew it onto the back of the fish. Adding small side fins with a few simple stitches can enhance the design and add dimension.
Finally, attach the keyring securely. Thread a strong piece of yarn through the top center of the fish and loop it around the metal ring. Pass the yarn through the body multiple times to reinforce the attachment. Tie secure knots and hide the ends deep inside the stuffing to ensure durability.
4. Creative Variations and Customization Ideas
One of the most enjoyable aspects of the Crocheted Fish Keychain is how easily it can be customized. With small changes in color and texture, you can create entirely different styles.
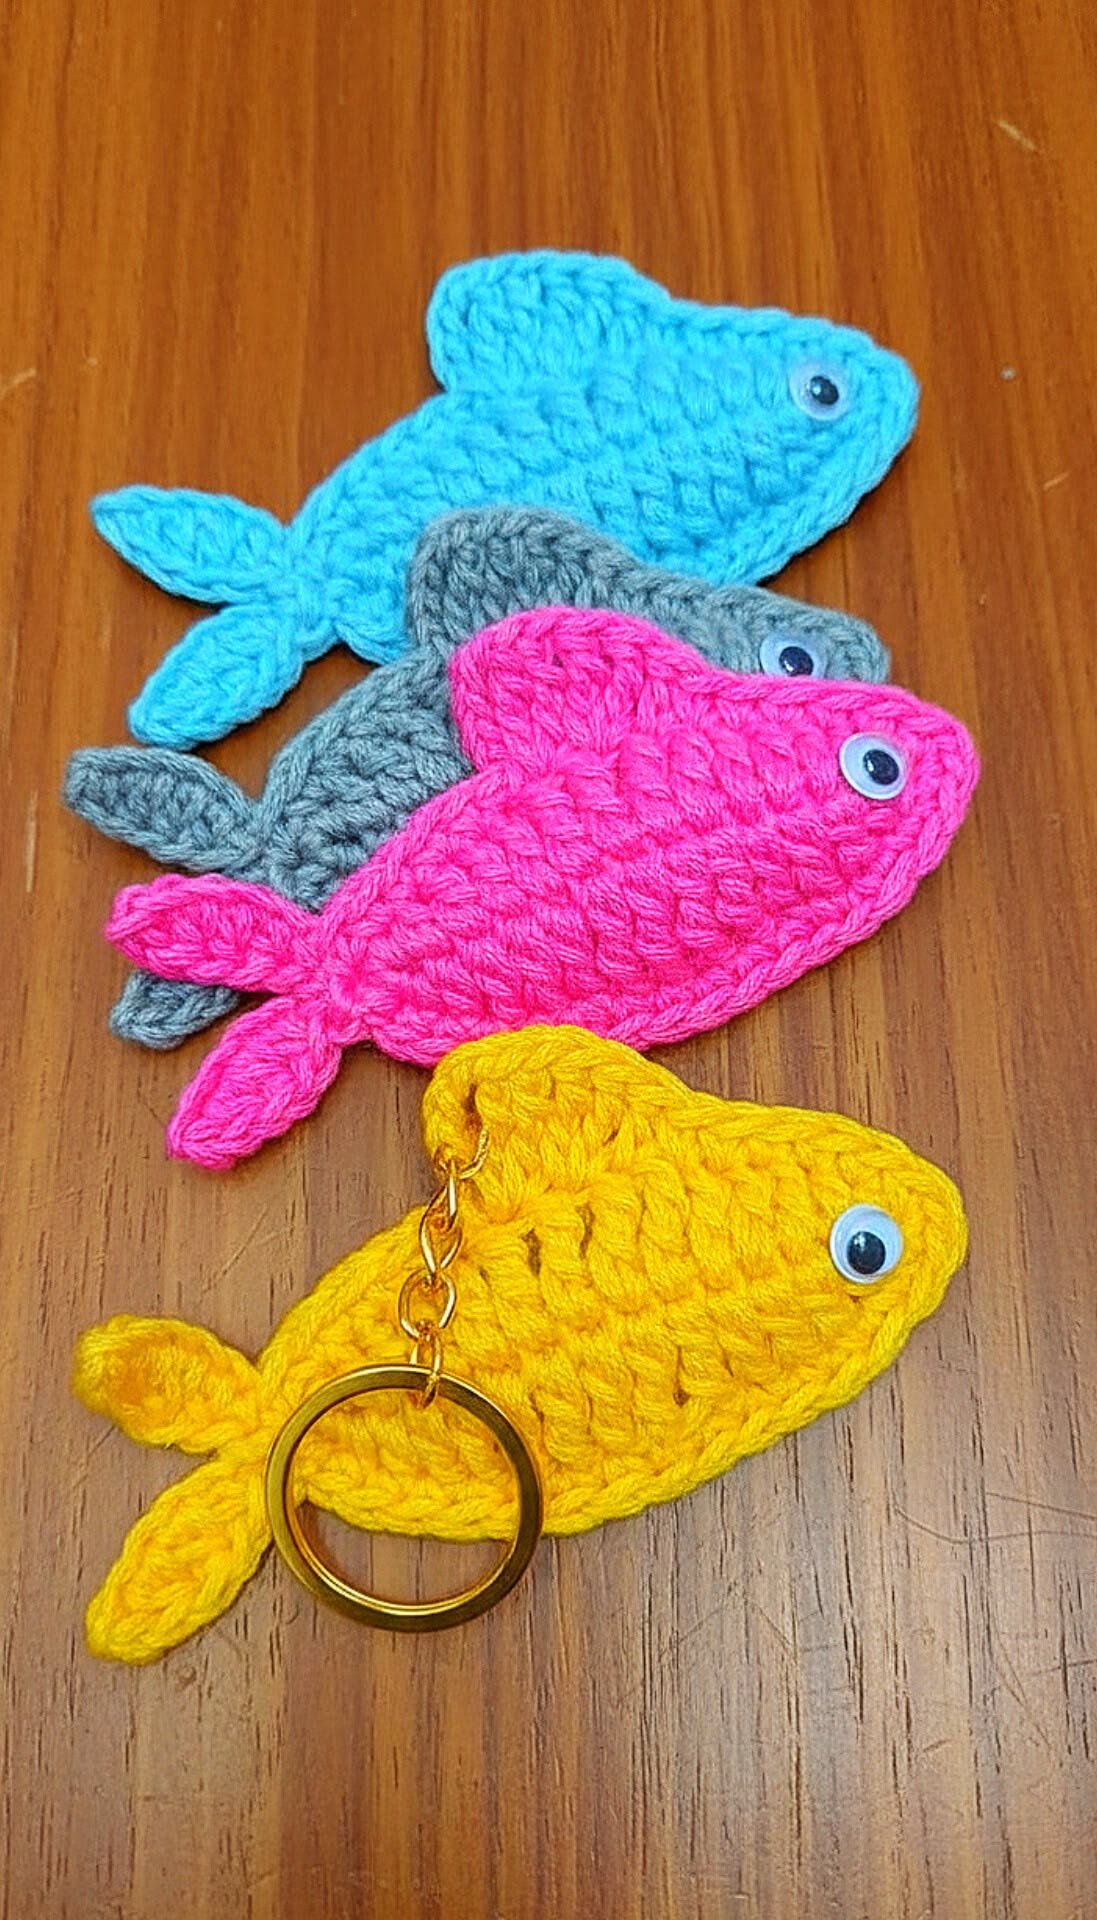
Playing with color is the simplest way to transform the design. Bright tropical combinations such as turquoise and yellow create a fun summer vibe. Classic orange can turn your fish into a cute goldfish. Blue and white stripes evoke a nautical theme, while pastel tones are perfect for baby gifts. Variegated yarn produces beautiful natural gradients that resemble real fish scales.
You can also experiment with texture. Adding bobble stitches to the body creates a subtle scale effect. Surface embroidery in small “V” shapes can suggest detailed scales without changing the basic structure. Metallic or glitter yarn adds sparkle, making the keychain stand out.
The fish keychain can be part of a themed collection. An ocean-inspired set might include starfish, whales, and turtles. A summer beach bundle could combine fish keychains with crochet pouches or mini bags. Creating multiple species such as clownfish-inspired designs or fantasy fish with oversized fins can expand your creative possibilities.
If you slightly enlarge the pattern by adding extra increase rounds, you can transform the keychain into a small plush toy. It can also become a zipper pull, bag charm, ornament, or decorative accessory for backpacks. The versatility of this simple design makes it a valuable addition to any crochet repertoire.
Frequently Asked Questions (FAQ)
Is the Crocheted Fish Keychain suitable for beginners?
Yes, it is an excellent beginner project. It uses basic stitches such as single crochet, increases, and decreases. Anyone comfortable working in the round can complete it successfully.
What type of yarn works best?
Cotton yarn is ideal because it offers structure and durability. Acrylic yarn can also be used, especially for decorative purposes, but cotton tends to hold its shape better over time.
How long does it take to make one keychain?
Most crocheters can complete a Crocheted Fish Keychain in one to two hours, depending on experience level and the amount of detailing added.
Can I sell keychains made from this tutorial?
In most cases, yes. Small handmade items like keychains are popular sellers. If you are using a purchased pattern, always review the designer’s terms regarding commercial use.
How can I make it more durable?
Use tight stitches, reinforce the keyring attachment with multiple passes of yarn, secure knots carefully, and avoid overstuffing. Choosing strong cotton yarn also improves durability.
Conclusion
The Crocheted Fish Keychain is a delightful project that combines creativity, practicality, and charm. It is beginner-friendly, quick to complete, and ideal for gifts or small business ideas. With endless color combinations and customization options, you can create an entire collection of unique crochet fish that reflect your personal style.
If you enjoyed this tutorial and love discovering new crochet ideas, share your thoughts and tell me which colors you would choose for your first fish. Your creativity can turn this simple project into something truly special.