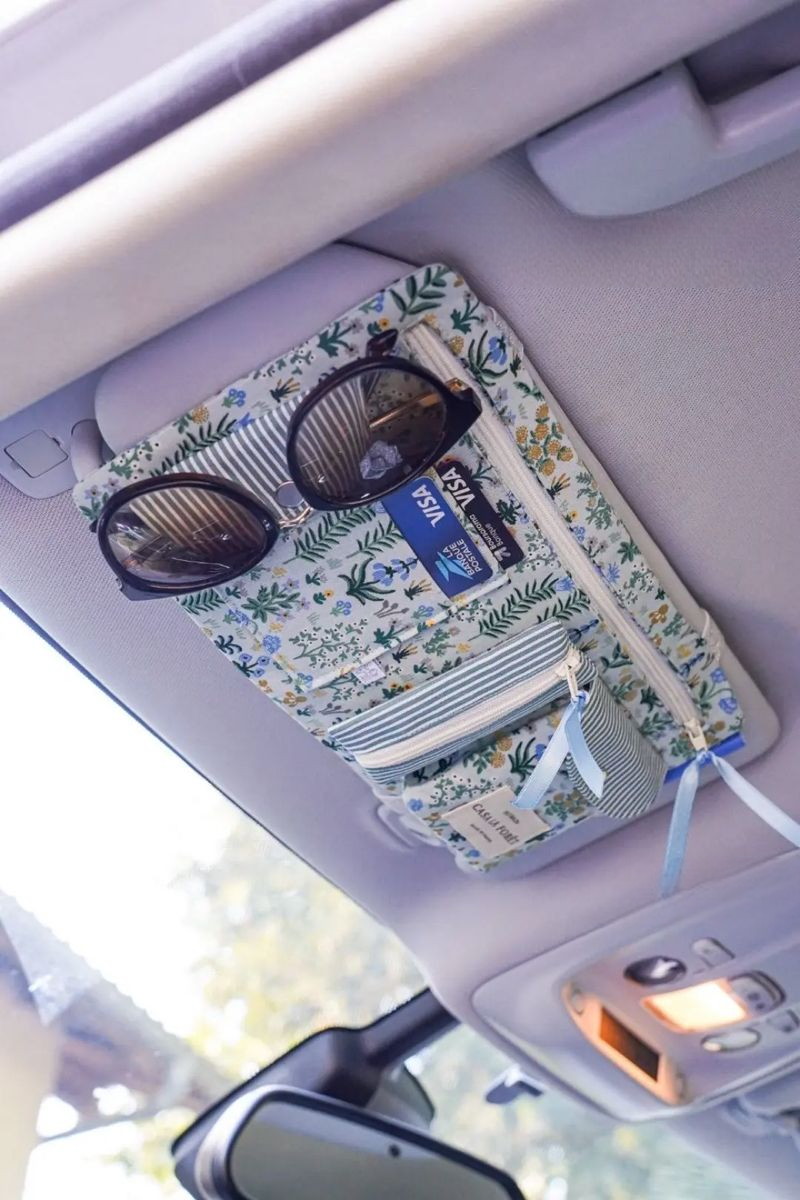
If you love practical sewing projects that truly make everyday life easier, the Visor Organizer – TUTORIAL is a must-try. Designed to attach neatly to your car’s sun visor, this compact quilted organizer helps keep small essentials within reach while reducing clutter inside your vehicle.
From sunglasses and pens to receipts, parking tickets, lip balm, and cards, a handmade visor organizer is both functional and stylish. In this complete guide, you’ll learn how to sew your own quilted visor organizer step by step, choose durable materials, and customize the design to match your personal style.
Let’s get started.
1. Why Make a Visor Organizer?
The Visor Organizer – TUTORIAL is one of those projects that blends creativity with real-world usefulness. Many cars lack convenient storage for small items, and loose objects often end up scattered across the dashboard or seats.
DISCOVER MORE FREE PATTERNS HERE!
A visor organizer solves that problem by:
Keeping essentials easily accessible
Reducing visual clutter
Adding a personalized touch to your vehicle
Creating a washable, reusable storage solution
This project is especially useful for:
Busy parents
Commuters
Road trip lovers
Students
Ride-share drivers
Unlike store-bought organizers, a handmade quilted version allows you to choose fabrics that match your car’s interior or reflect your personality. It also makes a thoughtful and practical gift for new drivers or anyone who appreciates organization.
The construction is beginner-friendly, using straight seams and basic quilting techniques, while still offering room for creativity in pocket design and fabric placement.
2. Materials and Preparation
Before beginning the Visor Organizer – TUTORIAL, gather your materials carefully. Durability is important because this item will be handled frequently.
You will need:
Quilting cotton for the exterior
Coordinating fabric for pockets
Batting or foam interfacing for structure
Lining fabric
Thread
Rotary cutter and ruler
Cutting mat
Sewing machine
Iron and pressing surface
Elastic or Velcro straps
Choosing the Right Structure
Because the organizer hangs vertically, adding structure is essential. Lightweight batting gives a soft quilted look, while foam interfacing adds more firmness and stability. Choose based on the level of structure you prefer.
Measuring Your Visor
Visors vary slightly in size, so measure yours before cutting. A common finished size is approximately 12 inches wide by 6 to 7 inches tall, but always confirm your specific dimensions.
Your fabric pieces will generally include:
One exterior panel
One lining panel
Batting or interfacing layer
Two or more pocket pieces
Straps or elastic bands
Press all fabrics before cutting to ensure accuracy.
3. Step-by-Step Visor Organizer – TUTORIAL
Now let’s walk through the construction of your Visor Organizer – TUTORIAL.
Step 1: Quilt the Exterior Panel
Layer the exterior fabric right side down, batting or interfacing in the middle, and lining fabric right side up if you prefer quilting all layers together. Alternatively, quilt only the outer fabric with batting.
Quilt simple straight lines, diagonal lines, or a grid pattern. This not only secures the layers but also adds decorative detail.
Trim the quilted panel to the exact finished size needed.
Step 2: Prepare the Pockets
Cut pocket pieces according to your desired layout. You can create:
A large pocket for documents
A narrow pocket for pens
A divided pocket for cards
An elastic loop for sunglasses
Hem the top edge of each pocket by folding it over twice and stitching. This gives a clean and durable finish.
Step 3: Attach Pockets to the Panel
Arrange the pockets on the quilted base panel. Pin or clip them in place.
Sew along the sides and bottom of each pocket. If creating divided pockets, stitch vertical lines to form separate compartments.
Be sure to backstitch at the top edges for reinforcement, as these areas experience the most stress.
Step 4: Add the Straps
Cut two fabric straps or use elastic bands. The straps should wrap around the visor securely without sagging.
Fold fabric straps lengthwise, sew along the edge, turn right side out, and press. Attach Velcro to the ends if you want adjustable closures.
Position the straps evenly along the top portion of the organizer’s back side. Baste or pin them securely before final assembly.
Step 5: Finish the Edges
Place the lining piece right sides together with the quilted front (if not already quilted together). Sew around the perimeter, leaving a small opening for turning.
Turn the organizer right side out and press carefully.
Topstitch around the entire edge to close the turning gap and give a polished finish.
Your Visor Organizer – TUTORIAL is now complete and ready to install in your car.
4. Customization Ideas and Creative Enhancements
One of the best parts of the Visor Organizer – TUTORIAL is how easily it can be personalized.
Add Elastic Details
Incorporate elastic bands across the panel to hold sunglasses or small notebooks securely.
Use Waterproof Fabric
Add laminated cotton or water-resistant lining for easy cleaning.
Create Themed Designs
Choose novelty prints such as florals, geometric patterns, animals, or seasonal fabrics. This makes the organizer both functional and decorative.
Add Labeling
Embroider initials or add a small fabric label for a professional handmade look.
Expand the Design
If you want additional storage, slightly increase the height of the organizer to include more pocket rows. Just ensure it does not block the mirror or interfere with visor movement.
Because this project is compact and practical, it also sells well at craft fairs and makes thoughtful handmade gifts.
Frequently Asked Questions (FAQ)
Is the Visor Organizer beginner-friendly?
Yes. It uses straight seams and simple construction, making it suitable for beginners with basic sewing skills.
What is the best fabric to use?
Quilting cotton works well for both exterior and pockets. Adding interfacing or batting provides necessary structure.
How do I make it sturdy?
Use foam interfacing or quilt multiple layers together. Reinforce pocket edges and strap attachment points.
Can I wash it?
Yes, if made from cotton fabrics. Machine wash on a gentle cycle and air dry for best results.
Will it fit all car visors?
Most visors are similar in size, but measuring your visor before cutting ensures a perfect fit.
Conclusion
The Visor Organizer – TUTORIAL is a practical and rewarding quilting project that combines organization with creativity. With simple construction techniques and customizable pocket layouts, you can create a useful car accessory tailored to your needs.
This project is perfect for personal use, thoughtful gifts, or even small handmade business opportunities. Once installed, you’ll appreciate how much easier it is to keep your car tidy and your essentials within reach.
If you enjoyed this tutorial, share your thoughts and tell me what fabric theme you would choose for your visor organizer. Your next quilting project might be the most practical one yet.