Patchwork Cat Rug – Tutorial is the perfect quilting project for cat lovers who want to combine creativity, comfort, and personality in a functional home décor piece. This charming design transforms fabric scraps into a cozy and decorative rug featuring an adorable cat silhouette or patchwork-inspired feline layout. Whether you are making it for your own space or as a thoughtful handmade gift, this project brings warmth and character to any room.
In this complete Patchwork Cat Rug – Tutorial, you will learn how to design the cat shape, choose durable fabrics, assemble patchwork sections, and properly finish the rug for long-lasting use. Unlike traditional quilts, a rug requires extra attention to structure and stability, making this tutorial both practical and creative.
If you’ve been searching for a detailed and beginner-friendly Patchwork Cat Rug – Tutorial, this guide will walk you step by step through materials, construction techniques, layout ideas, and finishing tips. Let’s explore how to turn simple patchwork into a delightful cat-themed rug.
1. Understanding the Design of Patchwork Cat Rug – Tutorial
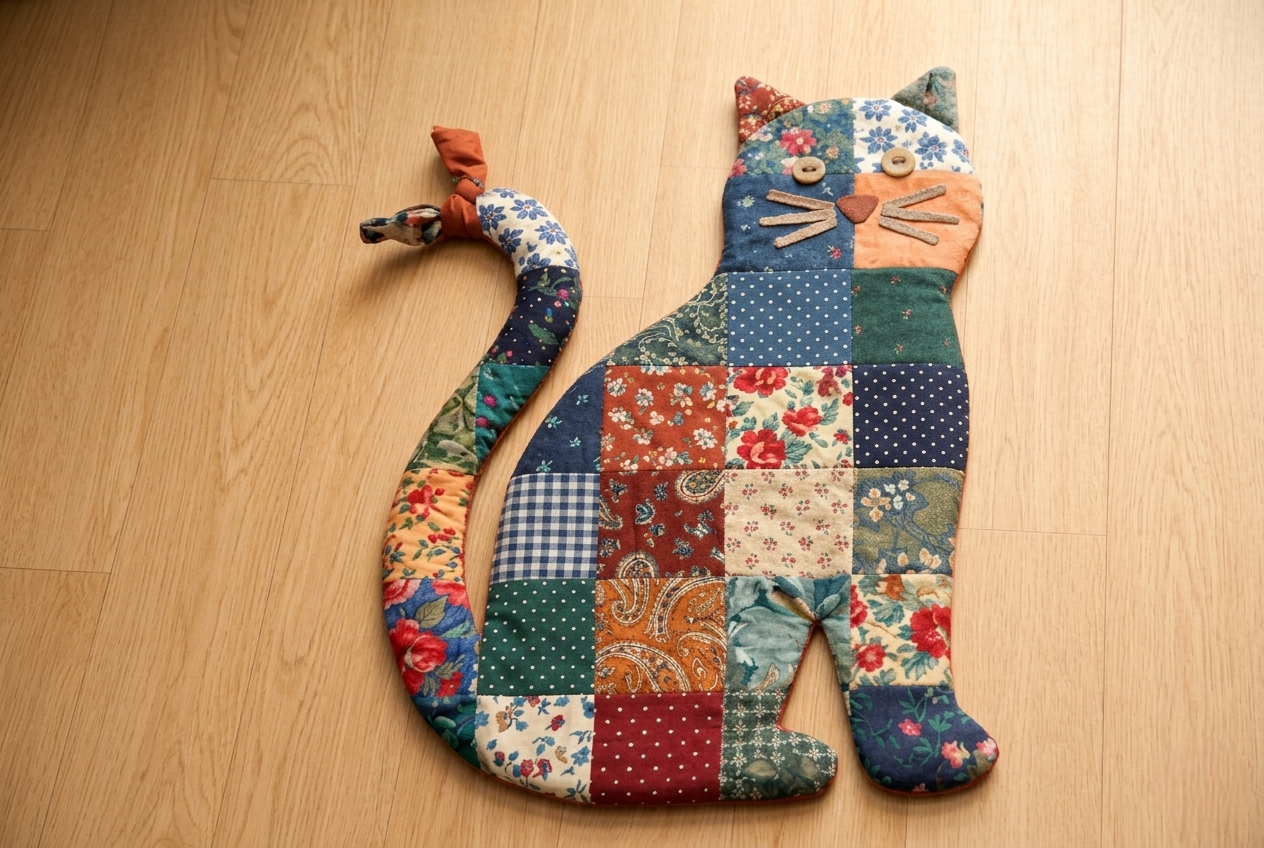
The foundation of a successful Patchwork Cat Rug – Tutorial begins with planning the overall shape and structure. Most patchwork cat rugs feature a large cat silhouette, either sitting, curled, or stretched out.
DISCOVER MORE FREE PATTERNS HERE!
You can create the cat shape using traditional patchwork piecing or appliqué techniques. Piecing involves assembling geometric shapes to form the cat design, while appliqué allows you to stitch a cat silhouette onto a patchwork background.
Proportion is important when designing the rug. The head, ears, body, and tail must be balanced to create a recognizable and appealing cat figure.
Since this is a rug rather than a wall quilt, durability is essential. The rug must be constructed with strong seams and possibly reinforced backing to withstand foot traffic.
Choosing the right finished size depends on where the rug will be placed. Smaller versions work well in entryways, while larger rugs make cozy additions beside a bed or reading chair.
Sketching your layout beforehand helps visualize fabric placement and ensures symmetry before cutting any fabric pieces.
2. Materials and Tools for Patchwork Cat Rug – Tutorial
Selecting appropriate materials is crucial for the longevity of your Patchwork Cat Rug – Tutorial. Durable quilting cotton is commonly used for the top, but consider heavier-weight fabrics for increased strength.
Denim, canvas, or upholstery-weight cotton can add extra durability to a rug project. Mixing textures within the patchwork also creates visual interest.
A non-slip rug backing is highly recommended for safety. You can attach a pre-made anti-slip mat or use specialized rug backing fabric.
Essential tools include a rotary cutter, cutting mat, quilting ruler, sewing machine, and strong polyester thread for reinforced seams.
Batting selection matters more for rugs than traditional quilts. A firm cotton batting or even thin foam padding provides cushioning without excessive bulk.
An iron is essential for pressing seams flat. Proper pressing ensures smooth patchwork and prevents uneven areas in the finished rug.
3. Step-by-Step Construction of Patchwork Cat Rug – Tutorial
To begin the Patchwork Cat Rug – Tutorial, cut your patchwork pieces according to your planned layout. If creating a pieced cat silhouette, prepare each geometric section carefully.
Sew smaller patchwork units together first, forming larger panels. Press seams consistently to maintain flat and even sections.
Once the main patchwork top is complete, trim it into the final cat shape. Use a template or pattern outline to guide precise cutting.
Layer the quilt top with batting and backing fabric. If using non-slip backing, ensure it aligns evenly with the top layer.
Quilt the layers together using straight-line stitching or simple free-motion quilting. Dense quilting adds durability and prevents shifting during use.
Finally, bind the edges securely. For curved cat shapes, bias binding works best because it bends smoothly around rounded areas like the tail or ears.
4. Creative Variations and Styling Ideas for Patchwork Cat Rug – Tutorial
One of the most exciting aspects of the Patchwork Cat Rug – Tutorial is the opportunity for customization. You can create realistic-looking cats using neutral tones like gray, black, or orange tabby patterns.
For a playful design, experiment with bright colors, florals, or even scrap fabric combinations. A rainbow patchwork cat makes a bold statement.
Adding embroidered facial features such as whiskers and eyes can bring personality to your rug. Keep stitching secure and durable for long-term use.
Consider quilting decorative patterns into the background area surrounding the cat. Paw prints or subtle texture stitching add charm without overwhelming the design.
You can also incorporate the cat silhouette into a rectangular rug rather than cutting around the shape. This option simplifies binding and enhances stability.
Seasonal versions are another creative idea. Create a holiday-themed patchwork cat using festive prints for special décor pieces throughout the year.
FAQ About Patchwork Cat Rug – Tutorial
Is the Patchwork Cat Rug – Tutorial suitable for beginners?
Yes, beginners can complete this project, especially if they choose a simple appliqué silhouette instead of complex piecing.
What fabric is best for a quilted rug?
Durable cotton, denim, or canvas fabrics are ideal choices due to their strength and wear resistance.
Do I need special backing for a rug?
A non-slip backing is highly recommended for safety, especially if the rug will be placed on hardwood or tile floors.
How do I wash a patchwork rug?
Spot cleaning is best for maintaining shape and structure. Always check fabric and batting recommendations before washing.
Can I make the rug without batting?
Yes, but adding batting provides cushioning and helps the rug maintain its form.
How do I prevent edges from fraying?
Use secure binding and strong stitching. Bias binding is especially helpful for curved edges.
What size should I make my cat rug?
The size depends on placement. Common sizes range from small accent rugs to medium floor mats.
Can I sell rugs made from this tutorial?
Yes, handmade rugs you create yourself can typically be sold. Always respect intellectual property if using a specific template or pattern source.
Conclusion
In this comprehensive Patchwork Cat Rug – Tutorial, you learned how to design, construct, and finish a charming and durable quilted rug featuring a cat-inspired design. From selecting sturdy materials and planning the patchwork layout to quilting and binding curved edges, each step contributes to a functional and decorative result.
This project allows endless creativity, whether you prefer realistic feline tones or colorful patchwork expressions. By following proper construction techniques, you can create a rug that is both visually appealing and built to last.
Now we would love to hear from you. Have you ever made a quilted rug before? What style of patchwork cat would you create? Share your honest opinion and suggestions below — your feedback inspires future quilting tutorials and creative ideas!

