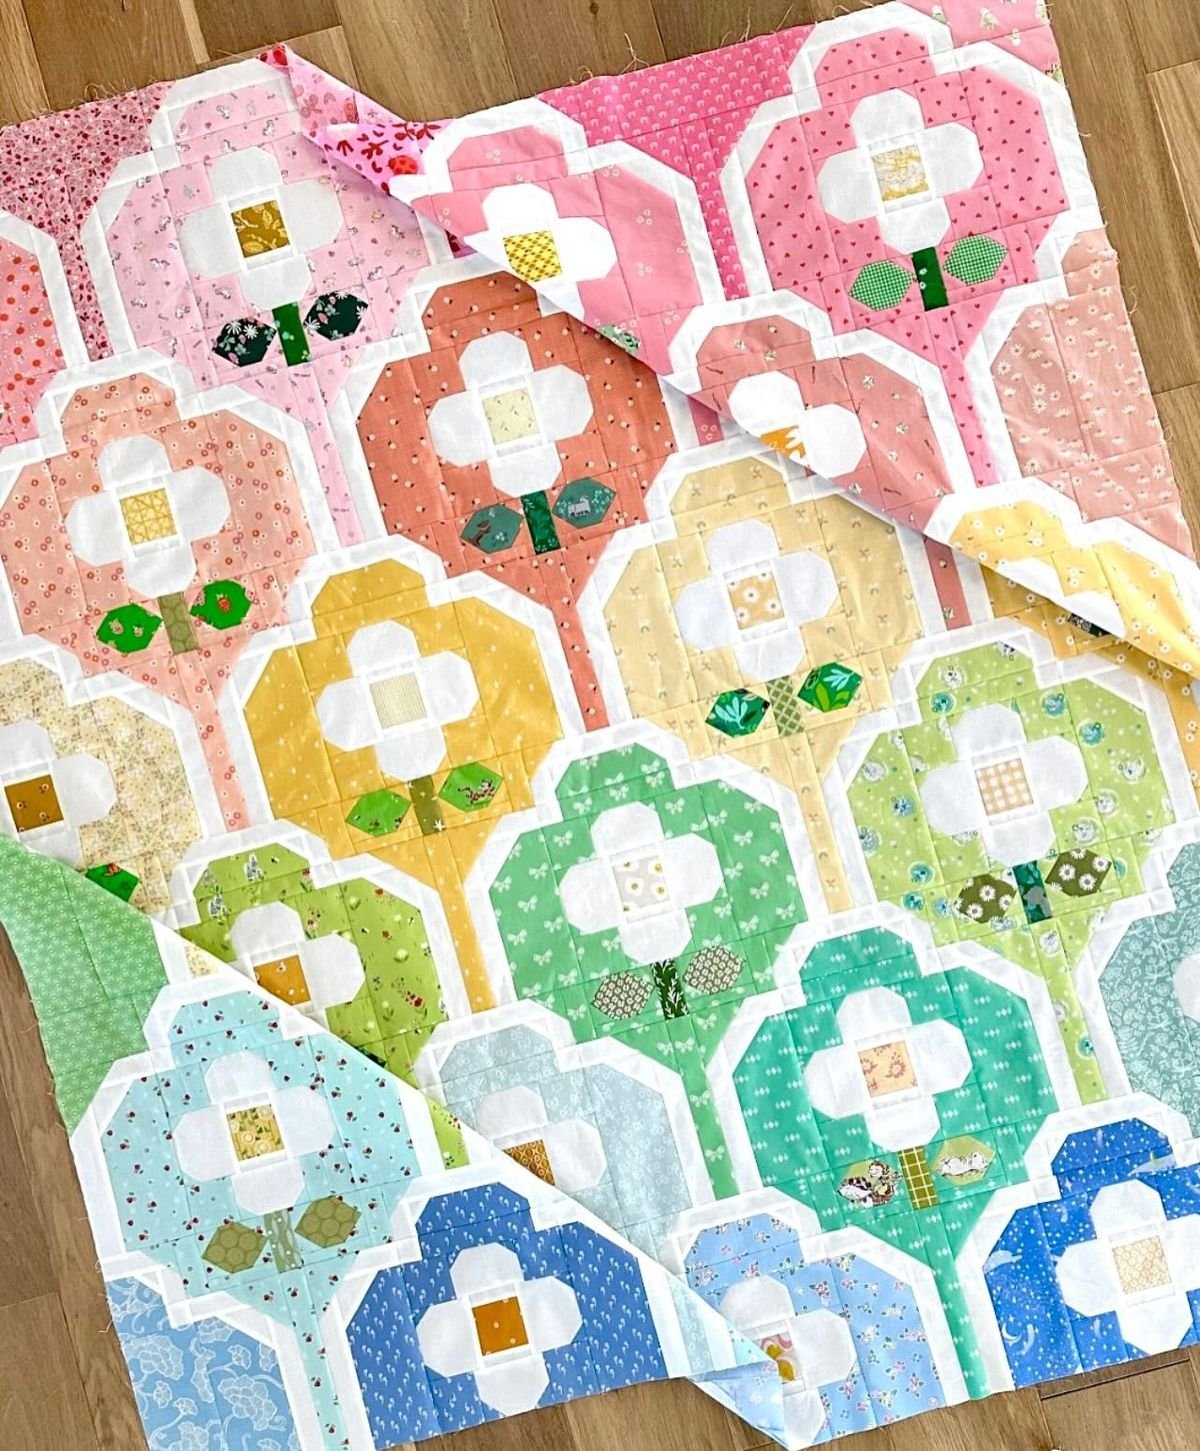
The Hello Spring Quilt – tutorial is the perfect quilting project to celebrate fresh beginnings, soft colors, and the beauty of seasonal change. Inspired by blooming flowers, gentle breezes, and longer days, this quilt pattern combines traditional patchwork techniques with a light and cheerful aesthetic. Whether you are decorating your home for spring or creating a heartfelt handmade gift, this design captures warmth and renewal in every stitch.
In this complete The Hello Spring Quilt – tutorial, you will learn how to select harmonious fabrics, construct balanced quilt blocks, assemble the quilt top with precision, and add finishing touches that enhance both durability and visual appeal. This project is suitable for confident beginners and experienced quilters who appreciate structured layouts with creative flexibility.
If you’ve been searching for a detailed and easy-to-follow The Hello Spring Quilt – tutorial, this guide will walk you step by step through materials, block construction, layout ideas, and quilting techniques. Let’s explore how to transform simple fabric pieces into a bright and uplifting spring-inspired quilt.
1. Planning and Designing The Hello Spring Quilt – tutorial
The foundation of a successful The Hello Spring Quilt – tutorial begins with thoughtful planning. Spring-themed quilts often feature floral prints, pastel shades, and light background fabrics that create an airy feel.
DISCOVER MORE FREE PATTERNS HERE!
Start by selecting a cohesive color palette. Soft pinks, mint greens, pale yellows, lavender, and sky blue are popular choices that reflect the freshness of spring.
Decide on your quilt size early in the process. Whether you are making a lap quilt, baby quilt, or full-size bed quilt, accurate measurements ensure balanced proportions.
Block selection is key to the overall design. You can incorporate simple squares, half-square triangles, or floral-inspired patchwork blocks to enhance the seasonal theme.
Sketching your layout before cutting fabric helps visualize placement and balance. A symmetrical arrangement creates a classic look, while an asymmetrical layout feels more modern.
Finally, calculate the number of blocks required based on your desired finished dimensions. This prevents fabric shortages and ensures consistent block sizing.
2. Materials and Tools for The Hello Spring Quilt – tutorial
Choosing quality materials significantly impacts the final outcome of The Hello Spring Quilt – tutorial. High-quality quilting cotton is recommended for durability and vibrant color retention.
Pre-cut fabric bundles such as charm packs or fat quarters work beautifully for spring quilts because they often feature coordinated prints.
A reliable rotary cutter, cutting mat, and clear acrylic quilting ruler are essential tools for precise cutting and accurate seam alignment.
Thread choice matters as well. A neutral cotton or polyester thread works well for piecing, while decorative thread can be used for quilting details.
Batting selection affects both comfort and drape. A lightweight cotton batting is ideal for spring quilts because it provides warmth without heaviness.
An iron with steam functionality ensures crisp seams and smooth block assembly. Proper pressing prevents distortion and maintains sharp lines.
3. Step-by-Step Construction of The Hello Spring Quilt – tutorial
To begin The Hello Spring Quilt – tutorial, cut all fabric pieces according to your chosen block design. Accuracy during this stage ensures smooth assembly later.
Start by constructing individual blocks. If using half-square triangles, carefully sew squares together, trim excess fabric, and press seams consistently.
Assemble block units into rows, double-checking alignment before sewing. Pinning at seam intersections helps maintain straight lines.
Once rows are complete, sew them together to form the full quilt top. Press each row before joining to minimize bulk and maintain flatness.
After completing the quilt top, layer it with batting and backing fabric. Ensure all layers are smooth and aligned before quilting.
Quilt the layers together using straight-line quilting, grid patterns, or soft free-motion floral designs that complement the spring theme.
4. Finishing Touches and Creative Variations for The Hello Spring Quilt – tutorial
The finishing stage of The Hello Spring Quilt – tutorial brings your project to life. Trim excess batting and backing fabric before attaching the binding.
Choose binding fabric that complements your quilt top. Floral prints or soft solids often frame the quilt beautifully.
Hand-stitching the binding on the back provides a clean and professional finish, though machine binding is a faster alternative.
Consider adding embroidered details such as small flowers or subtle lettering to enhance the “Hello Spring” theme.
Personalized quilt labels add sentimental value. Include the date and your name to create a lasting keepsake.
For creative variation, experiment with applique flowers, butterfly motifs, or even patchwork lettering spelling out “Spring” across the quilt top.
FAQ About The Hello Spring Quilt – tutorial
Is The Hello Spring Quilt – tutorial suitable for beginners?
Yes, especially if you choose simple block designs like squares or half-square triangles.
What size should I make this quilt?
Common sizes include baby quilts, lap quilts, or twin-size quilts. Choose based on intended use.
Do I need special spring-themed fabric?
No, but floral prints and pastel colors enhance the seasonal look.
How do I prevent my quilt from puckering during quilting?
Ensure the layers are properly basted and use even stitching tension.
What batting works best for spring quilts?
Lightweight cotton batting is ideal because it provides warmth without excessive thickness.
Can I use scrap fabrics?
Absolutely. Scrap quilting adds charm and variety while maintaining the spring theme.
How long does this project take to complete?
Depending on size and complexity, it can take several days to a couple of weeks.
Can I wash the finished quilt?
Yes, follow fabric care instructions and use gentle cycles to preserve quality.
Conclusion
In this complete The Hello Spring Quilt – tutorial, you learned how to plan, design, construct, and finish a cheerful spring-inspired quilt. From selecting soft seasonal fabrics to assembling balanced blocks and adding decorative touches, each step contributes to a vibrant and uplifting final result.
This project allows for endless creativity while reinforcing essential quilting skills such as accurate cutting, consistent seam allowances, and thoughtful layout planning. Whether displayed as home décor or gifted to someone special, your spring quilt will radiate warmth and joy.
Now we would love to hear from you. Have you created a seasonal quilt before? What colors remind you most of spring? Share your honest opinion and suggestions below — your feedback inspires future quilting tutorials and creative ideas!