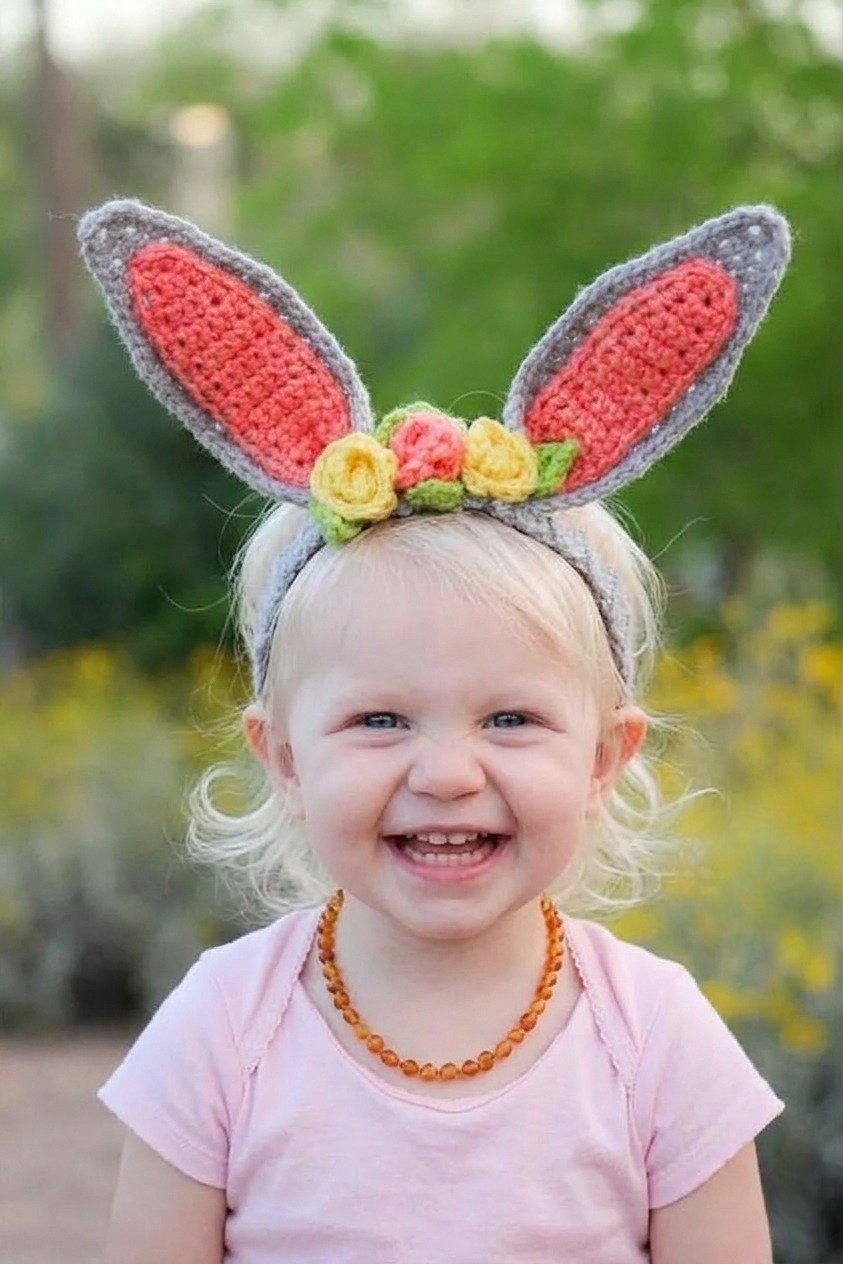
How to Crochet: Bunny Headband with Flowers is a delightful and creative crochet project that brings together softness, charm, and seasonal beauty. Learning How to Crochet: Bunny Headband with Flowers allows you to create an adorable accessory that is perfect for Easter, spring celebrations, photo sessions, or handmade gifts. This project combines simple crochet techniques with decorative elements to produce a headband that is both cute and elegant.
One of the reasons why How to Crochet: Bunny Headband with Flowers is so popular is its versatility. It can be made in different sizes for babies, children, or adults, and customized with various yarn colors and flower designs. Whether you prefer pastel tones for a soft spring look or brighter colors for a playful style, this crochet project offers endless possibilities.
In this complete How to Crochet: Bunny Headband with Flowers tutorial, you will learn how to select materials, crochet the headband base, create the bunny ears, add floral embellishments, and assemble everything into a beautiful finished piece. This guide is suitable for beginners and experienced crocheters who want to create a charming handmade accessory.
1. Materials Needed for Bunny Headband with Flowers
The first step in How to Crochet: Bunny Headband with Flowers is gathering the materials needed for the project. Having everything ready will make the process easier and more enjoyable.
DISCOVER MORE FREE PATTERNS HERE!
Soft yarn is essential for this project. Cotton yarn is a great choice because it is comfortable and gentle on the skin.
You can also use acrylic yarn if you prefer a softer and more flexible texture.
A crochet hook that matches your yarn weight is required. Hooks between 3 mm and 5 mm are commonly used for headbands.
Other essential tools include scissors and a yarn needle for finishing and sewing pieces together.
Stitch markers can help keep track of rows, especially when working on the headband base.
You will also need small amounts of yarn in different colors for creating the flowers and decorative details.
2. Crocheting the Headband Base
The next step in How to Crochet: Bunny Headband with Flowers is creating the base of the headband. This forms the foundation of the entire project.
Start by making a foundation chain that matches the head size you are creating the headband for.
The base is typically worked in rows using simple stitches such as single crochet or half double crochet.
As you continue the How to Crochet: Bunny Headband with Flowers pattern, keep your stitches even to ensure a comfortable fit.
You can adjust the width of the headband depending on your preference.
Once the desired length is reached, join the ends to form a circular band.
Make sure the headband is snug but not too tight, so it fits comfortably when worn.
3. Creating the Bunny Ears
The bunny ears are the highlight of the How to Crochet: Bunny Headband with Flowers project. They give the headband its playful and adorable look.
Begin by crocheting two identical ear shapes. These are usually made by working in rows or rounds.
The ear shape can be slightly curved or pointed depending on the style you prefer.
Some designs include a second inner ear piece in a different color to add contrast.
In the How to Crochet: Bunny Headband with Flowers tutorial, shaping the ears often involves increasing and decreasing stitches.
Once both ears are complete, lightly stuff them if you want a more structured look.
Attach the ears securely to the top of the headband using a yarn needle.
4. Adding Flowers and Finishing Touches
The final step in How to Crochet: Bunny Headband with Flowers is adding decorative flowers and finishing details.
Crochet small flowers using simple patterns. These usually involve working in the round with basic stitches.
You can create different flower styles, such as roses, daisies, or layered blossoms.
Attach the flowers around the base of the bunny ears or along one side of the headband.
In the How to Crochet: Bunny Headband with Flowers, arranging the flowers creatively can enhance the overall design.
Make sure all pieces are securely sewn and that there are no loose ends.
Once everything is assembled, your headband is ready to wear or gift.
FAQ – How to Crochet: Bunny Headband with Flowers
Is this project beginner-friendly?
Yes, How to Crochet: Bunny Headband with Flowers is suitable for beginners who know basic crochet stitches.
What yarn is best for this headband?
Cotton yarn is recommended because it is soft, breathable, and comfortable to wear.
Can I adjust the size of the headband?
Yes, simply adjust the number of chains and rows to fit different head sizes.
How long does it take to complete?
Most crocheters can finish this project in a few hours.
Can I customize the flowers?
Absolutely. You can use different colors and styles to personalize your headband.
Is this headband suitable for babies?
Yes, as long as soft yarn is used and all pieces are securely attached.
Conclusion
Learning How to Crochet: Bunny Headband with Flowers is a fun and rewarding experience that allows you to create a charming handmade accessory. This project combines simple crochet techniques with creative design elements, resulting in a beautiful and playful headband.
In this tutorial, you learned how to gather materials, crochet the headband base, create the bunny ears, and add floral decorations. Each step contributes to making a unique and personalized piece.
Projects like How to Crochet: Bunny Headband with Flowers are perfect for celebrating special occasions or creating thoughtful handmade gifts. The final result is both practical and visually delightful.
PATTERN VIDEO:
If you enjoyed this tutorial, feel free to share your honest opinion and leave your suggestions. Your feedback helps inspire more crochet ideas and creative projects for the crafting community.