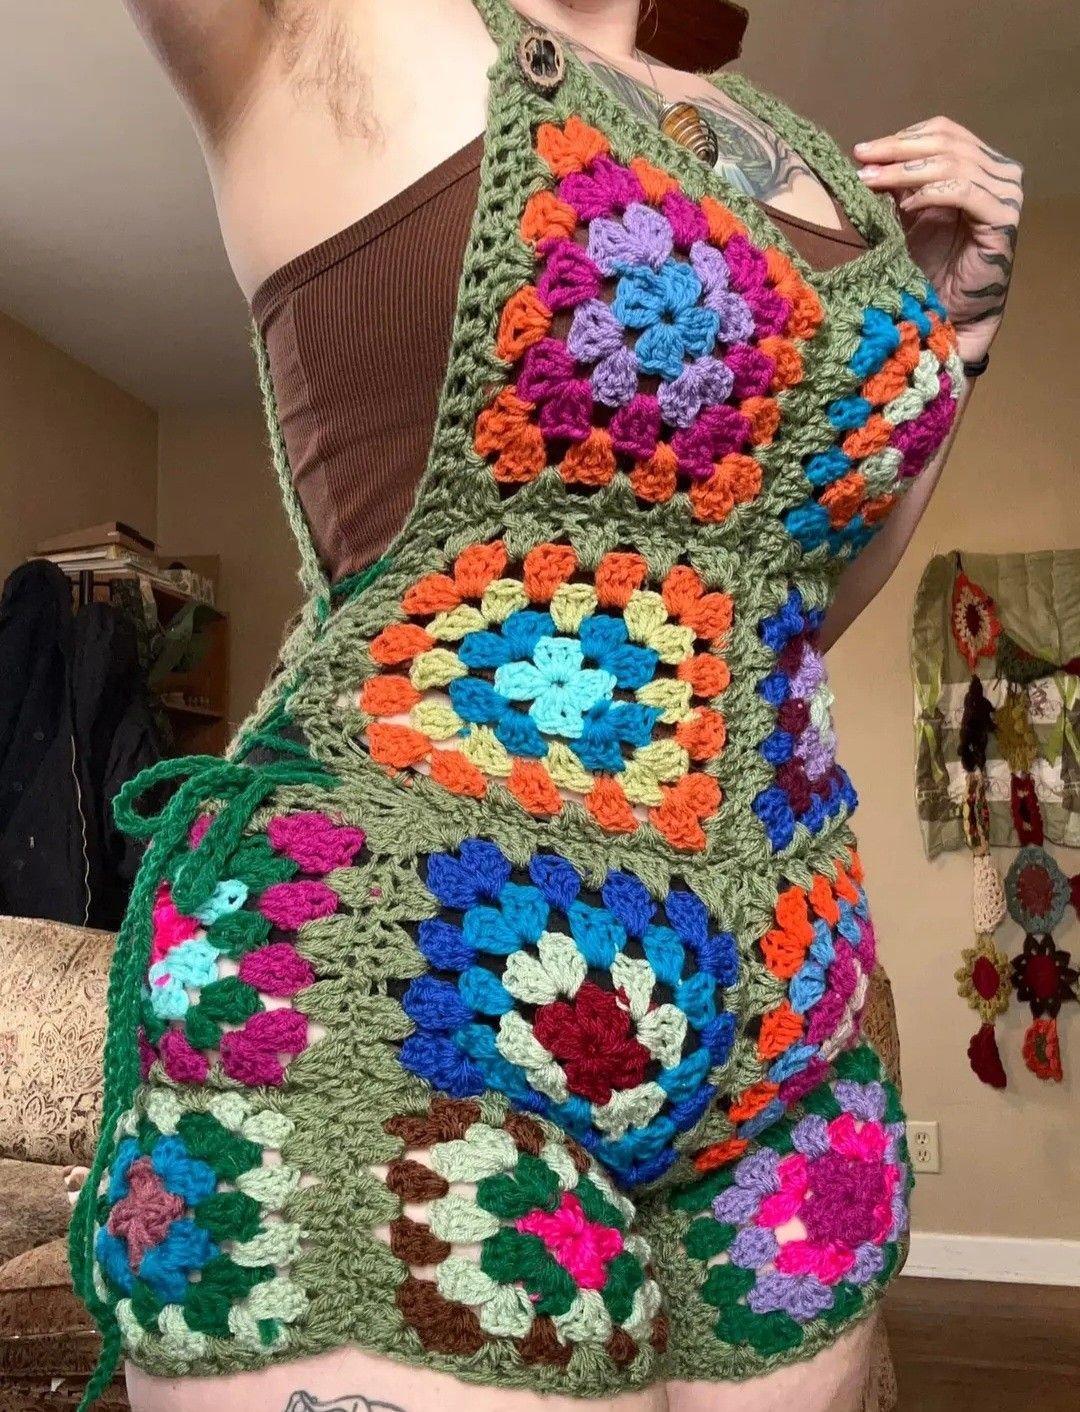
Granny Square Overalls – TUTORIAL is a creative and stylish crochet project that combines the timeless charm of granny squares with a modern and wearable design. Learning the Granny Square Overalls – TUTORIAL allows you to transform simple crochet motifs into a unique garment that stands out with personality and handmade beauty.
One of the most exciting aspects of the Granny Square Overalls – TUTORIAL is its versatility. You can mix and match colors, create bold patterns, or keep it minimalist with neutral tones. This project gives you full creative freedom to design overalls that reflect your personal style while making use of classic crochet techniques.
In this complete Granny Square Overalls – TUTORIAL, you will learn how to select materials, crochet granny squares, assemble the garment, and add finishing touches. Whether you are an intermediate crocheter or a beginner ready to take on a larger project, this guide will help you every step of the way.
1. Materials Needed for Granny Square Overalls
The first step in the Granny Square Overalls – TUTORIAL is gathering all the necessary materials. Proper preparation ensures a smoother and more enjoyable process.
DISCOVER MORE FREE PATTERNS HERE!
Yarn selection is essential for wearable projects. Cotton yarn is a popular choice because it is breathable and comfortable.
You can also use acrylic yarn for a softer and more flexible finish.
A crochet hook that matches your yarn weight is required to achieve consistent stitches.
You will need scissors and a yarn needle for weaving in ends and assembling the pieces.
Stitch markers can help keep track of rounds while making the granny squares.
A measuring tape is important to ensure the overalls fit properly.
2. Crocheting the Granny Squares
The foundation of the Granny Square Overalls – TUTORIAL lies in creating the individual granny squares.
Start by making a magic ring or a chain loop to form the center of each square.
Work in rounds using double crochet stitches and chain spaces to create the classic granny square pattern.
In the Granny Square Overalls – TUTORIAL, consistency in size is very important so all squares fit together evenly.
You can change colors in each round to create vibrant and eye-catching designs.
Continue crocheting squares until you have enough to form the front and back panels.
Make sure all squares are blocked and uniform before moving to the next step.
3. Assembling the Overalls
Once your squares are ready, the next step in the Granny Square Overalls – TUTORIAL is assembling the garment.
Lay out the squares in the desired arrangement to plan your design.
Join the squares together using slip stitch, single crochet, or a sewing method.
In the Granny Square Overalls – TUTORIAL, careful assembly ensures a neat and comfortable fit.
Create separate panels for the front, back, and sides of the overalls.
After joining the panels, sew or crochet them together to form the main structure.
Add straps and shape the neckline according to your preferred style.
4. Finishing and Customizing Your Overalls
The final stage of the Granny Square Overalls – TUTORIAL is adding finishing touches and personal details.
Weave in all loose ends securely to prevent unraveling.
Add edging around the neckline, armholes, and legs for a polished look.
You can include buttons, pockets, or decorative elements to enhance the design.
In the Granny Square Overalls – TUTORIAL, customization is what makes each piece unique.
Block the finished garment if needed to improve shape and fit.
Once completed, your overalls are ready to wear and showcase your creativity.
FAQ – Granny Square Overalls – TUTORIAL
Is this project suitable for beginners?
This project is better suited for beginners with some experience, as it involves multiple steps and assembly.
What yarn is best for overalls?
Cotton yarn is ideal for comfort and breathability, especially for wearable items.
How many granny squares do I need?
The number depends on the size and design of the overalls.
Can I customize the size?
Yes, you can adjust the number of squares and their arrangement to fit different sizes.
How long does it take to complete?
This project may take several days depending on your pace and experience.
Can I add pockets or buttons?
Yes, adding details like pockets and buttons is a great way to personalize your overalls.
Conclusion
The Granny Square Overalls – TUTORIAL is a fun and rewarding crochet project that turns simple granny squares into a fashionable and unique garment. It is an excellent way to combine creativity with practical crochet skills.
In this tutorial, you learned how to select materials, create granny squares, assemble the overalls, and add finishing touches. Each step plays an important role in achieving a comfortable and stylish final piece.
Projects like the Granny Square Overalls – TUTORIAL show how traditional crochet techniques can be transformed into modern fashion. The result is a handmade garment that reflects your creativity and effort.
PATTERN VIDEO:
If you enjoyed this tutorial, feel free to leave your honest opinion and share your suggestions. Your feedback helps inspire more creative crochet ideas and tutorials.