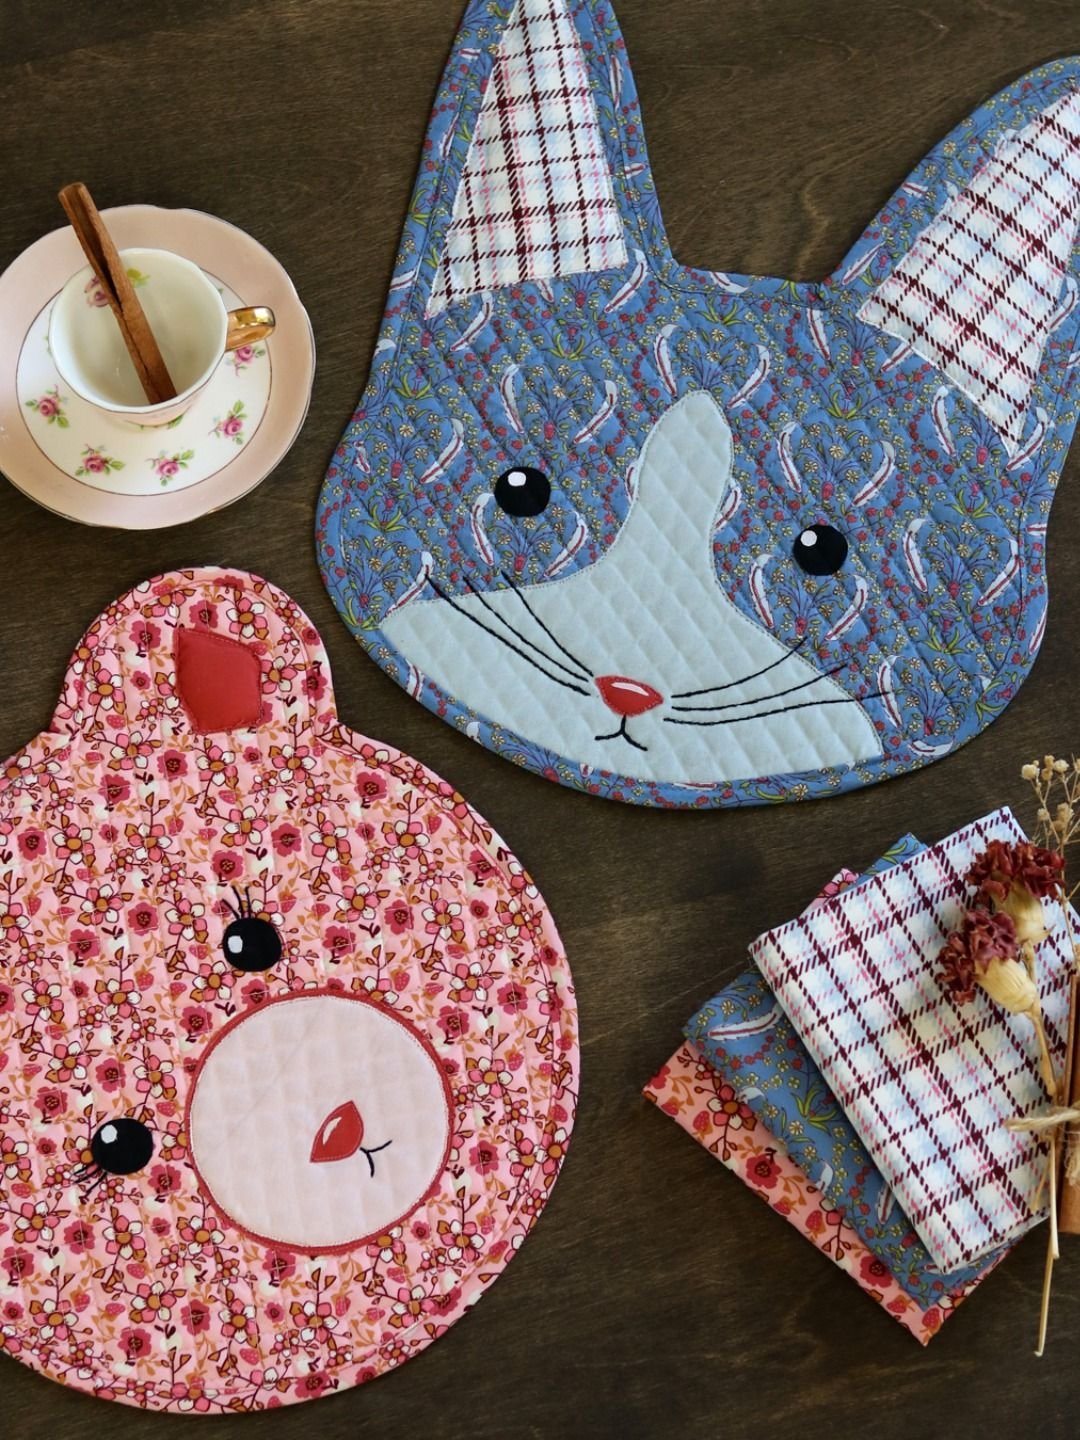
Learn How to Make Beautiful Placemats – What Are the Best Materials to Use is one of the most inspiring topics for sewing and quilting lovers who want to combine functionality with creativity. As shown in the image, these adorable animal-shaped placemats bring personality to your table while showcasing your sewing skills in a unique and charming way.
Handmade placemats like these are trending in the United States, Canada, and across Europe, especially among quilters who love combining patchwork with appliqué techniques. The bunny-inspired designs in soft floral and pastel fabrics create a cozy and inviting table setting, perfect for breakfast, tea time, or seasonal décor.
In this complete guide, you will learn everything about Learn How to Make Beautiful Placemats – What Are the Best Materials to Use, including the top materials, exact measurements, and a highly detailed 7-step tutorial to recreate this pattern exactly as seen. This article is optimized for SEO and designed to help you achieve professional, polished results.
1. Top 5 Materials to Use for Beautiful Placemats
Choosing the correct materials is essential when working on Learn How to Make Beautiful Placemats – What Are the Best Materials to Use, as they directly influence durability, structure, and appearance.
The most widely used material is quilting cotton fabric, especially in the United States. It is easy to sew, holds its shape well, and offers endless design possibilities such as florals, plaids, and soft prints like those in the image.
The second essential is cotton batting, which provides softness and protection against heat. It also creates the quilted texture visible on the bunny’s face.
Third, fusible interfacing is used to stabilize the fabric, particularly important for curved shapes like the bunny head and ears.
Fourth, felt or appliqué fabric is ideal for facial details. It does not fray and allows precise cutting for eyes, nose, and decorative elements.
Finally, high-quality sewing thread ensures strong seams and a clean finish. Matching colors or neutral tones work best.
These materials are the foundation for success in Learn How to Make Beautiful Placemats – What Are the Best Materials to Use.
2. Measurements, Pattern Design, and Preparation
Accurate measurements are crucial to replicate the placemat shown in the image when following Learn How to Make Beautiful Placemats – What Are the Best Materials to Use.
The finished placemat should measure approximately 35 cm (14 inches) wide and 40 cm (16 inches) tall, including the ears. The circular face area should be about 25–28 cm (10–11 inches) in diameter.
The ears should be 12–15 cm (5–6 inches) tall and slightly curved outward. This shape gives the bunny a playful and recognizable look.
You will need to cut:
- 1 front piece (main fabric)
- 1 backing piece
- 1 batting layer (same size)
- 2 outer ear pieces
- 2 inner ear pieces (contrast fabric)
- 1 oval or circular muzzle piece (approx. 12 cm / 5 inches wide)
Mark the face layout carefully:
- Eyes: 5–6 cm apart, slightly above center
- Nose: centered, about 2–3 cm below eyes
- Mouth and whiskers: lightly sketched for embroidery
Preparation ensures symmetry and makes the sewing process smoother in Learn How to Make Beautiful Placemats – What Are the Best Materials to Use.
3. Step-by-Step Tutorial: How to Make Beautiful Bunny Placemats (7 Detailed Stages)
This is the most important part of Learn How to Make Beautiful Placemats – What Are the Best Materials to Use. Follow each step carefully for a professional result.
Step 1: Create and Cut the Full Pattern Precisely
Draw your bunny template on paper or print one. Make sure the head is rounded and the ears are symmetrical. Fold your fabric in half before cutting to ensure both sides are identical. Cut the front, back, and batting layers using the same template. For accuracy, use fabric clips or pins and sharp scissors. Precision here ensures your placemat won’t look uneven later.
Step 2: Assemble and Shape the Ears Correctly
Take one outer ear piece and one inner ear piece, place them right sides together, and sew around with a 0.5–1 cm seam allowance, leaving the bottom open. Trim excess fabric along curves and clip notches to reduce bulk. Turn right side out and press with a warm iron. For a more defined look, topstitch 2–3 mm from the edge. Repeat for the second ear.
Step 3: Build the Face Appliqué Layer (Key Detail Step)
Position the muzzle (oval or circular piece) in the lower center of the front fabric. Use fusible web to fix it in place before sewing. Stitch around using a zigzag or blanket stitch. Add the nose using red or pink fabric (approx. 2–3 cm wide). Embroider the mouth using black thread with small backstitches. For the eyes, either sew black felt circles (2–2.5 cm diameter) or use safety eyes. Add small white stitches to create a shiny eye effect.
Step 4: Quilt the Front for Texture and Structure
Layer the front fabric over the batting. Pin or baste all layers to prevent shifting. Quilt simple diagonal or grid lines across the muzzle area (spacing about 2–3 cm). This step not only adds beauty but also stabilizes the placemat and gives it that padded, professional finish seen in the image.
Step 5: Position the Ears and Prepare Final Assembly
Place the ears at the top of the bunny head, spacing them about 3–5 cm apart. The raw edges of the ears should align with the edge of the placemat, pointing inward. Secure them with pins or a temporary stitch. Then place the backing fabric on top, right sides facing inward, sandwiching the ears between layers.
Step 6: Sew Around the Entire Shape with Precision
Using a sewing machine, stitch around the entire bunny shape with a consistent 1 cm seam allowance. Go slowly around curves to maintain smooth lines. Leave a 5 cm (2-inch) opening at the bottom. Trim seam allowances slightly and clip curves to help the shape turn smoothly.
Step 7: Turn, Finish, and Refine the Final Shape
Turn the placemat right side out through the opening. Use a blunt tool to gently push out the curves and ears. Press the entire piece flat. Fill slightly with batting if you want extra volume (optional). Close the opening using a ladder stitch. Finally, topstitch around the entire placemat (about 3 mm from edge) to secure all layers and give a clean, finished look.
By carefully following these expanded steps, you will master Learn How to Make Beautiful Placemats – What Are the Best Materials to Use and achieve a result that looks truly professional.
4. Tips for Professional Results and Creative Variations
To improve your results in Learn How to Make Beautiful Placemats – What Are the Best Materials to Use, follow these expert tips.
Always pre-wash and iron fabrics before cutting to avoid shrinkage and distortion.
Use a walking foot when quilting to keep layers aligned and avoid wrinkles.
Stick to soft color palettes like pink, cream, and blue for a cozy aesthetic, or experiment with bold prints for a modern look.
Add personalized details such as names or initials for gifts.
Try creating matching sets with napkins or table runners.
Precision, patience, and creativity are key to achieving stunning results.
FAQ – Frequently Asked Questions
1. What is the best fabric for placemats?
Quilting cotton is the most recommended for durability and ease.
2. Do I need batting?
Yes, it provides structure and heat resistance.
3. Is this beginner-friendly?
Yes, especially with a step-by-step guide.
4. Can I machine wash?
Yes, use a gentle cycle for best results.
5. How long does it take?
About 1–2 hours per placemat.
6. Can I customize the design?
Absolutely! You can create different animals or styles.
Conclusion
In this detailed guide on Learn How to Make Beautiful Placemats – What Are the Best Materials to Use, you learned how to select materials, prepare your pattern, and follow a fully detailed 7-step tutorial to recreate the adorable bunny placemats shown.
With the right techniques, attention to detail, and creativity, you can transform simple fabrics into beautiful, functional art pieces for your home.
Now it’s your turn! Try this pattern and share your honest opinion. Your feedback and suggestions are always welcome and help inspire even more creative tutorials.