DIY Patchwork Bird Marker Organizer Wall Hanging is a creative and functional quilting project that combines organization with decorative charm. By following the DIY Patchwork Bird Marker Organizer Wall Hanging, you can create a beautiful wall piece that not only enhances your space but also helps you keep your tools neatly arranged.
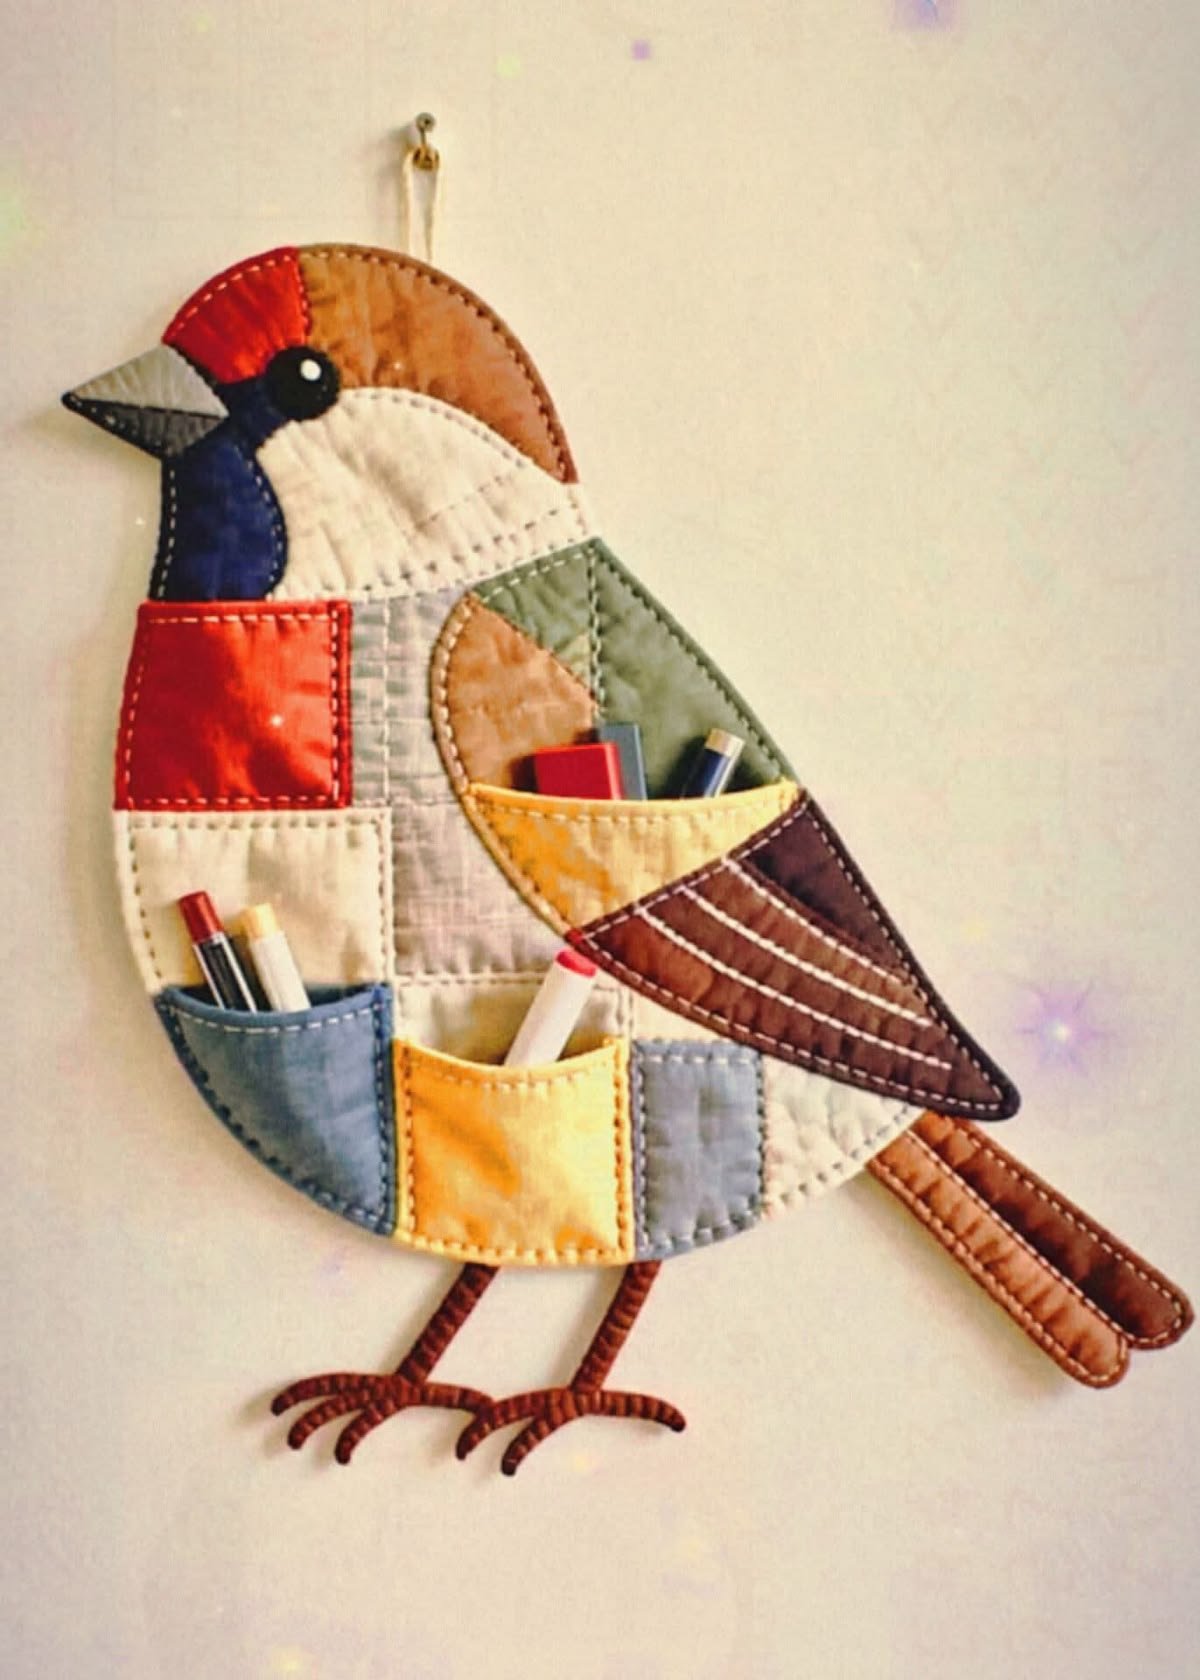
One of the most appealing aspects of the DIY Patchwork Bird Marker Organizer Wall Hanging is its combination of artistry and practicality. The bird-themed patchwork design adds a playful and cozy touch, while the organizer pockets make it perfect for storing sewing tools, craft supplies, or everyday items. This project is ideal for quilters who enjoy both creativity and functionality.
In this complete DIY Patchwork Bird Marker Organizer Wall Hanging, you will learn how to choose fabrics, prepare and cut patchwork pieces, assemble the bird design, and add functional pockets. This guide is suitable for beginners and experienced quilters who want to create something useful and decorative.
1. Materials Needed for DIY Patchwork Bird Marker Organizer
The first step in the DIY Patchwork Bird Marker Organizer Wall Hanging is gathering all the materials required for a smooth quilting process.
DISCOVER MORE FREE PATTERNS HERE!
Cotton fabric is highly recommended for durability and ease of sewing.
Choose colorful scraps to create the patchwork bird design.
A neutral fabric works well for the background.
A rotary cutter, cutting mat, and quilting ruler are essential tools.
Thread that matches your fabric helps create a clean finish.
Batting is needed to give the wall hanging structure.
2. Cutting and Preparing the Fabric Pieces
Preparation is a key part of the DIY Patchwork Bird Marker Organizer Wall Hanging, ensuring all elements are ready for assembly.
Start by cutting fabric pieces for the bird shape and background.
Use templates to achieve accurate shapes.
In the DIY Patchwork Bird Marker Organizer Wall Hanging, precision ensures a neat and professional look.
Organize your pieces by color and function.
Press all fabric pieces before sewing.
Lay out the design to visualize the final arrangement.
3. Assembling the Bird Design and Organizer
The next stage in the DIY Patchwork Bird Marker Organizer Wall Hanging is assembling the decorative and functional elements.
Sew the patchwork pieces together to form the bird design.
Attach the bird to the background fabric using appliqué techniques.
In the DIY Patchwork Bird Marker Organizer Wall Hanging, careful stitching ensures durability.
Add pockets or compartments for storing markers or tools.
Reinforce the edges of the pockets for strength.
This step combines decoration with functionality.
4. Finishing and Hanging Your Organizer
The final stage of the DIY Patchwork Bird Marker Organizer Wall Hanging focuses on finishing and preparing your piece for display.
Layer the top with batting and backing fabric.
Quilt the layers together to add texture and stability.
In the DIY Patchwork Bird Marker Organizer Wall Hanging, finishing details enhance both appearance and durability.
Add binding around the edges for a clean look.
Attach loops or a sleeve for hanging.
Once completed, your organizer is ready to be displayed.
FAQ – DIY Patchwork Bird Marker Organizer Wall Hanging
Is this project suitable for beginners?
Yes, the DIY Patchwork Bird Marker Organizer Wall Hanging is beginner-friendly with basic sewing skills.
What fabrics work best?
Cotton fabrics are ideal for this project.
Can I customize the design?
Yes, you can change colors, shapes, and pocket sizes.
How long does it take to complete?
It can be finished over a weekend.
What can I store in it?
Markers, sewing tools, or small craft supplies.
Is it suitable as a gift?
Absolutely, it makes a thoughtful handmade gift.
Conclusion
The DIY Patchwork Bird Marker Organizer Wall Hanging is a creative and practical quilting project that allows you to combine artistic design with everyday functionality. It is perfect for organizing your space while adding a decorative handmade touch.
In this tutorial, you learned how to select materials, prepare fabric pieces, assemble the bird design, and finish the wall hanging with professional techniques. Each step contributes to a durable and visually appealing final product.
Projects like the DIY Patchwork Bird Marker Organizer Wall Hanging demonstrate how quilting can be both decorative and useful, transforming simple materials into meaningful creations.
If you enjoyed this tutorial, feel free to leave your honest opinion and share your suggestions. Your feedback helps inspire more creative quilting ideas and projects.