Pocket Airplane Organizer Quilt Tutorial is a creative and highly functional quilting project that combines playful design with practical organization. This pattern is perfect for quilters who want to create something useful for travel, especially for children, while still showcasing their sewing skills and creativity.
One of the most appealing aspects of the Pocket Airplane Organizer Quilt Tutorial is its purpose-driven design. It transforms a simple quilted panel into a multi-pocket organizer that can be attached to an airplane seat, keeping essentials like toys, books, and snacks within easy reach during flights.
In this complete guide, you will learn everything you need to create your own Pocket Airplane Organizer Quilt Tutorial, including understanding the structure, choosing the best materials, following a step-by-step process, and exploring creative customization ideas.
1. Understanding the Pocket Airplane Organizer Quilt Tutorial
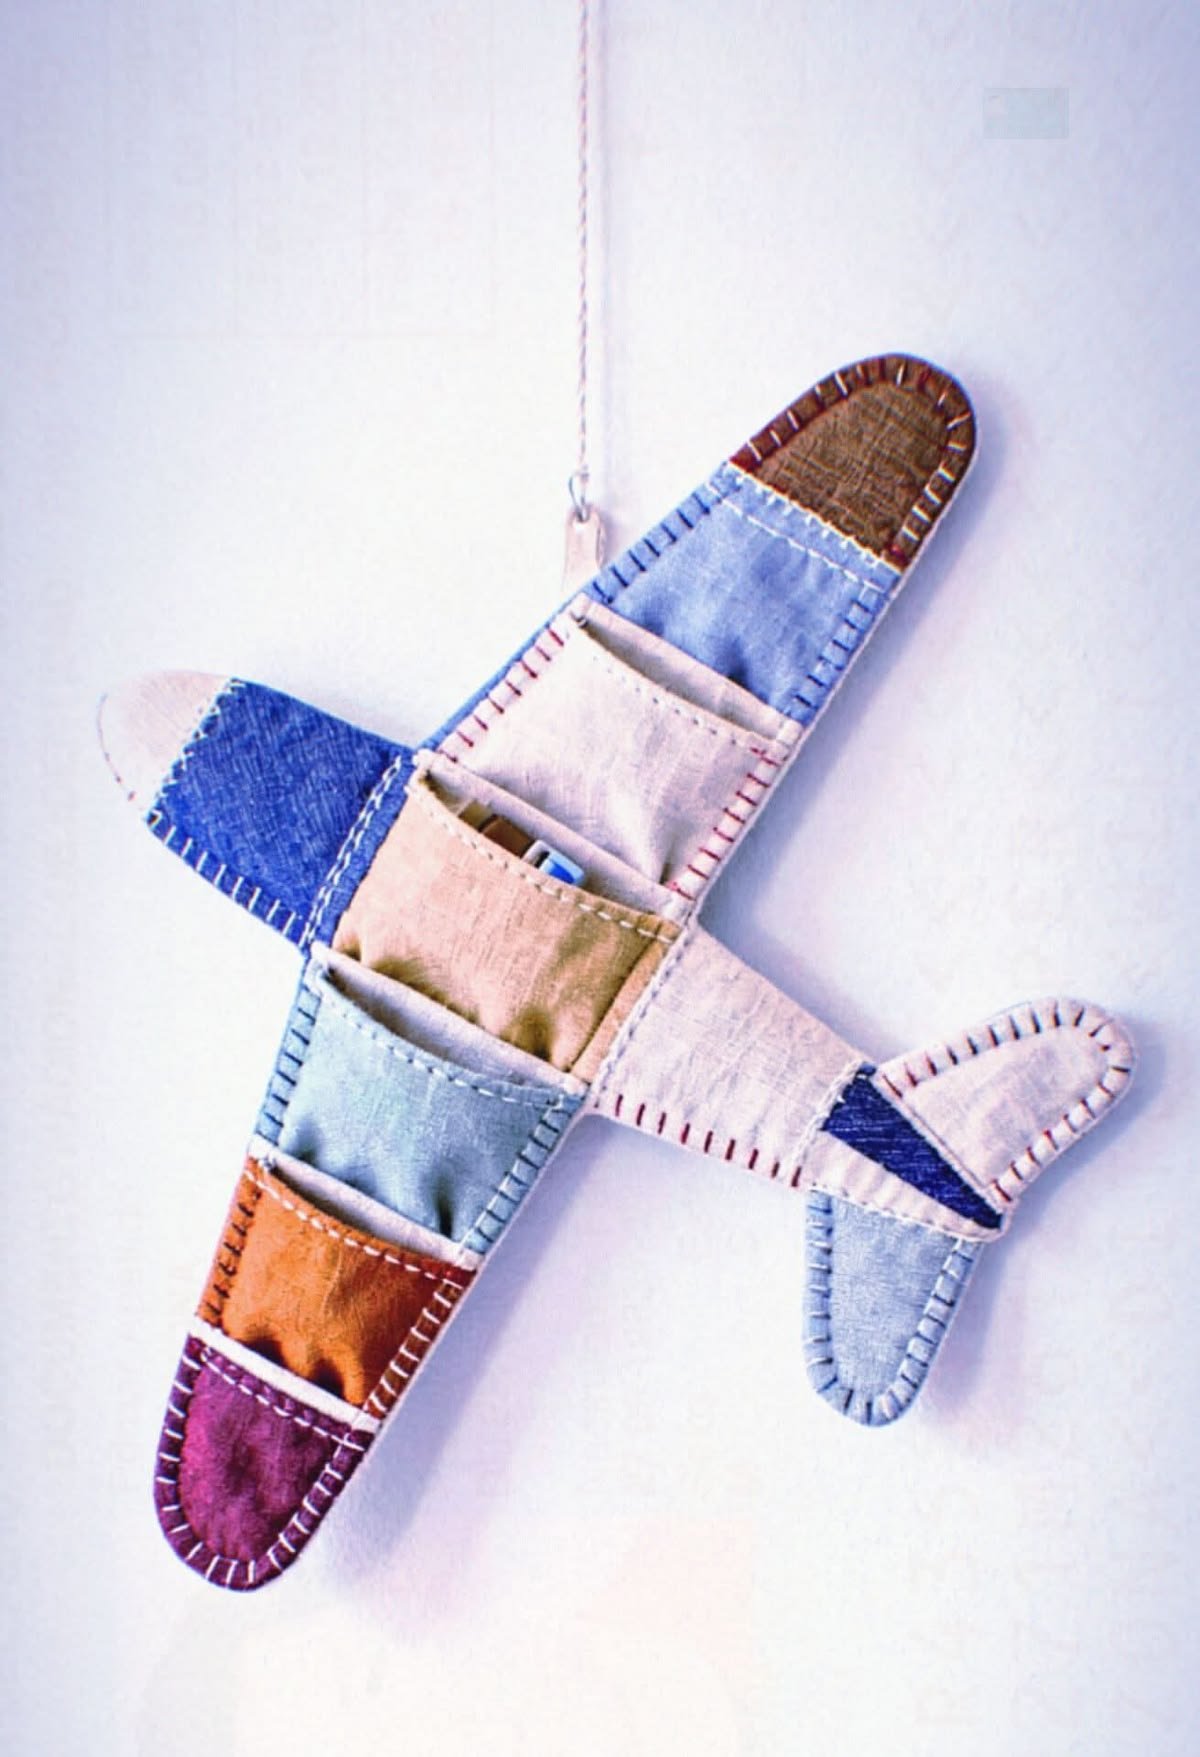
The Pocket Airplane Organizer Quilt Tutorial is designed as a compact quilted panel with multiple pockets.
The base structure includes a sturdy backing, batting for light padding, and a front panel with attached compartments.
DISCOVER MORE FREE PATTERNS HERE!
The pockets vary in size to accommodate different items such as tablets, books, or small accessories.
One of the key features of the Pocket Airplane Organizer Quilt Tutorial is its attachment system, which allows it to hang securely on the back of an airplane seat.
The design focuses on durability and convenience, ensuring it can handle frequent use.
Understanding how each section is assembled is essential for creating a functional and long-lasting organizer.
2. Best Materials for Pocket Airplane Organizer Quilt Tutorial
Choosing the right materials is essential for achieving the best results with your Pocket Airplane Organizer Quilt Tutorial.
Durable cotton fabric is highly recommended for both the outer layer and the pockets.
Heavier fabrics or interfacing can be used to reinforce the pockets and maintain structure.
Batting should be lightweight but firm enough to provide stability.
Strong thread is important for securing seams and handling weight.
Basic tools include a rotary cutter, quilting ruler, pins, and a sewing machine.
Additional materials such as elastic bands, straps, or buckles may be used for attachment.
Selecting sturdy and washable materials ensures long-term usability.
3. Step-by-Step Pocket Airplane Organizer Quilt Tutorial Process
Creating your own Pocket Airplane Organizer Quilt Tutorial becomes manageable when broken into clear steps.
Start by cutting the base fabric, batting, and backing to your desired size.
Quilt the layers together to create a stable foundation.
Prepare the pockets by cutting fabric pieces and hemming the edges.
Arrange the pockets on the front panel, considering size and placement for easy access.
Sew the pockets securely onto the quilted base.
Add straps or loops at the top to allow the organizer to hang from an airplane seat.
Finish by trimming edges and adding binding for a clean and professional look.
4. Creative Ideas for Pocket Airplane Organizer Quilt Tutorial
The Pocket Airplane Organizer Quilt Tutorial offers endless opportunities for creativity and personalization.
You can use themed fabrics such as airplanes, animals, or cartoons to make it more fun for children.
Adding labels or embroidery can help organize items more efficiently.
This organizer is not limited to travel—it can also be used in cars, at home, or in classrooms.
The Pocket Airplane Organizer Quilt Tutorial can be customized with additional pockets or compartments.
You might consider adding a clear pocket for tablets or documents.
Creating matching travel accessories can result in a cohesive and stylish set.
FAQ About Pocket Airplane Organizer Quilt Tutorial
Is this pattern suitable for beginners?
Yes, it is beginner-friendly with basic sewing and quilting skills.
What size should the organizer be?
It should be compact enough to fit airplane seats, typically around 16×24 inches.
What fabric works best?
Durable cotton or reinforced fabric is ideal.
How do I attach it to the seat?
Use straps, loops, or adjustable bands to secure it.
Can it be washed?
Yes, if made with washable materials.
Can I sell organizers made from this pattern?
Yes, functional handmade items like this are very popular.
Conclusion
The Pocket Airplane Organizer Quilt Tutorial is a practical and creative quilting project that combines organization with design. In this guide, you learned how to understand the structure, choose the best materials, follow a step-by-step process, and explore creative ideas.
This pattern is perfect for making travel more convenient while adding a personal handmade touch.
Now it’s your turn to create your own Pocket Airplane Organizer Quilt Tutorial. Customize it to fit your needs and style, and enjoy the satisfaction of making something both beautiful and useful. Don’t forget to leave your honest opinion and share your suggestions—your feedback helps inspire even more creative quilting ideas!