
Hunter’s Star Quilt Pattern is one of the most admired quilt designs among quilting enthusiasts because of its striking geometric appearance, timeless elegance, and endless color possibilities. Although the finished quilt may look complex at first glance, the Hunter’s Star Quilt Pattern can be completed successfully by breaking the design into manageable units and following a logical sewing sequence. The beautiful arrangement of stars and diamonds creates a dramatic visual effect that makes this pattern suitable for bed quilts, wall hangings, table toppers, and treasured heirloom gifts.
The beauty of the Hunter’s Star Quilt Pattern lies in its ability to create movement and depth through careful placement of fabrics rather than complicated sewing techniques. High-contrast fabrics produce bold stars that seem to sparkle across the quilt surface, while softer color palettes create an elegant, traditional appearance. Whether you prefer modern solids, reproduction fabrics, florals, batiks, or holiday prints, this pattern adapts beautifully to almost any fabric collection.
In this tutorial, you will learn how to recreate the quilt shown in the image using traditional quilting methods. You’ll discover how to choose fabrics, cut accurate pieces, assemble the star blocks, arrange the quilt layout, and complete the quilting and binding with professional results. By working step by step, you’ll build confidence while creating a stunning quilt that showcases the timeless beauty of the Hunter’s Star Quilt Pattern.
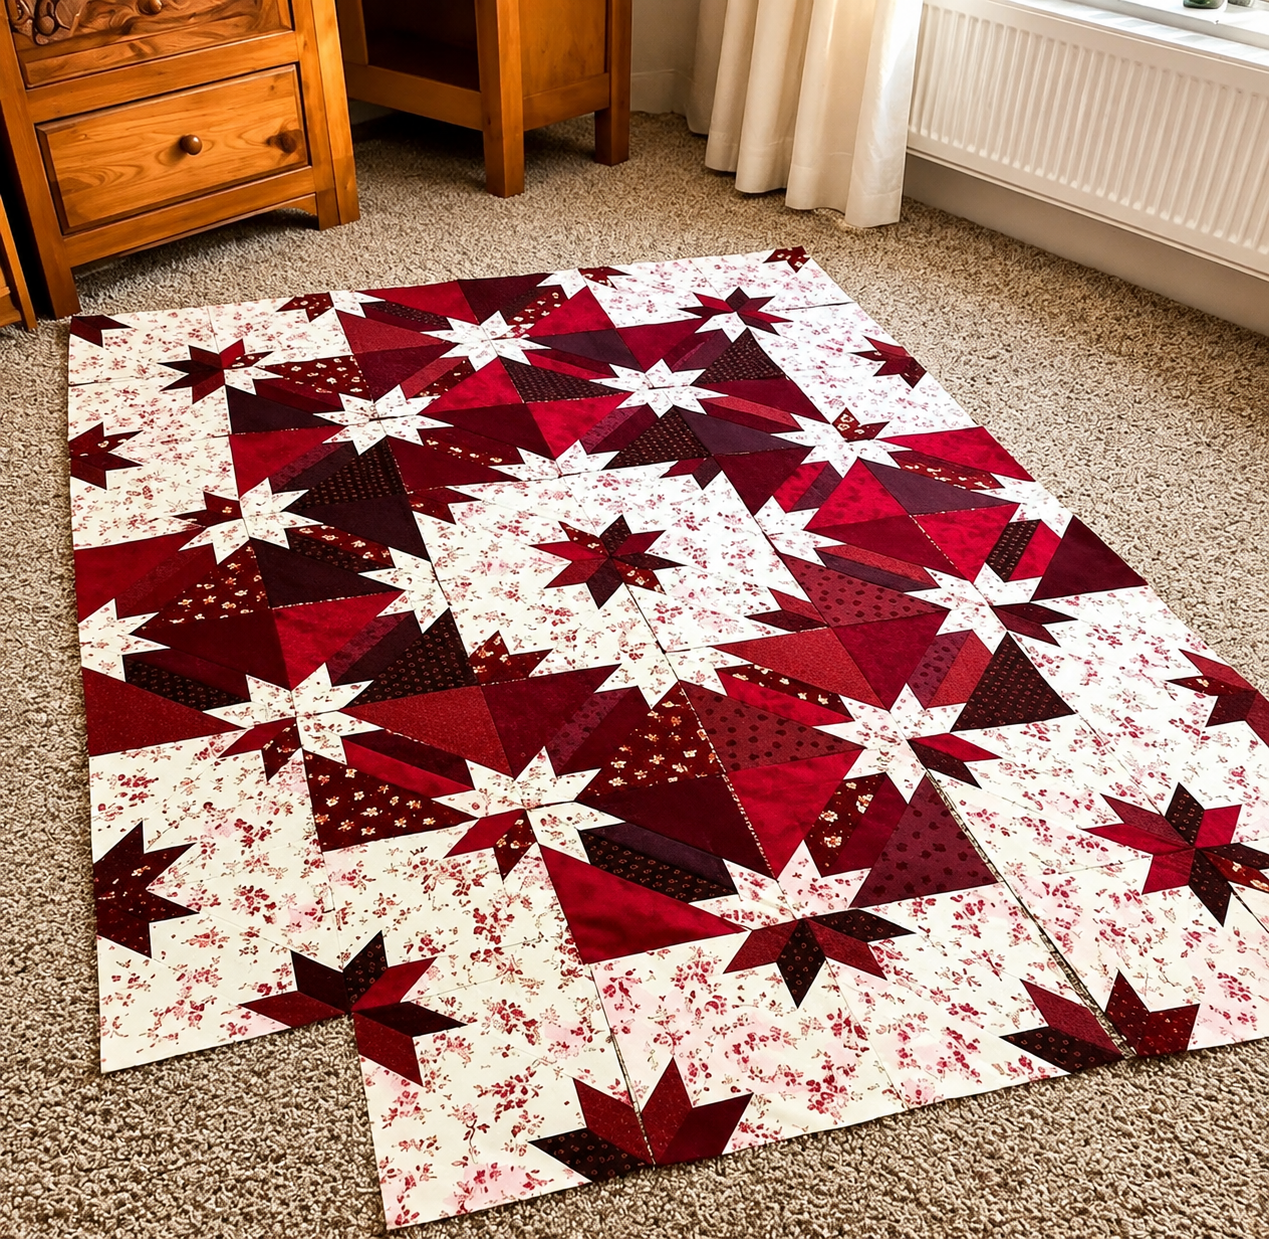
Choosing Fabrics and Preparing the Hunter’s Star Quilt Pattern
Selecting the right fabrics is the foundation of every successful Hunter’s Star Quilt Pattern. Contrast is one of the most important design elements because it defines the star shapes throughout the finished quilt.
DISCOVER MORE FREE PATTERNS HERE!
Begin by selecting one light background fabric. Cream, ivory, white, or soft beige works beautifully because it allows the star points to stand out clearly.
Choose several coordinating medium and dark fabrics for the stars. Deep reds, burgundy, wine, cranberry, maroon, and rich burgundy prints—as shown in the photo—create a warm and sophisticated quilt.
Small-scale prints, tone-on-tone fabrics, batiks, and subtle florals help maintain the overall design without distracting from the geometric layout.
Prepare cotton batting, backing fabric, coordinating thread, rotary cutter, quilting ruler, cutting mat, pins or clips, sewing machine, and a hot iron.
Before cutting, wash or starch your fabrics if desired. Press every piece carefully to ensure accurate measurements and precise piecing throughout the project.
Cutting and Piecing the Hunter’s Star Quilt Pattern
Accurate cutting is the secret to achieving sharp points and perfectly aligned stars.
Print or trace your preferred Hunter’s Star Quilt Pattern template, or use specialty rulers designed specifically for this block if available.
Cut all triangles, diamonds, squares, and background pieces according to the pattern measurements. Keep each fabric grouped separately to avoid mixing similar pieces.
Arrange the units into individual star blocks before sewing. Laying everything out on a design wall or large table helps prevent assembly mistakes.
Sew small units together first, using a consistent ¼-inch seam allowance throughout the project. Press every seam carefully after each stitching step.
Combine the smaller units into larger block sections. Continue checking alignment frequently to maintain crisp star points and smooth intersections.
Trim each completed block to the exact unfinished size before joining it to neighboring blocks. Consistent sizing ensures the entire quilt lays flat.
Assembling the Quilt Top Step by Step
Once all of the blocks are completed, assembling the quilt becomes much easier.
Lay every block on a large surface to determine the final arrangement. Rotate blocks as needed until the stars appear balanced across the quilt.
Sew the blocks together into horizontal rows. Match all seams carefully using pins or clips for accurate intersections.
Join the completed rows while pressing seams in alternating directions whenever possible to reduce bulk.
After the quilt top is complete, inspect every seam and reinforce any areas that may have shifted during assembly.
Layer the quilt backing, batting, and quilt top using safety pins or spray basting. Smooth all wrinkles before quilting.
Quilt the layers using straight-line quilting, echo quilting, crosshatch designs, gentle curves, feathers, or free-motion quilting. Choose a quilting style that complements the dramatic star layout without overpowering the pieced design.
Finishing the Hunter’s Star Quilt Pattern Like a Professional
Finishing techniques give your quilt a polished appearance and improve its durability.
Square the quilt carefully before trimming away excess batting and backing. Straight edges make binding much easier.
Prepare continuous binding strips from coordinating fabric, joining them with diagonal seams for a smooth finish.
Attach the binding to the front using a ¼-inch seam allowance before folding it neatly to the back and securing it by hand or machine.
Press the finished quilt using steam to flatten seams and enhance the crisp appearance of the star blocks.
Label your quilt with the project name, completion date, and your signature. Handmade quilts often become cherished family heirlooms passed down through generations.
Finally, enjoy displaying your finished Hunter’s Star Quilt Pattern as a bed quilt, lap quilt, wall hanging, or seasonal decoration that showcases both precision piecing and timeless quilting artistry.
FAQ About Hunter’s Star Quilt Pattern
Is the Hunter’s Star Quilt Pattern suitable for beginners?
Yes. While it appears intricate, beginners with basic quilting experience can complete it successfully by sewing carefully and working one unit at a time.
What fabrics work best?
High-quality quilting cotton is the preferred choice because it presses well, cuts accurately, and creates crisp seams.
Do I need specialty rulers?
No. Standard quilting rulers work perfectly, although specialty Hunter’s Star rulers can simplify cutting and improve efficiency.
How important is fabric contrast?
Very important. Strong contrast helps define the stars and creates the dramatic visual effect that makes this quilt so recognizable.
Can I make this quilt in different sizes?
Absolutely. Add or remove blocks to create baby quilts, throw quilts, twin quilts, queen quilts, or king-size versions.
What quilting design works best?
Straight-line quilting, echo quilting around the stars, crosshatching, and free-motion feathers are all beautiful choices depending on your preferred style.
Should I prewash my fabric?
Many quilters choose to prewash fabric to reduce shrinkage, while others prefer using starch for improved cutting accuracy. Either approach works well.
Is this pattern suitable for gifts?
Yes. A finished Hunter’s Star Quilt Pattern makes a thoughtful handmade gift for weddings, anniversaries, birthdays, holidays, graduations, or housewarming celebrations.
Conclusion
The Hunter’s Star Quilt Pattern is a timeless quilting project that combines classic geometry with endless opportunities for creative color placement. Throughout this tutorial, you learned how to choose coordinating fabrics, prepare accurate cuts, assemble the individual star blocks, arrange the quilt layout, quilt the finished top, and apply professional finishing techniques that result in a durable and beautiful heirloom-quality quilt.
Although the design may appear detailed, careful preparation and patient piecing make this project both enjoyable and achievable. Every completed block brings the stunning star design to life, and the finished quilt reflects the precision and craftsmanship that make quilting such a rewarding hobby.
VIDEO PATTERN
I hope this guide has inspired you to create your own Hunter’s Star Quilt Pattern and experiment with unique color combinations that reflect your personal style. If you found this tutorial helpful, please leave your honest opinion in the comments and share your suggestions or creative ideas. Your feedback is greatly appreciated and helps inspire even more quilting projects for fellow makers.