
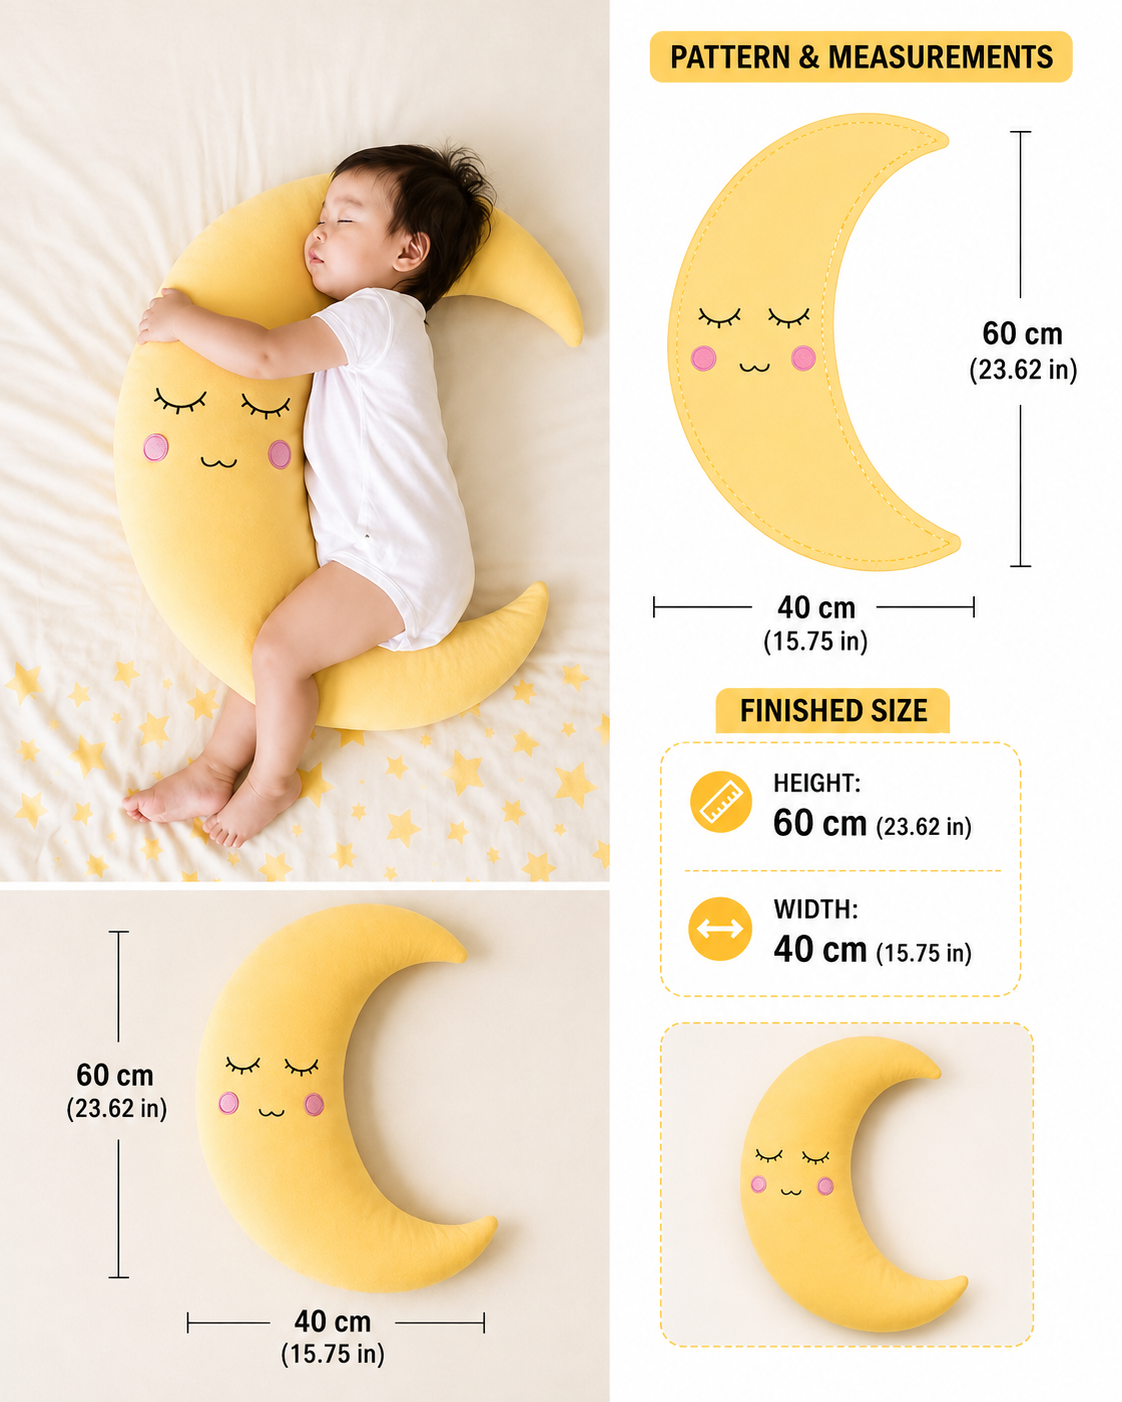
Crescent Moon Cushion Pattern is a charming sewing and quilting project for creating a soft crescent-shaped pillow that works beautifully as nursery décor, a decorative cushion, or a handmade gift. Inspired by the yellow moon cushion in the reference image, this project features a smooth curved silhouette, gently pointed tips, soft stuffing, and an optional embroidered sleepy face. The finished example measures approximately 60 cm (23.62 in) high × 40 cm (15.75 in) wide, making it large enough to become an eye-catching decorative piece.
The beauty of this Crescent Moon Cushion Pattern comes from its relatively simple construction. Although the finished moon has an elegant curved shape, it can be made from two matching crescent pieces, interfacing or lightweight batting if desired, and polyester fiberfill. Quilters can also turn the project into a true quilted moon pillow by piecing scraps before cutting the crescent or by adding subtle quilting lines to the front and back panels.
Fabric choice gives this project endless possibilities. Yellow and gold create the traditional moon appearance shown in the reference, while cream, dusty pink, baby blue, lavender, sage green, or patchwork fabrics can create completely different styles. The sleepy embroidered eyes and rosy cheeks are optional, allowing you to make either a playful nursery cushion or a sophisticated decorative crescent moon pillow.
Materials, Measurements, and Preparing the Crescent Moon Cushion Pattern
For the main Crescent Moon Cushion Pattern, you will need approximately 3/4 to 1 yard (0.7–0.9 m) of fabric, depending on fabric width and whether the material has a directional print. Cotton quilting fabric is easy to sew, while minky, fleece, velvet, or brushed cotton creates an especially soft cushion.
DISCOVER MORE FREE PATTERNS HERE!
You will also need approximately 14–24 oz (400–680 g) of polyester fiberfill. The exact quantity depends on how firmly you want the cushion stuffed. A decorative pillow needs less filling, while a plump three-dimensional moon requires considerably more.
Other useful supplies include coordinating thread, fabric scissors or rotary cutter, cutting mat, pins or sewing clips, washable fabric marker, sewing machine, hand-sewing needle, ruler, measuring tape, iron, and pattern paper. Lightweight batting is optional if you want to add quilting.
The finished reference size is approximately 60 cm (23.62 in) tall and 40 cm (15.75 in) wide. These measurements create a substantial cushion suitable for a bed, chair, reading corner, or nursery display.
Draft the crescent on a large sheet of paper. Begin with an overall outer shape approximately 60 cm high and 40 cm wide. Draw a smooth outer curve, then create a second inward curve that forms the open side of the crescent. Allow the upper and lower sections to taper gradually into rounded points.
Add approximately 1 cm (3/8 in) seam allowance around the entire pattern if it is not already included. Avoid making the tips extremely narrow because a little extra width makes them easier to turn and stuff neatly.
Cutting and Quilting the Crescent Moon Pillow Pieces
Fold your main fabric with right sides together and position the crescent template on top. Pin securely or use pattern weights before cutting. Cut through both layers to produce two identical mirrored moon pieces.
If you are making a traditional quilted Crescent Moon Cushion Pattern, cut matching pieces of lightweight batting. Place the batting behind the fabric and quilt the layers before assembling the pillow. Simple parallel lines, gentle curves, diamonds, or free-motion swirls can all complement the moon shape.
Another attractive method is to create patchwork fabric first. Sew together squares or strips from several coordinating fabrics, press the seams carefully, and then place the crescent template over the completed patchwork panel. This transforms leftover quilting cotton into a colorful scrap fabric moon cushion.
Before assembling the cushion, add the facial details to the front panel. Doing this while the fabric is flat is significantly easier than embroidering after stuffing. Use a washable fabric marker to position the eyes, mouth, and cheeks.
For the sleepy eyes, use black embroidery floss and a simple backstitch or stem stitch. Add several short stitches along each curved eye to create eyelashes. The small mouth can be embroidered with the same thread.
For the cheeks, appliqué two small pink fabric circles or embroider circular shapes using pink floss. Keep decorative components securely stitched, especially when the finished project will be placed in a child’s room. For infant sleep spaces, follow current safe-sleep guidance and treat decorative cushions as décor rather than placing them in a baby’s sleep area.
Sewing, Turning, and Stuffing the Crescent Moon Cushion
Place the completed front and back pieces right sides together. Carefully align the outer curve, inner curve, and both pointed ends. Use plenty of pins or sewing clips because curved edges can shift while stitching.
Mark a turning opening approximately 10–15 cm (4–6 in) long along a relatively straight portion of the outer curve. Do not position the opening at one of the narrow points because stuffing and closing the cushion will be much more difficult.
Using approximately a 1 cm (3/8 in) seam allowance, sew around the entire moon shape, beginning at one side of the turning opening and stopping at the opposite side. Backstitch securely at both ends.
The inner concave curve requires special attention. Carefully clip small notches into the seam allowance along this curve without cutting through the stitching. These clips allow the seam allowance to spread when the pillow is turned and prevent pulling or puckering.
Along the outer convex curve, trim or notch excess seam allowance where necessary. Trim the pointed tips slightly, but do not cut too close to the seam. Turn the cushion right side out slowly and gently shape both moon points.
Begin stuffing with small portions of polyester fiberfill. Push filling into the upper and lower tips first, using a blunt turning tool or the handle of a wooden spoon. Continue filling the center gradually until the entire crescent feels smooth and evenly supported.
Professional Finishing and Customizing Your Crescent Moon Cushion Pattern
Once the cushion has reached the desired firmness, inspect the curves carefully. Add small amounts of fiberfill to any areas that appear hollow. Avoid pushing large handfuls into one location because this can create visible lumps.
Fold the seam allowances of the turning opening inward so they align with the machine-sewn seam. Close the opening using a ladder stitch or invisible slip stitch. Small, evenly spaced hand stitches will make the closure nearly disappear.
Gently massage the finished cushion with your hands to redistribute the stuffing. Pay special attention to the narrow crescent tips and the deepest part of the inner curve.
For a classic nursery design, use golden yellow fabric, black embroidered eyes, and pale pink cheeks. White stars can also be appliquéd around the moon for additional celestial decoration.
A patchwork version can combine cream, yellow, mustard, beige, and gold fabrics. Quilting these fabrics before assembly produces a traditional handcrafted appearance and makes the Crescent Moon Cushion Pattern especially suitable for quilters with leftover fabric scraps.
You can also create an entire celestial collection. Pair the moon with quilted star pillows, cloud cushions, sun pillows, or small fabric planets. Using the same collection of quilting fabrics across several shapes can create coordinated handmade nursery or bedroom décor.
FAQ About the Crescent Moon Cushion Pattern
Is the Crescent Moon Cushion Pattern suitable for beginners?
Yes. A beginner with basic sewing-machine skills can complete the project. Sewing the inner curve requires patience, but careful clipping makes the shape much easier to turn.
What is the finished size?
The reference design measures approximately 60 cm (23.62 in) high × 40 cm (15.75 in) wide.
How much fabric do I need?
Approximately 3/4–1 yard (0.7–0.9 m) should be sufficient for many versions of this size.
What fabric works best?
Quilting cotton is excellent for easy sewing. Fleece, minky, velvet, linen blends, and soft upholstery-weight fabrics can also work depending on the desired appearance.
How much stuffing should I use?
Approximately 14–24 oz (400–680 g) of polyester fiberfill is a useful range, although the exact amount depends on fabric and desired firmness.
What seam allowance should I use?
Approximately 3/8 in (1 cm) works well for this project.
Why does my inner curve pucker?
The seam allowance probably needs additional clipping. Make small clips along the concave curve, stopping safely before the seam.
How do I get smooth pointed ends?
Do not draft the points excessively narrow. After turning, gently shape them with a blunt tool and insert stuffing in small amounts.
Can I quilt the moon before sewing it together?
Yes. Add lightweight batting behind the front and back fabrics and quilt them before assembling the cushion.
Can I use fabric scraps?
Absolutely. Creating a patchwork panel first is an excellent way to use scraps and produces a beautiful quilted crescent moon pillow.
How do I embroider the face?
Mark the design before assembly and use embroidery floss with backstitch or stem stitch. Embroidering while the panel is flat is much easier.
Can I leave the face off?
Yes. Without the face, the moon becomes a simple modern decorative cushion.
Can I make a smaller version?
Yes. Reduce the entire template proportionally. Remember that extremely small crescents are more difficult to turn and stuff.
Can I enlarge the pattern?
Yes. A larger version can make an attractive floor cushion, although it will require considerably more fabric and fiberfill.
Can this cushion be placed in a baby’s crib?
A decorative cushion should not be treated as an infant sleep product. Keep pillows and other soft objects out of an infant’s sleep space and use the moon as supervised décor or for an age-appropriate setting.
Conclusion
The Crescent Moon Cushion Pattern is a delightful way to combine simple sewing techniques with the creativity of quilting. With an approximate finished measurement of 60 cm (23.62 in) × 40 cm (15.75 in), the finished moon creates a substantial decorative accent without requiring complicated pattern pieces.
The construction begins with two matching crescent panels, followed by optional quilting or embroidery, careful curved sewing, clipping the seam allowances, turning, and gradual stuffing. Paying particular attention to the inner curve and narrow points will help produce the smooth professional shape seen in the inspiration.
For quilters, the design offers many opportunities for personalization. The moon can be made from a single fabric, pieced strips, traditional patchwork, scrap quilting cotton, or softly quilted panels. Embroidered sleepy eyes and rosy cheeks can add a playful personality, while omitting the face creates a more minimalist result.
Whether made in classic golden yellow, soft nursery pastels, elegant neutrals, or colorful patchwork, this Crescent Moon Cushion Pattern is a versatile handmade project that can become beautiful bedroom décor, a thoughtful handmade gift, or part of a coordinated celestial quilt-and-cushion collection.