
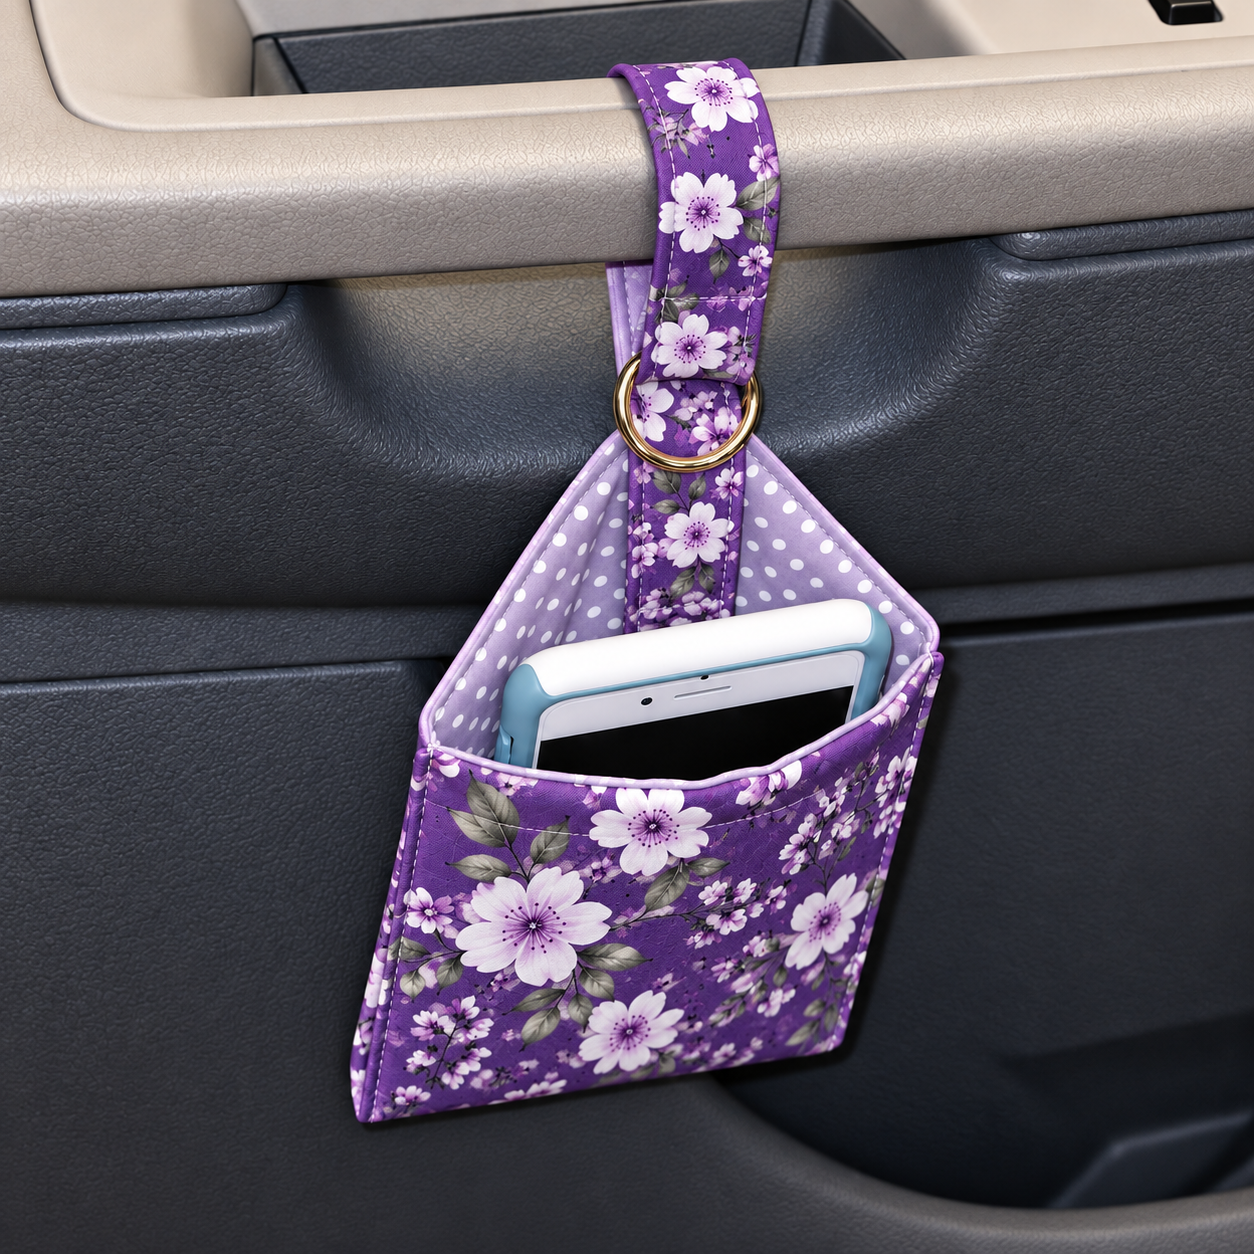
The Car Organizer Pattern is a practical and attractive sewing project designed to keep everyday essentials organized and within easy reach while traveling. Inspired by a compact hanging pocket, this project combines a roomy fabric compartment with a reinforced hanging strap and metal ring. It is especially useful for holding a phone, charging cable, tissues, sunglasses, small notebook, or other lightweight accessories that tend to disappear inside a vehicle. With a floral outer fabric and contrasting lining, the organizer can also add a handmade decorative detail to an otherwise plain car interior.
One of the best features of this quilted car organizer is its straightforward construction. Unlike large seat-back organizers with many separate pockets, this version focuses on one accessible main compartment. The slightly structured body keeps the opening visible, while the hanging strap allows the organizer to be positioned around a suitable fixed interior support. A layer of fusible fleece or interfacing between the exterior and lining gives the pocket enough body to maintain its shape without making it excessively rigid.
This tutorial explains how to create a similar fabric car organizer using standard sewing techniques and measurements that can easily be customized. The suggested finished pocket measures approximately 8½ inches wide × 8 inches high × 2 inches deep (21.5 × 20 × 5 cm), excluding the strap. Because vehicle interiors differ, always measure the intended mounting location before cutting your fabric. The organizer should never obstruct controls, airbags, seat belts, mirrors, vents, doors, or the driver’s movement or visibility.
Materials, Measurements, and Cutting the Car Organizer Pieces
For the main exterior, choose a durable quilting cotton, canvas, home décor cotton, or similar woven fabric. A floral print works beautifully for the outside, while a small polka-dot or geometric print can create an attractive contrast inside. If using ordinary quilting cotton, adding interfacing is particularly important because it helps the finished pocket maintain its shape.
DISCOVER MORE FREE PATTERNS HERE!
You will need approximately ¼ yard (0.23 m) of exterior fabric and the same amount of lining fabric for one organizer. Also prepare medium-weight fusible interfacing or fusible fleece, coordinating polyester thread, one metal D-ring or O-ring approximately 1–1½ inches (2.5–4 cm) wide, fabric scissors or a rotary cutter, quilting ruler, pins or clips, iron, sewing machine, and a marking tool.
For a medium organizer, cut two exterior rectangles measuring 10 × 10 inches (25.5 × 25.5 cm) and two matching lining rectangles. Cut two interfacing pieces slightly smaller than the exterior panels. These dimensions include room for seam allowances and shaping.
To create depth at the bottom, mark approximately 1 inch (2.5 cm) squares at both lower corners of the main panels. These corners can later be boxed to produce a pocket with enough volume for a phone and several small accessories. For a deeper organizer, increase the corner measurement slightly.
For the hanging system, cut one strip approximately 4 × 18 inches (10 × 46 cm). After folding and sewing, this creates a strong strap approximately 1 inch wide. The exact length should be adjusted to the location where the organizer will hang.
Fuse the interfacing to the wrong side of each exterior piece according to the manufacturer’s directions. Use an ironing cloth when necessary and avoid stretching the fabric while pressing. A properly stabilized exterior is one of the most important details for achieving the clean, structured appearance of a professional DIY car organizer.
Sewing the Main Pocket, Lining, and Boxed Corners
Place the two exterior pieces right sides together. Pin or clip along the sides and bottom, leaving the upper edge open. Sew with a ⅜-inch (1 cm) seam allowance, backstitching at the beginning and end for reinforcement.
Repeat the process with the lining pieces, but leave an opening approximately 3–4 inches (7.5–10 cm) along the bottom seam. This opening will later allow you to turn the entire organizer right side out.
To create the boxed corners, open one lower corner and align the side seam directly over the bottom seam. The corner should form a small triangle. Sew straight across the marked line. Repeat on the opposite side and trim excess fabric while leaving an adequate seam allowance.
Repeat the corner construction on the lining. Try to make both boxed corners identical because uneven corners can cause the finished organizer to lean toward one side. Turn the exterior right side out temporarily and inspect the shape.
For additional structure, you can add simple vertical quilting lines to the exterior before final assembly. Straight-line quilting spaced approximately 1–1½ inches (2.5–4 cm) apart creates a neat finish and helps secure fusible fleece. If using firm interfacing instead, quilting is optional.
Insert the exterior pocket inside the lining so that their right sides are facing each other. Match the side seams and upper raw edges carefully. Pin or clip around the opening, but do not sew yet—the strap should be prepared and positioned first.
Making the Hanging Strap and Assembling the Organizer
Take the 4 × 18-inch (10 × 46 cm) strap strip and press it in half lengthwise with wrong sides together. Open it again, then fold each long raw edge inward until it meets the center crease. Fold the entire strip in half again. The finished strap should be approximately 1 inch (2.5 cm) wide.
Topstitch approximately ⅛ inch (3 mm) from both long edges. For a strap that will experience regular pulling, sew a second line of topstitching or use a layer of lightweight interfacing inside the strip.
Slide one end of the strap through the metal ring and fold approximately 1½–2 inches (4–5 cm) back onto itself. Stitch securely using a rectangle with an X through the center. This reinforced stitching helps prevent the strap from pulling loose.
The opposite end can be designed as a permanent loop, a buttoned tab, or an adjustable closure. A simple approach is to create a long loop that passes around the chosen support and returns through the ring. Whatever method you choose, test the strap before completing the organizer.
Position the lower end of the strap at the center of the organizer’s back panel. The raw end should align with the upper raw edge while the majority of the strap remains safely between the exterior and lining layers. Baste it approximately ¼ inch (6 mm) from the edge.
Now sew around the entire upper opening with a ⅜-inch (1 cm) seam allowance. Carefully pull the project through the opening left in the lining. Push out the corners gently, press the upper edge, close the lining opening with a narrow machine stitch or invisible hand stitching, and topstitch around the organizer opening for a crisp finish.
Customizing, Finishing, and Safely Using Your Car Organizer
Once the main construction is complete, inspect every seam. Pay particular attention to the hanging strap, because this area supports the organizer’s weight. Reinforce any stitching that appears loose before placing items inside.
You can personalize the Car Organizer Pattern with contrasting piping around the opening. Narrow piping produces the polished outlined edge seen on many professionally made fabric organizers. It should be basted to the exterior before joining the lining.
Another useful customization is an interior divider. Cut a rectangle slightly narrower than the finished pocket, finish its upper edge, and sew it into the interior before assembling the exterior and lining. This can create separate areas for a phone and smaller accessories.
A snap closure can also be added near the upper center, although an open pocket is often more convenient when quick access is important. If adding hardware, reinforce the fabric behind the snap with interfacing so repeated opening does not damage the cotton.
For cleaning, the best method depends on your chosen materials. A cotton organizer without cardboard or non-washable stabilizers can generally be gently washed according to the fabric manufacturer’s care instructions. Reshape the pocket and allow it to dry thoroughly before returning it to the vehicle.
Most importantly, choose the mounting position carefully. A car storage pocket should be treated as an accessory for lightweight items rather than a load-bearing container. Do not mount it where it could interfere with airbags, seat belts, pedals, gear selectors, door operation, emergency equipment, or driving visibility.
Frequently Asked Questions About the Car Organizer Pattern
Is the Car Organizer Pattern beginner-friendly?
Yes. The project primarily uses straight seams, simple boxed corners, interfacing, and basic strap construction. A confident beginner should be able to complete it successfully.
What is the recommended finished size?
A useful medium size is approximately 8½ × 8 × 2 inches (21.5 × 20 × 5 cm), excluding the hanging strap.
What fabric should I use?
Quilting cotton, canvas, twill, or home décor cotton are good choices. Lightweight cotton should be reinforced with interfacing.
Do I need batting?
Not necessarily. Fusible fleece provides a softer quilted appearance, while medium or firm interfacing creates a more structured pocket.
Can I make the organizer larger?
Yes. Increase the exterior and lining pieces equally. Remember that a larger organizer may require stronger interfacing and a reinforced strap.
What seam allowance should I use?
A consistent ⅜-inch (1 cm) seam allowance works well for this project.
How do I make the pocket deeper?
Increase the size of the squares removed from the lower corners before boxing them. Larger boxed corners create greater depth but slightly reduce the finished width and height.
Can I add multiple pockets?
Yes. Interior or exterior patch pockets can be added before the main panels are assembled.
Can I use leftover quilt fabric?
Absolutely. This is an excellent scrap-friendly sewing project, especially if you piece several coordinating fabrics together for the exterior.
How can I make the organizer more rigid?
Use firm fusible interfacing, foam stabilizer, or multiple layers of compatible stabilizer. Test a small sample first to ensure your sewing machine can handle the thickness.
Can I add piping?
Yes. Piping around the upper edge gives the organizer a more defined and professional appearance.
What type of ring should I use?
A sturdy D-ring or O-ring measuring approximately 1–1½ inches (2.5–4 cm) is suitable for a small lightweight organizer.
How should I reinforce the strap?
Interfacing, multiple rows of topstitching, and box-X reinforcement stitching at stress points will make the strap stronger.
Can the organizer hold a smartphone?
Yes, provided the pocket dimensions accommodate your phone and case. Measure your device before cutting if phone storage is your main purpose.
Where should I hang it in the car?
Only use a secure location where the organizer cannot affect safe vehicle operation. Avoid any position near airbags, controls, pedals, seat-belt mechanisms, or the driver’s field of view.
Conclusion
The Car Organizer Pattern is a useful way to turn a small amount of fabric into an attractive storage accessory. Its combination of a structured main pocket, contrasting lining, reinforced hanging strap, and decorative metal ring creates a project that feels more polished than an ordinary fabric pouch while remaining approachable for home sewing.
Accurate cutting and careful pressing make a noticeable difference in the finished result. Keep the seam allowance consistent, match the boxed corners carefully, stabilize lightweight fabrics, and reinforce the strap attachment. These small details help the quilted car organizer hold its shape and withstand everyday handling.
The design also offers plenty of opportunities for personalization. Floral fabric creates a soft decorative style, while geometric prints, solids, patchwork scraps, denim, or coordinating quilt fabrics can produce completely different looks. You can also add piping, extra pockets, decorative quilting, contrasting lining, snaps, or an adjustable strap.
With a few basic sewing materials and thoughtful construction, this DIY fabric car organizer can become a practical handmade accessory for keeping lightweight essentials together while traveling. It is also an excellent small project for practicing interfacing, boxed corners, lined construction, topstitching, and reinforced fabric straps—all useful techniques that can be carried into many future quilting and sewing projects.