
The Crochet Christmas Star Pattern is a beautiful and timeless holiday project that brings warmth, elegance, and handmade charm to Christmas decorations. Whether you want to decorate your Christmas tree, create festive garlands, or prepare thoughtful handmade gifts, these delicate crochet stars are a wonderful addition to your holiday crafting collection.
One of the most attractive features of a crochet Christmas star is its versatility. You can create small stars using fine cotton yarn for delicate ornaments or use thicker yarn to make larger decorations. Traditional Christmas colors such as red, green, white, and gold create a classic festive appearance, while cream, champagne, and soft beige produce an elegant vintage-inspired style.
This easy crochet Christmas star tutorial explains how to make a five-pointed star using basic crochet stitches and a simple construction method. The pattern is suitable for confident beginners and experienced crocheters who enjoy making beautiful seasonal decorations. With clear instructions, measurements, materials, and finishing techniques, you can create a collection of handmade stars that will become treasured Christmas decorations for years to come.
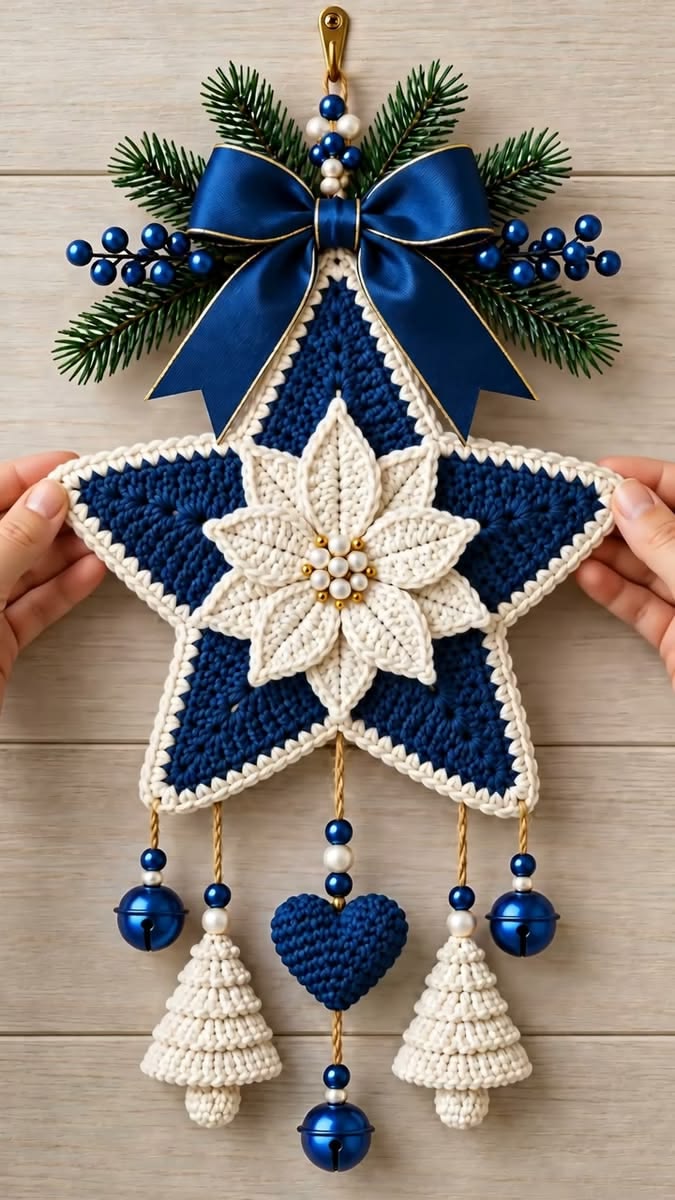
1. Materials, Crochet Stitches, and Measurements
Before starting your Crochet Christmas Star Pattern, gather the necessary supplies and choose your favorite Christmas yarn colors.
DISCOVER MORE FREE PATTERNS HERE!
Cotton yarn is especially suitable for this project because it provides excellent stitch definition and helps the star maintain its shape.
A smooth cotton yarn also makes the decorative points more visible and creates a clean, professional finish.
Materials Needed
- Worsted-weight cotton yarn (Category 4).
- 4.0 mm (G/6) crochet hook.
- Yarn needle.
- Sharp scissors.
- Stitch markers.
- Measuring tape.
- Optional fabric stiffener.
- Optional gold or silver metallic thread.
- Optional decorative ribbon for hanging.
- Blocking pins and a suitable blocking mat.
Recommended Christmas Colors
For traditional Christmas decorations, choose:
- Christmas red.
- Forest green.
- Snow white.
- Champagne gold.
- Cream.
- Burgundy.
- Metallic silver.
You can make each star in a single color or combine two colors for a decorative border.
A white star with a gold border is particularly elegant, while red and green stars create a cheerful traditional Christmas display.
Finished Measurements
Using worsted-weight cotton yarn and a 4.0 mm crochet hook, the finished star measures approximately:
Diameter: 12–14 cm (4.7–5.5 inches), measured from one point to the opposite outer edge.
Thickness: Approximately 0.3–0.5 cm (0.1–0.2 inches), depending on the yarn.
Hanging loop: Approximately 8–10 cm (3.1–3.9 inches) long before folding.
These measurements are approximate and may vary with your crochet tension.
Crochet Abbreviations – US Terms
| Abbreviation | Meaning |
|---|---|
| ch | Chain |
| sl st | Slip stitch |
| sc | Single crochet |
| hdc | Half double crochet |
| dc | Double crochet |
| tr | Treble crochet |
| st | Stitch |
| sp | Space |
| rep | Repeat |
| MR | Magic ring |
| FO | Fasten off |
All instructions in this tutorial use US crochet terminology.
Skill Level
Beginner to Intermediate
The project uses basic crochet stitches, simple increases, and a decorative pointed edging.
If you already know how to make a magic ring, double crochet, and slip stitch, you should be comfortable following this pattern.
2. How to Crochet the Center of the Christmas Star
The first stage of this handmade crochet Christmas ornament is creating the circular center.
The center provides the foundation for the five pointed sections that form the star.
Work carefully and maintain even tension so the finished ornament remains symmetrical.
Step 1: Create the Magic Ring
Using your chosen yarn color, make a magic ring.
Chain 3.
The beginning chain 3 counts as the first double crochet.
Work 9 additional double crochet stitches into the magic ring.
You should now have 10 double crochet stitches.
Pull the yarn tail gently to close the center.
Join with a slip stitch to the top of the beginning chain 3.
Round 1: 10 dc.
Step 2: Increase the Center
Chain 3.
Work 1 double crochet into the same stitch as the beginning chain.
Work 2 double crochet stitches into each of the remaining 9 stitches.
Join with a slip stitch to the top of the beginning chain 3.
You should now have 20 double crochet stitches.
Round 2: 20 dc.
This round creates a wider circular foundation.
Step 3: Prepare the Five Star Points
Chain 1.
Work 1 single crochet into the same stitch.
Chain 2, skip 3 stitches, and work 1 single crochet into the next stitch.
Repeat the sequence around the circle.
After five repetitions, you should have five evenly spaced chain-2 arches.
Join with a slip stitch into the first single crochet.
Round 3: 5 chain-2 spaces.
These spaces will serve as the attachment points for the star’s five decorative points.
Step 4: Check the Center
Lay the crochet circle on a flat surface.
The five chain spaces should be evenly distributed.
If the center looks slightly cupped, gently flatten it with your fingers.
Avoid pulling the stitches too tightly.
A flat center makes the following steps easier and helps create a balanced star.
Step 5: Prepare for the Star Points
Keep the same yarn attached.
Move the hook into the first chain-2 space using a slip stitch if necessary.
The next round will create five pointed sections.
Each point will be worked into one chain-2 space.
3. Step-by-Step Instructions for Making the Five Christmas Star Points
The star points are the most important decorative feature of this Crochet Christmas Star Pattern.
They transform the circular center into a recognizable five-pointed Christmas ornament.
The following instructions create pointed sections using stitches of different heights.
Step 1: Crochet the First Star Point
Working into the first chain-2 space, make:
1 single crochet.
1 half double crochet.
1 double crochet.
1 treble crochet.
Chain 2.
1 treble crochet.
1 double crochet.
1 half double crochet.
1 single crochet.
All these stitches are worked into the same chain-2 space.
The chain-2 section forms the tip of the point.
Step 2: Secure the First Point
After completing the first point, work a slip stitch into the next single crochet stitch from Round 3.
This helps define the separation between neighboring points.
Keep your tension consistent.
Step 3: Crochet the Remaining Points
Repeat the same sequence in each of the remaining four chain-2 spaces.
For every point, work:
(sc, hdc, dc, tr, ch 2, tr, dc, hdc, sc) into the chain-2 space.
Slip stitch into the following single crochet between points.
Continue until all five points are completed.
Step 4: Join the Round
After completing the fifth point, join with a slip stitch into the first stitch of the round.
Fasten off if you want a single-color star.
If you prefer a contrasting border, leave the yarn attached or join a second color.
Step 5: Add a Decorative Border
For a more elegant appearance, use white, gold, or silver yarn to create a contrasting edge.
Join the new yarn at the base of any point.
Work 1 single crochet into each stitch along the outer edge.
At the chain-2 tip of each point, work:
(1 sc, ch 2, 1 sc) into the chain-2 space.
Continue around the entire star.
Join with a slip stitch and fasten off.
This border helps emphasize the five pointed sections.
Step 6: Weave in the Yarn Ends
Thread the yarn tails through a yarn needle.
Carefully weave them through several stitches on the back of the star.
Change direction once or twice to help secure the ends.
Trim any excess yarn.
Avoid cutting too close to the stitches.
Step 7: Create the Hanging Loop
Cut a piece of matching yarn or decorative ribbon approximately 20 cm (8 inches) long.
Fold it in half.
Thread the folded end through the tip of one star point.
Pass the loose ends through the loop and pull gently to secure.
Tie the loose ends together to create a hanging loop.
Your crochet Christmas tree ornament is now ready for finishing.
4. Blocking, Decorating, and Creative Christmas Star Ideas
Finishing is an important part of creating a beautiful handmade crochet Christmas star.
Blocking helps define the points, flatten the center, and improve the overall appearance.
You can also personalize the finished stars with decorative borders, ribbons, and different color combinations.
How to Block the Crochet Star
Lightly dampen the finished star with clean water.
Place it on a blocking mat.
Gently stretch each of the five points into shape.
Use rustproof blocking pins to secure the points.
Make sure the distances between the points are even.
Allow the star to dry completely before removing the pins.
Blocking gives the ornament a more professional appearance.
How to Stiffen the Star
If you want your star to remain firm when hanging, you can use a suitable fabric stiffener.
Follow the product manufacturer’s instructions.
Shape the star while it is still damp.
Allow it to dry thoroughly on a protected surface.
For softer ornaments, you can skip this step.
Elegant Christmas Color Combinations
White and gold: A classic combination for elegant Christmas trees.
Red and white: Perfect for traditional holiday decorations.
Forest green and cream: Beautiful for rustic or farmhouse Christmas themes.
Burgundy and champagne: Ideal for sophisticated vintage-inspired displays.
Silver and icy blue: A lovely choice for winter-themed decorations.
Emerald green and gold: A luxurious combination that looks especially attractive with warm Christmas lights.
Christmas Tree Decorations
Make several stars in different colors and sizes.
Attach hanging loops and distribute them throughout your Christmas tree.
Small stars look beautiful near the outer branches.
Larger stars can become statement ornaments.
You can also use one oversized star as a decorative tree topper if it is securely supported.
Crochet Christmas Star Garland
Create 8–12 stars using coordinating colors.
Crochet a long chain or use a decorative ribbon.
Attach the stars at regular intervals.
Hang the garland across a mantel, shelf, or window.
This is a wonderful way to add handmade charm to your holiday decorations.
Handmade Christmas Gift Tags
Small crochet stars make lovely reusable gift embellishments.
Attach one to a wrapped present using cotton string.
Choose colors that coordinate with the wrapping paper.
After the gift is opened, the recipient can keep the star as a Christmas ornament.
Christmas Table Decorations
Use several stars to decorate a holiday table.
Place them around a centerpiece or beside folded napkins.
Cream, gold, and forest green create an elegant seasonal arrangement.
Keep crochet decorations away from open flames and hot surfaces.
Professional Finishing Tips
Use consistent tension. Even stitches help maintain symmetry.
Count your stitches. Accurate stitch counts prevent uneven points.
Choose smooth yarn. Cotton yarn produces clear stitch definition.
Block carefully. Proper blocking improves the finished shape.
Use contrasting borders. A different edging color highlights the star design.
Secure the hanging loop. Reinforce the attachment point if necessary.
Experiment with yarn thickness. Fine yarn creates delicate ornaments, while thicker yarn produces larger stars.
Frequently Asked Questions About the Crochet Christmas Star Pattern
Is this crochet Christmas star suitable for beginners?
Yes. The pattern is suitable for confident beginners who already understand basic crochet stitches.
The star points use a combination of single crochet, half double crochet, double crochet, and treble crochet.
What is the best yarn for crochet Christmas stars?
Cotton yarn is an excellent choice because it maintains its shape and provides clear stitch definition.
Acrylic yarn can also be used, although the finished ornament may feel softer.
Can I make smaller Christmas stars?
Yes.
Use thinner yarn and a smaller crochet hook.
Sport-weight or fingering-weight cotton yarn can produce smaller, more delicate ornaments.
Can I make larger stars?
Absolutely.
Use thicker yarn and a larger hook, or add additional decorative rounds.
Keep the five points evenly spaced to maintain the star shape.
Do I need to stiffen the finished star?
No.
Stiffening is optional.
However, it can help the star maintain a crisp, decorative shape when hanging.
Can I wash crochet Christmas ornaments?
If you use washable yarn, gentle hand washing may be possible.
Check the yarn label before washing.
If the ornament has been stiffened, washing may remove or weaken the stiffening treatment.
How long does it take to crochet one Christmas star?
An experienced crocheter may complete a simple star in approximately 20–40 minutes.
Beginners may need more time, especially when learning the pointed edging.
Can I sell finished crochet Christmas stars?
You can generally sell handmade items created from this original tutorial, subject to any applicable local rules and requirements.
Handmade Christmas ornaments can be attractive products for seasonal craft fairs and holiday gift collections.
Conclusion
The Crochet Christmas Star Pattern is a delightful holiday project that combines simple crochet techniques with beautiful festive results.
With just a small amount of yarn and a crochet hook, you can create elegant five-pointed stars for Christmas trees, garlands, gift wrapping, and seasonal decorations.
The pattern is easy to customize with different yarn colors, decorative borders, and finishing techniques.
Whether you prefer traditional red and green, elegant white and gold, or sophisticated burgundy and champagne, each star can reflect your personal Christmas decorating style.
Gather your favorite yarn, prepare your crochet hook, and enjoy creating a collection of beautiful handmade crochet Christmas stars that will bring warmth, creativity, and festive charm to your home.