The Birdhouse Quilt Block is a charming and fun design that adds a whimsical touch to any quilting project. Whether you’re a beginner or an experienced quilter, this Birdhouse Quilt Block tutorial will guide you step by step, helping you create this delightful block. The birdhouse pattern is a wonderful choice for a variety of quilt themes, from springtime quilts to bird lover’s quilts, and even cozy home-themed patterns. This article provides you with everything you need to know to complete your Birdhouse Quilt Block, from materials to step-by-step instructions, tips, and tricks.
If you’ve been looking for a project that allows you to combine creativity with a little bit of quilting skill, the Birdhouse Quilt Block is perfect for you. With its simple yet engaging design, you can create stunning quilts that are both aesthetically pleasing and full of character. Throughout this tutorial, we’ll explore the essentials of making the Birdhouse Quilt Block, including techniques for piecing together the pattern, choosing the right fabrics, and finishing your block with a polished look.
This tutorial is structured to make the process as smooth as possible. It’s designed to be accessible to all skill levels, offering clear, concise instructions and tips that will help you achieve a beautiful result. By the end of this guide, you’ll have the skills needed to make your own Birdhouse Quilt Blocks with confidence, and you’ll be able to incorporate them into any quilt project of your choosing.
1. Materials Needed for the Birdhouse Quilt Block
Before you begin making the Birdhouse Quilt Block, it’s essential to gather all the necessary materials. The right tools and fabric choices will set the foundation for your success. Here’s what you’ll need:
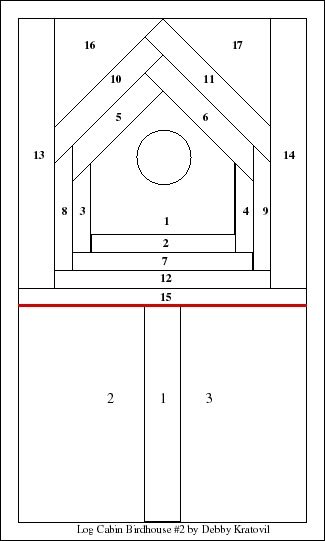
SEE OTHER FACE PATTERNS HERE!
Fabric: You’ll need a selection of fabrics in various colors and patterns. The classic Birdhouse Quilt Block design typically uses contrasting fabrics to highlight the birdhouse, roof, and background. You’ll need different fabrics for the house, the roof, and the background. A good choice for beginners is to use cotton quilting fabrics, as they are easy to work with and come in a wide variety of colors and patterns.
Quilting Ruler and Rotary Cutter: A quilting ruler and rotary cutter are essential for making precise cuts. They’ll help you cut your fabric into the necessary shapes for the Birdhouse Quilt Block. Make sure your quilting ruler is at least 6” wide and 12” long for versatility.
Thread: Choose a good-quality cotton thread that matches your fabric. A neutral thread color like beige or white often works well for this pattern, but you can also opt for colors that match or contrast with your fabric choices.
Needles: Use quilting needles for your sewing machine. These are specifically designed to work with multiple layers of fabric and batting, ensuring that your stitching is clean and precise.
Iron and Ironing Board: Pressing your seams as you go is crucial to creating a neat and professional-looking Birdhouse Quilt Block. Use an iron and ironing board to press your fabric pieces flat after each step.
Batting (Optional): If you plan to turn your block into a quilted piece right away, you may want to use batting. Batting is the filling that goes inside quilts, and it adds thickness and warmth. However, for a basic quilt block, you can skip this step.
2. Cutting the Fabric Pieces for the Birdhouse Quilt Block
Once you’ve gathered all your materials, the next step is cutting your fabric. Accuracy is key, and using a rotary cutter and quilting ruler will help you achieve precise cuts. Here’s how to cut the pieces for the Birdhouse Quilt Block:
Step 1: Cutting the House Shape
Start by cutting the fabric for the house portion of the Birdhouse Quilt Block. You’ll need a rectangle for the body of the house. Typically, this piece is around 3.5″ by 4.5″. Make sure to measure carefully and cut straight lines to ensure the best fit.
Step 2: Cutting the Roof
Next, cut the fabric for the roof of the birdhouse. This piece is usually a small triangle or rectangle, depending on your preferred design. For a traditional birdhouse shape, the roof can be a triangle, which is approximately 4.5″ wide and 2.5″ tall. If you prefer a different roof style, feel free to adjust accordingly.
Step 3: Cutting the Background Pieces
The background fabric forms the surrounding area of the birdhouse block. Cut this fabric into squares or rectangles that will fit around the house, typically measuring about 5.5″ by 5.5″. These pieces will form the quilt’s background and provide balance to the design.
Step 4: Cutting the Door and Window (Optional)
Some Birdhouse Quilt Blocks feature a little door and window, adding extra character to the design. Cut small squares or rectangles for these features—typically no larger than 1.5″ each. You can also use contrasting fabric to make these details stand out.
Step 5: Cutting the Accent Pieces
If you’re adding flowers, birds, or other details to your block, now is the time to cut those accent pieces. These small details can make your Birdhouse Quilt Block truly unique, and they often require small, precise cuts.
Step 6: Preparing the Pieces for Sewing
Once all of your pieces are cut, arrange them on a flat surface to ensure everything fits together properly. Double-check the measurements and make sure your fabric pieces align as you plan before you begin sewing.
3. Assembling the Birdhouse Quilt Block
Now that you’ve cut your pieces, it’s time to start assembling the Birdhouse Quilt Block. This step involves sewing the fabric pieces together, one by one, to form the block.
Step 1: Sewing the House and Roof
Start by sewing the house body and roof together. Use a quarter-inch seam allowance for accuracy. You can stitch the roof to the top of the house, making sure it aligns perfectly. Press the seams flat with your iron.
Step 2: Adding the Background Pieces
Once the house and roof are attached, it’s time to add the background fabric. Arrange the background pieces around the house, making sure they fit evenly. Sew the pieces together to create the outer frame for the birdhouse. Press each seam after stitching.
Step 3: Adding Details
If you’re adding a door, window, or accent pieces, now is the time to attach them. These small details can be hand-sewn or machine-sewn depending on your preference. Arrange them creatively and secure them in place with small stitches.
Step 4: Attaching the Bird
If you’re adding a bird or any other embellishments to your block, sew them on after the background pieces are in place. This is a fun way to personalize your Birdhouse Quilt Block.
Step 5: Pressing the Seams
After every seam, use your iron to press the fabric flat. Pressing helps to create crisp, clean edges, ensuring your block looks neat and professional.
Step 6: Completing the Block
Once all the pieces are attached, you’ll have a finished Birdhouse Quilt Block. Take a moment to admire your work and check for any stray threads or imperfections before moving on to the next step.
4. Tips and Tricks for Making the Perfect Birdhouse Quilt Block
As you create your Birdhouse Quilt Block, keep the following tips in mind to ensure the best results:
Tip 1: Choose High-Quality Fabric
The quality of your fabric can make a big difference in the final result. Choose quilting cotton or other fabric specifically designed for quilting, as it’s easier to work with and ensures the block will hold up over time.
Tip 2: Use a Rotary Cutter for Precision
A rotary cutter and quilting ruler help ensure your cuts are straight and precise, which is key to a well-made quilt block. Take your time with this step for the best result.
Tip 3: Press Frequently
Don’t skip the pressing! Pressing your seams after every step will help keep your block looking neat and polished. It’s a small effort that pays off in the final product.
Tip 4: Experiment with Different Fabrics
While the classic Birdhouse Quilt Block uses traditional fabric choices, don’t be afraid to experiment with different fabric textures and colors. A modern take on the block can be just as charming!
Tip 5: Add Personal Touches
Consider adding personal touches to your block, like embroidery, appliqué, or decorative stitching. These details can make your Birdhouse Quilt Block even more special.
Tip 6: Practice Makes Perfect
If you’re new to quilting or the Birdhouse Quilt Block design, don’t worry if your first block isn’t perfect. Practice will help you improve, and each block you make will get better!
🌟Join our exclusive Quilt broadcast list on Messenger! Receive the best patterns, tips, and updates directly in your inbox. Our team is ready to send you delightful content that will inspire your projects. Don’t miss this opportunity to stay updated and create amazing pieces. Join now and be part of this passionate quilt community!✨📩
FAQ (Frequently Asked Questions)
1. What size is the Birdhouse Quilt Block?
The typical Birdhouse Quilt Block is about 9.5″ by 9.5″ when finished, but the size can vary depending on your pattern. Always check the pattern instructions for the exact dimensions.
2. Can I add my own designs to the Birdhouse Block?
Yes! You can customize your Birdhouse Quilt Block by adding personal touches such as flowers, birds, or other small embellishments. Be creative!
3. What are the best fabrics for a Birdhouse Quilt Block?
Cotton fabrics are the most commonly used for quilt blocks. They are easy to work with, come in many patterns, and hold up well over time.
4. Do I need a lot of quilting experience to make this block?
Not at all! This tutorial is beginner-friendly, and the Birdhouse Quilt Block is simple enough for anyone to try. Follow the steps carefully, and you’ll be successful.
5. How do I make my Birdhouse Quilt Block fit into a larger quilt?
To incorporate your Birdhouse Quilt Block into a larger quilt, you can sew several blocks together. Just make sure each block is the same size, and adjust the layout to suit your design.
Conclusion
In this Birdhouse Quilt Block tutorial, we’ve walked you through everything from selecting the right materials to cutting, assembling, and finishing your block. Whether you’re a seasoned quilter or a beginner, this guide gives you all the steps needed to create a beautiful Birdhouse Quilt Block. The combination of fun, creativity, and technique will result in a stunning piece that you’ll be proud to show off.
We’d love to hear your thoughts! Please leave a sincere comment with any questions, suggestions, or ideas you have for future tutorials. Happy quilting!


