Starting your journey with crochet accessories is both exciting and creative, and this Crochet Bracelet – tutorial is the perfect place to begin. Handmade jewelry is becoming increasingly popular because it combines style, uniqueness, and the satisfaction of creating something with your own hands. This project is not only simple but also versatile, giving you endless possibilities to express your personality through colors, stitches, and embellishments. Whether you are a beginner or an experienced crocheter, making your own crochet bracelets can open doors to new skills and fresh design ideas.
One of the greatest advantages of this Crochet Bracelet – tutorial is how quick and affordable it is. You don’t need a lot of yarn, special tools, or advanced techniques. With just a small amount of leftover yarn and a crochet hook, you can create beautiful bracelets in no time. These bracelets can be made to match your outfits, given as thoughtful handmade gifts, or even sold as part of a small craft business. The process is enjoyable and relaxing, allowing you to practice stitches while producing something practical and stylish.
The beauty of learning this Crochet Bracelet – tutorial is that you can experiment with endless variations. From adding beads, buttons, or charms to combining different yarn textures, the possibilities are truly limitless. It is also a fantastic way to practice tension control and stitch consistency in a small-scale project before moving on to larger items like scarves or blankets. Now let’s dive into the steps and creative ideas that will guide you in making your own crochet bracelets.
1. Materials You Need for the Crochet Bracelet – Tutorial
To begin this project, you’ll need just a few simple supplies. The basic items include a crochet hook that matches the yarn weight you choose, some cotton yarn (ideal for bracelets because it is soft and durable), scissors, and a needle for weaving in ends. If you want to add embellishments like beads or charms, make sure to select ones with holes large enough to fit your yarn or thread.
DISCOVER MORE FREE PATTERNS HERE!
Cotton yarn is highly recommended because it provides structure and comfort for everyday wear. You can also experiment with embroidery thread, hemp, or nylon cord depending on the style you’re aiming for. For beginners, using a medium-weight cotton yarn can make it easier to see stitches clearly and create a neat finish.
Your choice of crochet hook size will affect the overall look of your bracelet. A smaller hook will create tighter stitches, making the bracelet more delicate, while a larger hook will produce a softer, more relaxed design. Don’t be afraid to experiment with different hook sizes until you find the perfect fit for your desired style.
Additional supplies like buttons, beads, or clasps can add a unique touch to your bracelet. Buttons work well as closures and can also serve as decorative elements. Clasps give a professional look and allow you to wear your bracelet more easily. If you’re using beads, thread them onto your yarn before you begin crocheting so they’re ready to incorporate into your design.
It’s always a good idea to prepare your workspace before starting. Lay out your materials in a comfortable and well-lit area to avoid interruptions. Having everything ready will help you stay focused and enjoy the process more.
With your materials prepared, you’re ready to start working on the actual stitches that bring the Crochet Bracelet – tutorial to life.
2. Step-by-Step Process of the Crochet Bracelet – Tutorial
Start your bracelet by creating a foundation chain. The number of chains depends on the size of your wrist and the design you want. Measure your wrist loosely and then chain that length, keeping in mind that crochet can stretch slightly.
Once you have your chain, you can begin adding rows of single crochet or double crochet stitches. These basic stitches are easy to learn and create a sturdy base for the bracelet. If you want to add texture, consider using half-double crochet or alternating stitch patterns for visual interest.
After establishing the base, you can begin incorporating decorative details. For example, if you prepared beads, slide them into place and secure them within your stitches. This adds sparkle and uniqueness to your bracelet without complicating the process.
Continue crocheting until the bracelet reaches the desired width. Some people prefer a slim and delicate band, while others enjoy a wider cuff-style bracelet. Adjusting the width is as simple as adding or reducing the number of rows.
When your bracelet is complete, finish off your work by cutting the yarn and weaving in any loose ends with a needle. Make sure your bracelet looks neat and tidy, as small finishing touches make a big difference in the overall quality.
Finally, add your closure. Sew on a button, attach a clasp, or simply tie the ends together in a knot. This final step ensures your bracelet is not only beautiful but also functional.
3. Creative Variations of the Crochet Bracelet – Tutorial
One exciting aspect of making crochet bracelets is the ability to customize them endlessly. A simple change in yarn color can completely transform the bracelet’s style, making it more casual, elegant, or playful.
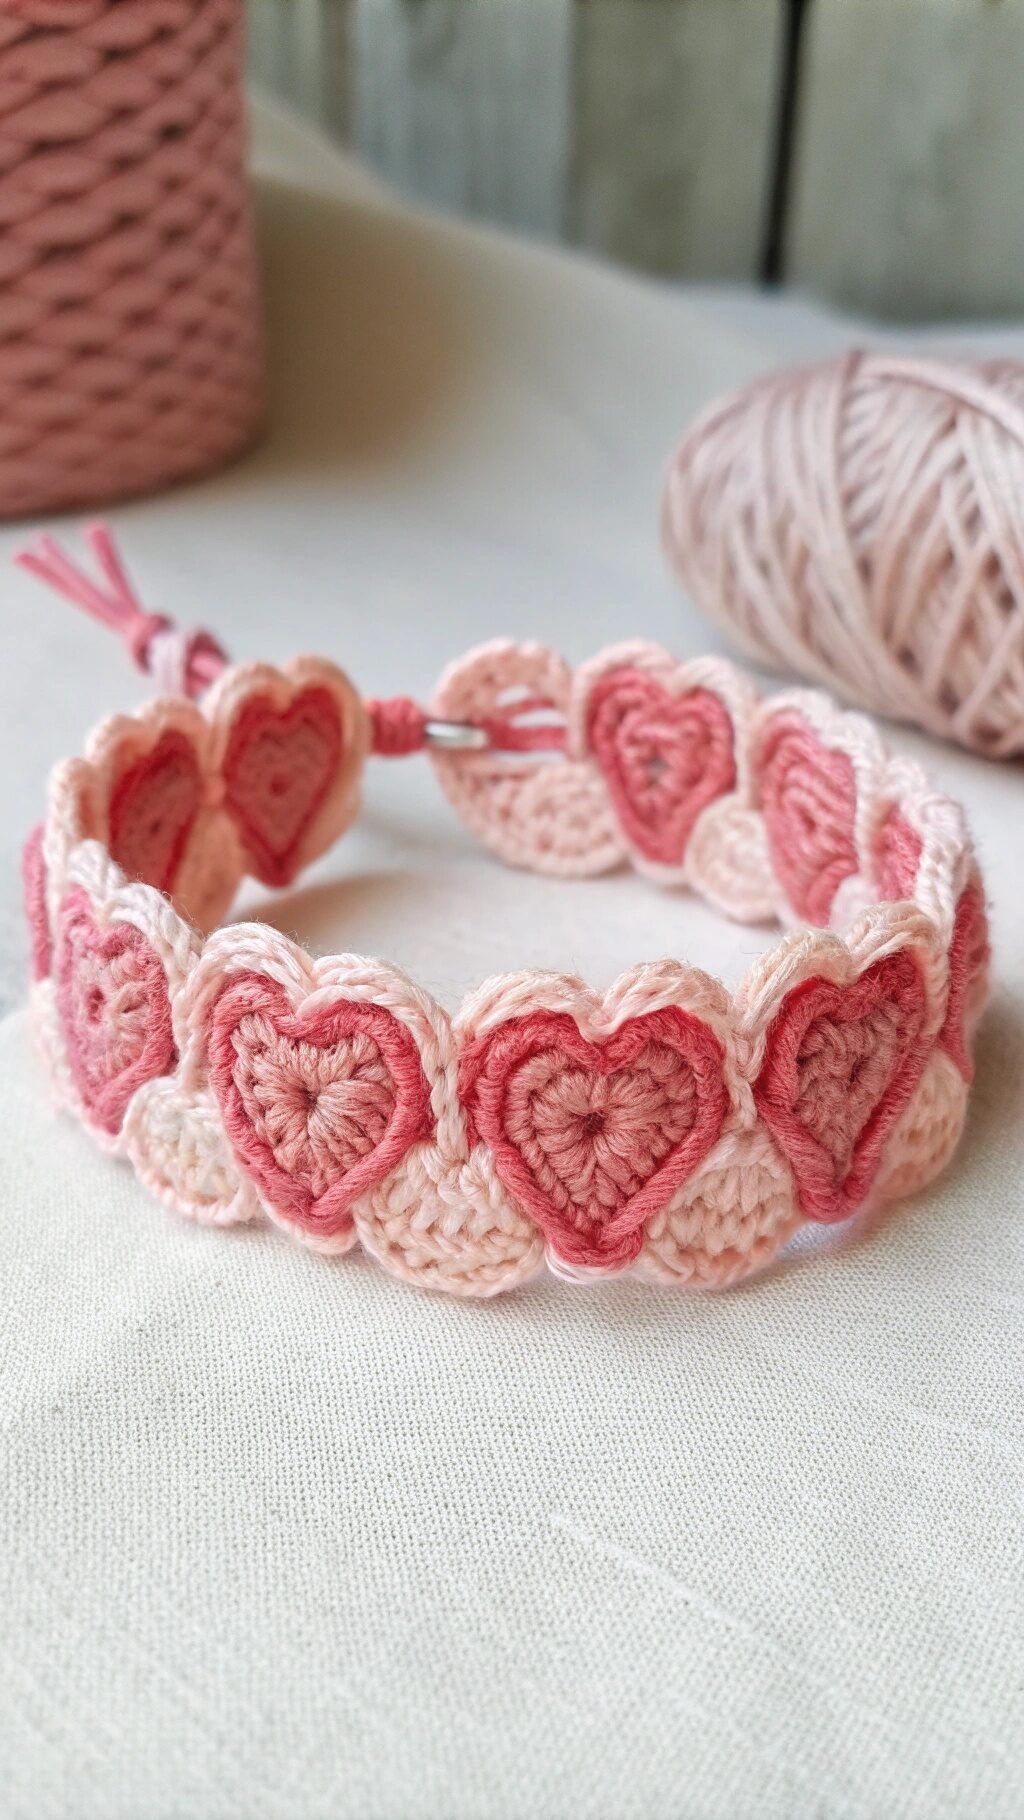
Adding beads is another popular variation. Glass beads, wooden beads, or metallic accents can make your bracelet stand out. By spacing beads evenly along your stitches, you can create patterns that catch the eye.
Charms are also a wonderful addition. You can attach small pendants, initials, or symbols that hold personal meaning. These accessories not only beautify your bracelet but also make it more personal and meaningful.
Experimenting with stitch patterns is a fun way to create unique textures. Try combining shell stitches, picots, or even lace-like stitches for an elegant bracelet that looks far more intricate than it actually is.
Another variation is making friendship-style bracelets. Use multiple colors of yarn to create stripes, braids, or chevron designs. These are great for gifts and allow you to practice color changes in crochet.
If you’re interested in turning this into a small business idea, creating themed sets for holidays or special occasions can be profitable. For example, red and green bracelets for Christmas or pastel tones for springtime are always popular.
4. Benefits of Learning the Crochet Bracelet – Tutorial
Learning how to make a crochet bracelet comes with several benefits beyond just having a stylish accessory. It’s a relaxing and mindful activity that allows you to de-stress and focus on creativity.
This small project also helps beginners practice important crochet techniques. Since it doesn’t require a large time commitment, it’s perfect for practicing tension, stitch uniformity, and finishing techniques.
Crochet bracelets are also budget-friendly. You can use leftover yarn from other projects, meaning you don’t need to invest in new supplies. This makes it an eco-friendly and sustainable craft option.
Handmade bracelets also make meaningful gifts. Giving someone a piece of jewelry you created yourself shows thoughtfulness and care. They are also lightweight and easy to mail, making them perfect for sharing with friends or family at a distance.
For those looking to sell handmade items, crochet bracelets are an excellent product. They are quick to make, customizable, and appealing to buyers who appreciate unique, handcrafted accessories.
Finally, crocheting bracelets builds confidence and sparks creativity. Once you’ve mastered this tutorial, you’ll feel inspired to tackle more complex projects, expanding your crochet skills even further.
FAQ About the Crochet Bracelet – Tutorial
1. What is the best yarn for crochet bracelets?
Cotton yarn is the most recommended because it is soft, durable, and comfortable to wear on the skin.
2. Can I add beads to my crochet bracelet?
Yes, beads are a wonderful way to add decoration. Just make sure to thread them onto your yarn before you begin crocheting.
3. How long does it take to make a crochet bracelet?
Most bracelets can be completed in under an hour, making them quick projects for both beginners and advanced crocheters.
4. Do I need a clasp for my bracelet?
Not necessarily. You can use a button, a knot, or even tie the yarn ends together. Clasps are optional but provide a professional finish.
5. Is this project suitable for beginners?
Absolutely. This Crochet Bracelet – tutorial is simple enough for beginners but also offers creative variations for advanced crocheters.
6. Can I sell the bracelets I make?
Yes, many people sell handmade crochet bracelets at craft fairs, online shops, or as part of personalized gift sets.
Conclusion
The Crochet Bracelet – tutorial is a fantastic introduction to handmade jewelry and a perfect small project for anyone who enjoys crocheting. With just a bit of yarn and creativity, you can create unique accessories that reflect your personal style.
We explored materials, step-by-step instructions, variations, and the many benefits of making crochet bracelets. I’d love to hear your thoughts—have you tried making your own crochet jewelry? Leave a sincere opinion and share your suggestions in the comments!

