Crochet Bucket Hat with Braided Band Tutorial is the perfect project for makers who want to combine timeless style with handmade charm. Whether you’re a beginner exploring your first wearable piece or an experienced crocheter looking to expand your collection, this tutorial will guide you step by step through creating a fashionable and functional accessory. The bucket hat has made a huge comeback in recent years, and adding a braided band gives it a unique and personalized touch.
In this complete Crochet Bucket Hat with Braided Band Tutorial, you’ll learn not only how to construct the hat itself but also how to shape it properly, choose the best yarn, and create a beautiful braided band that elevates the final look. This project is versatile, customizable, and suitable for all seasons depending on the yarn you choose.
If you’re searching for a detailed, beginner-friendly, and SEO-optimized guide to mastering the Crochet Bucket Hat with Braided Band Tutorial, you’re in the right place. Let’s dive into the materials, techniques, and professional tips that will help you create a stunning crochet bucket hat you’ll be proud to wear or gift.
1. Understanding the Basics of the Crochet Bucket Hat with Braided Band Tutorial
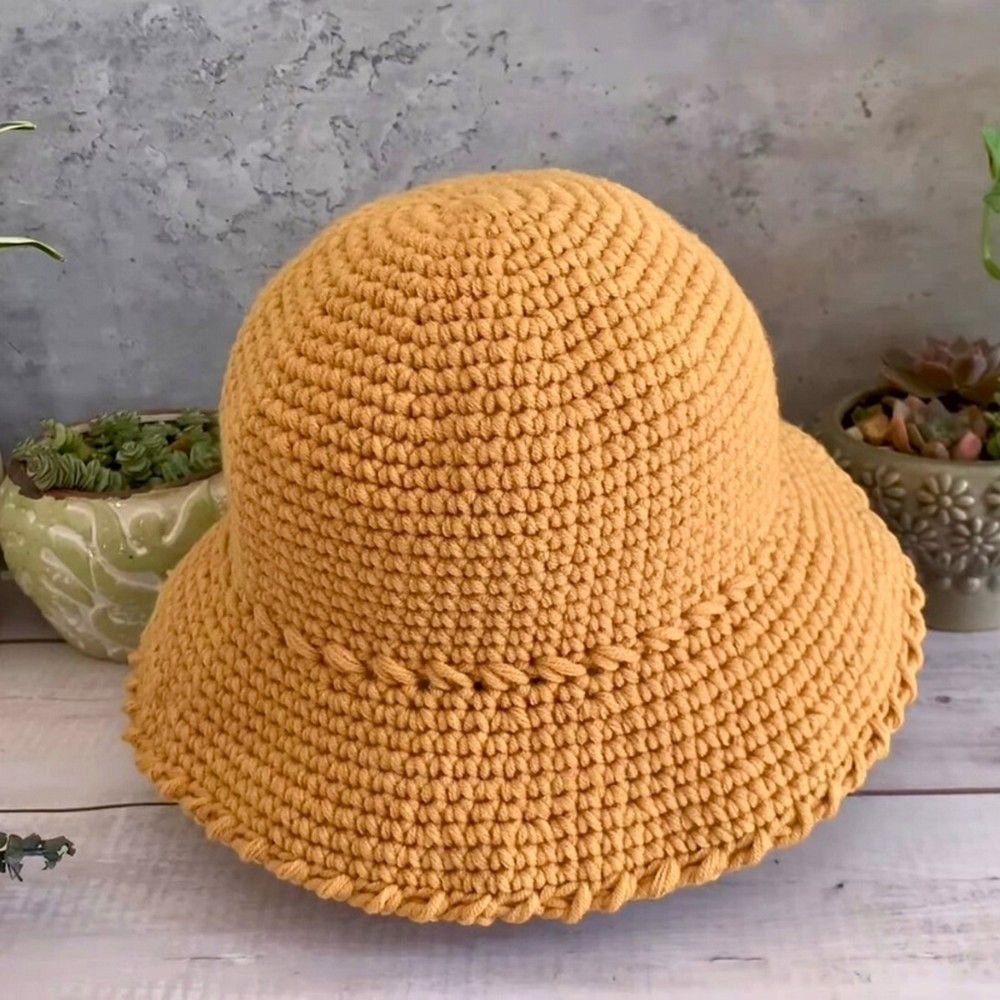
The Crochet Bucket Hat with Braided Band Tutorial begins with understanding the structure of a bucket hat. A classic bucket hat consists of three main sections: the crown (top), the body (sides), and the brim. Each section requires specific stitch techniques to achieve the correct shape.
DISCOVER MORE FREE PATTERNS HERE!
The crown is typically worked in continuous rounds, starting with a magic ring or chain circle. Increasing evenly in each round ensures the top remains flat rather than curling or cupping. Proper stitch counting is essential for symmetry and balance.
The body of the hat is created once the crown reaches the desired diameter. At this stage, you stop increasing and work evenly around. This forms the vertical sides of the bucket hat and determines the depth of the hat.
The brim is shaped by reintroducing increases. These increases allow the brim to gently flare outward. The spacing of these increases affects how dramatic or subtle the brim appears.
The braided band is the decorative highlight of the Crochet Bucket Hat with Braided Band Tutorial. It can be crocheted separately and sewn on or created using chain strands that are later braided together.
Understanding gauge, tension, and stitch consistency ensures your hat maintains its structure. A slightly tighter tension often works best for hats to ensure durability and proper shape retention.
2. Materials and Tools for the Perfect Crochet Bucket Hat with Braided Band Tutorial
Choosing the right materials is crucial for a successful Crochet Bucket Hat with Braided Band Tutorial. The yarn you select will determine the hat’s texture, durability, and seasonal use.
Cotton yarn is ideal for summer bucket hats. It provides breathability, structure, and comfort. For cooler weather, acrylic or wool blends offer warmth and flexibility.
A medium-weight (worsted weight) yarn is commonly recommended for beginners. It’s easier to handle and provides good stitch definition, which is helpful when learning shaping techniques.
Selecting the correct crochet hook size is equally important. Always check the yarn label recommendations, but remember that going half a size down can create a firmer fabric ideal for hats.
You will also need a yarn needle for weaving in ends, stitch markers to keep track of rounds, scissors, and a measuring tape to ensure accurate sizing.
For the braided band, you can use the same yarn as the hat for a cohesive look or a contrasting color for a bold statement. The braid can be thick or thin depending on how many strands you use.
3. Step-by-Step Guide to Crafting the Crochet Bucket Hat with Braided Band
To begin the Crochet Bucket Hat with Braided Band Tutorial, start with a magic ring and crochet the required number of stitches into the ring. Pull tight and join to form the first round.
Continue increasing evenly in each round. A common formula is to increase by the same number of stitches each round. This creates a smooth and flat circular crown.
Once the crown measures the appropriate diameter for the desired size, stop increasing. Crochet evenly around to form the body of the hat. This section determines how deep the hat will sit on the head.
After reaching the desired height, begin shaping the brim. Add evenly spaced increases every few stitches. The frequency of increases controls how wide the brim flares outward.
Now it’s time to create the braided band. Crochet three long chains of equal length. Secure them at one end, braid tightly but evenly, and then secure the opposite end.
Attach the braid around the base of the hat body using a yarn needle or slip stitches. Make sure the band sits evenly and does not distort the shape of the hat.
4. Styling Tips, Customization Ideas, and Finishing Touches
The beauty of the Crochet Bucket Hat with Braided Band Tutorial lies in its versatility. You can customize the hat with color changes, textured stitches, or decorative edging.
Adding stripes to the body section creates a playful and modern aesthetic. Neutral tones give a minimalist vibe, while bright colors make the hat a bold fashion statement.
Experimenting with stitch patterns like half double crochet, single crochet, or even subtle textured stitches can give your bucket hat a unique appearance.
For added durability, consider lightly steaming or blocking your hat. Blocking helps shape the brim and ensures even stitch definition throughout the project.
You can also embellish your braided band with wooden beads, buttons, or small crochet flowers. Just make sure they are securely attached if the hat will be worn frequently.
Finally, always weave in your ends neatly and securely. A clean finish enhances both comfort and professionalism in your handmade crochet bucket hat.
FAQ About Crochet Bucket Hat with Braided Band Tutorial
What skill level is required for the Crochet Bucket Hat with Braided Band Tutorial?
This project is beginner-friendly. Basic knowledge of working in the round, increasing stitches, and chaining is sufficient.
How do I know what size to make my crochet bucket hat?
Measure the head circumference and adjust the crown diameter accordingly. There are standard sizing charts available, but measuring ensures accuracy.
Can I use chunky yarn for this tutorial?
Yes, but the hat will have a thicker and more structured look. Adjust your hook size and stitch count accordingly.
How do I prevent my brim from curling?
Ensure your increases are evenly spaced. If the brim curls inward, you may need more increases. If it ruffles, you may have too many.
Is the braided band necessary?
No, but it adds a beautiful decorative touch. You can replace it with a ribbon, cord, or crocheted strap if desired.
How do I wash my crochet bucket hat?
Follow the yarn label instructions. Most cotton and acrylic hats can be gently hand washed and laid flat to dry.
Can I sell hats made from this tutorial?
Yes, handmade items created from this Crochet Bucket Hat with Braided Band Tutorial can typically be sold. However, always avoid copying proprietary written patterns.
How long does it take to complete the project?
For beginners, it may take a few hours. Experienced crocheters can often complete it in under two hours.
Conclusion
In this comprehensive Crochet Bucket Hat with Braided Band Tutorial, we explored the essential techniques for constructing a stylish and functional bucket hat from crown to brim. You learned how to shape the hat correctly, select appropriate yarn and tools, create a decorative braided band, and customize the final piece to reflect your personal style.
By mastering the steps outlined in this guide, you can confidently create beautiful crochet bucket hats for yourself, friends, or customers. This project combines creativity, practicality, and timeless fashion appeal.
Now I’d love to hear from you. Have you tried making a crochet bucket hat before? Do you prefer bold colors or neutral tones? Leave your honest opinion and suggestions below — your feedback helps inspire future tutorials and creative ideas!

