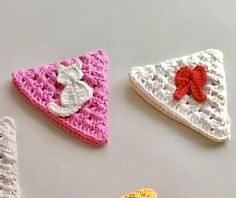
The Crochet Butterfly Granny Square is a beautiful and intricate design that adds a touch of elegance and charm to any crochet project. Known for its colorful, delicate appearance, this pattern is perfect for creating blankets, shawls, bags, and other decorative items. The butterfly shape within the granny square is symbolic of transformation and beauty, making it a popular choice among crochet enthusiasts. In this tutorial, we’ll guide you step-by-step through the process of creating the Crochet Butterfly Granny Square, providing tips for beginners and experienced crocheters alike.
Whether you’re a seasoned crocheter or just starting, this pattern is both fun and rewarding to make. It features a classic granny square construction but incorporates the added beauty of a butterfly motif in the center. The design is flexible, and you can easily adjust the colors and size to fit your needs. With the right materials and techniques, you’ll soon master the Crochet Butterfly Granny Square and create stunning pieces of crochet art.
In this article, we’ll break down the steps for making this lovely granny square, discuss essential tips for success, and explore how you can incorporate the Crochet Butterfly Granny Square into various crochet projects. Let’s get started on creating this delicate and beautiful piece!

1. Materials Needed for the Crochet Butterfly Granny Square
Before diving into the pattern, it’s important to gather the necessary materials. The right yarn and crochet hook are key to achieving the perfect Crochet Butterfly Granny Square. Here’s a list of what you’ll need:
DISCOVER MORE FREE PATTERNS HERE!
- Yarn: Choose a yarn that is suitable for granny squares, typically a medium-weight yarn (like worsted weight). You can use a variety of colors for the butterfly motif or stick to a more uniform design—it’s all up to you! Consider using yarns that are soft and durable, such as acrylic or cotton.
- Crochet Hook: The hook size typically recommended for worsted weight yarn is 5mm (H-8), but this may vary depending on the yarn you’re using. Make sure the hook size you choose matches the yarn to ensure your stitches are the right size.
- Scissors: You’ll need a pair of scissors to cut the yarn after each round.
- Yarn Needle: A yarn needle is essential for weaving in the ends of the yarn once you’ve completed the square.
- Stitch Markers: While optional, stitch markers can help you keep track of your rounds and stitches, making it easier to follow the pattern.
Now that you have your materials ready, let’s begin the tutorial!
2. Step-by-Step Instructions for the Crochet Butterfly Granny Square
Creating the Crochet Butterfly Granny Square requires patience and attention to detail. Follow these steps to make your very own butterfly granny square:
Step 1: Start with a Magic Ring
Begin by creating a magic ring (also known as a magic loop). This will serve as the foundation for the center of the butterfly. If you’re unfamiliar with this technique, you can substitute it with a chain-4 ring, but the magic ring provides a tighter and neater finish.
- Wrap the yarn around your fingers, forming a loop.
- Insert your hook into the loop and yarn over.
- Pull the yarn through to create the first chain, and you are ready to begin crocheting into the ring.
Step 2: Crochet the First Round (Butterfly Body)
For the first round, we will work double crochet stitches (US terms) into the magic ring to form the butterfly’s body.
- Yarn over and make 3 double crochet (dc) into the magic ring.
- Chain 1 and make 3 dc into the ring again.
- Chain 1 and complete 3 dc into the ring.
- Pull the yarn tight to close the ring.
- Join with a slip stitch into the top of the first double crochet.
You should now have a small center that forms the basis of the butterfly’s body.
Step 3: Crochet the Butterfly’s Wings (Second Round)
In this round, you will start to form the wings of the butterfly. This is where the pattern begins to take shape.
- Chain 3 to create the first wing.
- Work into the space between the 3 dc clusters from the previous round: Make 2 dc into the space.
- Chain 1 and repeat by making 3 dc into the same space.
- For the second wing, move to the next space between the dc clusters and repeat the process of 2 dc, chain 1, and 3 dc.
- Continue this process for the rest of the square until you have worked the two wings into each space around the butterfly’s body.
Join the round with a slip stitch at the top of the initial chain 3. You’ll notice that the wings of the butterfly are now clearly defined.
Step 4: Crochet the Outer Round (Granny Square Border)
Now that you’ve completed the butterfly shape, it’s time to turn your work into a granny square by adding a border.
- Chain 3 to begin the round.
- Work 2 dc into the same stitch.
- Skip 2 stitches and make 3 dc into the next stitch, forming the typical granny square corner.
- Repeat this process all the way around until you return to the starting point.
- Finish the round with a slip stitch into the first chain 3.
At this point, your Crochet Butterfly Granny Square is complete! You should see the beautiful butterfly motif surrounded by a traditional granny square border.
3. Tips for Success When Making the Crochet Butterfly Granny Square
Creating the Crochet Butterfly Granny Square can be a bit tricky if you’re new to granny squares, but with these tips, you’ll find the process much smoother:
- Use Stitch Markers: To keep track of the rounds, especially when you start the wings and border, use stitch markers to mark the beginning of each round. This will ensure that your work remains even and neat.
- Consistency in Tension: Keep your tension consistent throughout the pattern. This is especially important when working the butterfly wings, as it ensures that the shape will be crisp and well-defined.
- Choose Contrasting Colors: For the butterfly motif, use colors that contrast with the border for a more striking effect. For example, a bright butterfly with a neutral border can create a stunning visual impact.
- Block Your Square: Once you’ve completed the square, blocking it can help even out any uneven edges and make the colors pop. Use a gentle steam iron or blocking mats to reshape the square.
- Experiment with Colors: Don’t be afraid to experiment with different color combinations. The beauty of the Crochet Butterfly Granny Square lies in its versatility, so feel free to try various shades to create a unique design that matches your project.
4. How to Use the Crochet Butterfly Granny Square in Projects
The Crochet Butterfly Granny Square is a versatile design that can be used in a variety of crochet projects. Here are a few ideas for incorporating these beautiful squares into your creations:
- Blankets: Create a stunning blanket by joining multiple butterfly granny squares together. You can mix and match colors for a vibrant look or stick to a more monochromatic theme for a subtle yet elegant effect.
- Shawls: Use a smaller version of the Crochet Butterfly Granny Square to make a gorgeous shawl or wrap. These squares will add texture and a playful design to your garment.
- Bags: Design a beautiful crochet bag or purse by incorporating these squares into the main body. The butterfly motif will add a whimsical touch to your accessory.
- Pillows: Create a decorative pillow by sewing multiple butterfly granny squares together. You can make a large, eye-catching pillow or several small ones for a coordinated look.
- Wall Hangings: For a boho-inspired décor piece, stitch these granny squares into a larger tapestry and hang them on the wall. The butterfly shape will bring a touch of nature into your space.
FAQ – Frequently Asked Questions
1. Can I use a different yarn weight for this pattern? Yes! While worsted weight yarn is recommended, you can adjust the pattern to work with other yarn weights. Just be sure to use the appropriate crochet hook size for the yarn you choose.
2. How do I join multiple butterfly squares together? You can join your Crochet Butterfly Granny Squares using the whip stitch, slip stitch, or even by crocheting them together using the join-as-you-go method. Choose the technique that works best for your project.
3. How do I change colors in the pattern? To change colors, simply drop the current color when you reach the end of a round and join the new color with a slip stitch. Continue crocheting as usual with the new color.
4. Is this pattern suitable for beginners? While the Crochet Butterfly Granny Square requires basic crochet knowledge, it’s a great pattern for beginners who want to practice working with granny squares and changing colors.
Conclusion
The Crochet Butterfly Granny Square is a delightful and rewarding project that adds a touch of whimsy to any crochet creation. Whether you’re making a blanket, pillow, or bag, this pattern provides endless opportunities for customization and creativity. With the steps and tips provided in this tutorial, you now have the tools to create your own beautiful butterfly granny squares. Don’t forget to experiment with colors and techniques to make the design uniquely yours. We’d love to hear how you’ve used the Crochet Butterfly Granny Square in your projects—leave your thoughts and suggestions in the comments below!


