Crochet Curtain Tieback Tutorial is a wonderful way to combine practicality and creativity in a single handmade project. From the very first stitch, Crochet Curtain Tieback Tutorial shows how crochet can transform everyday home details into charming decorative accents. These tiebacks are not only functional, but they also add warmth, texture, and personality to any room.
Many people fall in love with Crochet Curtain Tieback Tutorial because it is a relatively small project with a big visual impact. You don’t need a large amount of yarn or advanced techniques to achieve a beautiful result. With simple stitches and thoughtful design, crochet curtain tiebacks can elevate the look of living rooms, bedrooms, kitchens, or even cozy reading corners.
In this article, you will learn everything you need to know about Crochet Curtain Tieback Tutorial, from understanding its purpose to choosing materials, mastering construction, and styling the finished piece. Whether you are a beginner or an experienced crocheter, this guide will help you enjoy the process and create tiebacks you’ll be proud to use or gift.
1. Understanding the Crochet Curtain Tieback Tutorial Concept
Crochet Curtain Tieback Tutorial focuses on creating a handmade accessory designed to hold curtains neatly to the side.
DISCOVER MORE FREE PATTERNS HERE!
Tiebacks help control light while adding decorative detail.
Crochet allows endless variations in texture and pattern.
The project is small, making it ideal for quick results.
Many designs use basic stitches, making them accessible.
This makes Crochet Curtain Tieback Tutorial both practical and enjoyable.
2. Choosing Yarn and Tools for Crochet Curtain Tieback Tutorial
Selecting the right materials is essential in Crochet Curtain Tieback Tutorial.
Cotton yarn is popular for its strength and clean look.
Medium-weight yarn offers durability and flexibility.
Hooks should match yarn size for proper tension.
Neutral colors blend easily with home décor.
Thoughtful material choices enhance the final look of Crochet Curtain Tieback Tutorial.
3. Crochet Techniques Used in Crochet Curtain Tieback Tutorial
Crochet Curtain Tieback Tutorial often relies on simple, repeatable stitches.
Chains create the base length of the tieback.
Single and double crochet add structure and texture.
Consistent tension ensures even results.
Some patterns include decorative edging.
These techniques make Crochet Curtain Tieback Tutorial relaxing and satisfying to work on.
4. Styling, Using, and Customizing Crochet Curtain Tiebacks
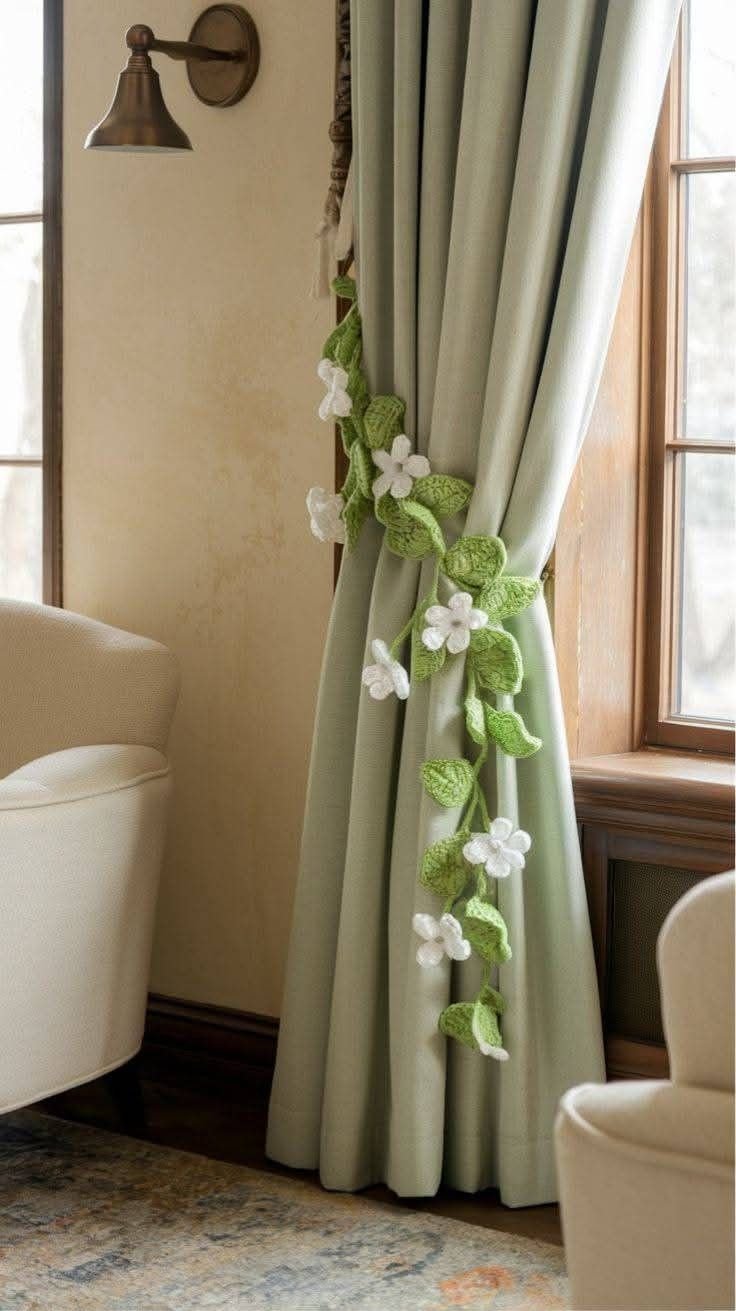
Once completed, Crochet Curtain Tieback Tutorial offers many styling options.
Tiebacks can be plain or embellished with flowers or buttons.
They can be adjusted to fit different curtain thicknesses.
Matching tiebacks can unify a room’s design.
They also make thoughtful handmade gifts.
Finished pieces from Crochet Curtain Tieback Tutorial add charm and function to any space.
FAQ – Crochet Curtain Tieback Tutorial
Is Crochet Curtain Tieback Tutorial suitable for beginners?
Yes, most designs use basic stitches and simple construction.
How long does it take to make a crochet curtain tieback?
Most tiebacks can be completed in a few hours.
What type of yarn works best?
Cotton yarn is ideal due to its strength and durability.
Can I customize the length of the tieback?
Yes, you can easily adjust the length to fit your curtains.
Do crochet tiebacks hold heavy curtains?
With sturdy yarn and tight stitches, they can support medium-weight curtains.
Can these tiebacks be washed?
Yes, especially when made with washable yarns like cotton.
Conclusion
Crochet Curtain Tieback Tutorial is a delightful project that blends creativity, functionality, and personal style. In this article, we explored the purpose of crochet curtain tiebacks, how to choose the right materials, essential crochet techniques, and creative ways to use and customize the finished pieces. This tutorial proves that even small crochet projects can make a meaningful difference in home décor.
PATTERN VIDEO:
If you enjoyed learning about Crochet Curtain Tieback Tutorial, feel free to leave your honest opinion and share your suggestions. Your feedback and ideas help inspire new projects and strengthen the creative community.

