Looking to create something cozy, beautiful, and handmade? This Crochet Flower Beanie Hat – TUTORIAL is exactly what you need. Whether you’re a beginner wanting to learn a new craft or an experienced crocheter in search of inspiration, this guide will walk you through every step of making a charming flower-accented beanie. The combination of warmth, style, and creativity makes this crochet project one of the most loved among enthusiasts.
The Crochet Flower Beanie Hat – TUTORIAL is designed with accessibility in mind. We break down the pattern in an easy-to-follow format, using friendly language and expert tips. From choosing the right yarn to shaping the flower, this article will help you create a handmade piece that’s both practical and adorable.
Not only is this beanie a fantastic gift idea, but it’s also a stylish winter essential. The flower embellishment adds a touch of elegance that elevates the entire look. If you’re ready to dive into the colorful world of crochet, stay with us as we explore the full Crochet Flower Beanie Hat – TUTORIAL step by step.
1. Choosing the Right Materials for Your Crochet Flower Beanie Hat – TUTORIAL
The success of your Crochet Flower Beanie Hat – TUTORIAL begins with selecting the appropriate materials. While crochet is versatile, choosing the right yarn and hook size can greatly impact the final result. For a beanie, soft and medium-weight yarn like acrylic or wool blend works best.
DISCOVER MORE FREE PATTERNS HERE!
Start by picking a yarn that feels comfortable against the skin. Since beanies are worn on the head, avoid rough or itchy textures. Opt for yarn labeled “worsted weight” or “medium weight” to ensure the right balance between warmth and structure.
Hook size matters too. Most patterns recommend a 5.0 mm (H-8) crochet hook for medium-weight yarn. Using a different size could alter the hat’s fit, so be sure to match the recommended gauge if provided.
Color selection is also important. A solid background color will help the crochet flower stand out. Consider classic shades like cream, gray, or navy for the hat, and brighter tones like pink, red, or yellow for the flower.
You’ll also need a yarn needle, stitch markers, and scissors. These tools help finish the piece neatly and ensure all parts are joined securely.
Finally, consider using a measuring tape to check sizing throughout the project. The key to a great beanie is a snug but comfortable fit, and measuring ensures consistency from start to finish.
2. Step-by-Step Guide to Crocheting the Beanie Base
Now that you have your materials ready, let’s begin the first major step in the Crochet Flower Beanie Hat – TUTORIAL: crafting the beanie base. This forms the foundation of your hat, and it’s typically done in the round using simple crochet stitches.
Start with a magic ring, a popular technique for beginning projects worked in the round. This allows you to pull the center tight, creating a smooth crown for the beanie.
Next, work single crochet (sc) or half double crochet (hdc) stitches in increasing rounds. This gradually forms the top of the beanie and builds its shape. Each round increases the diameter to fit an average adult head.
After reaching the desired crown size, stop increasing and continue crocheting evenly around to build the body of the hat. This is where the hat starts to resemble its final shape.
Measure frequently to ensure the beanie fits properly. An average adult beanie is about 7 to 8 inches in height from crown to edge.
To finish the base, you can use a ribbed edging by alternating front and back post double crochet (fpdc and bpdc). This adds a stretchy, professional-looking border that hugs the head nicely.
Once the base is complete, fasten off the yarn and weave in any loose ends using your yarn needle. The beanie is now ready for its beautiful floral embellishment.
3. Creating the Flower for the Crochet Beanie
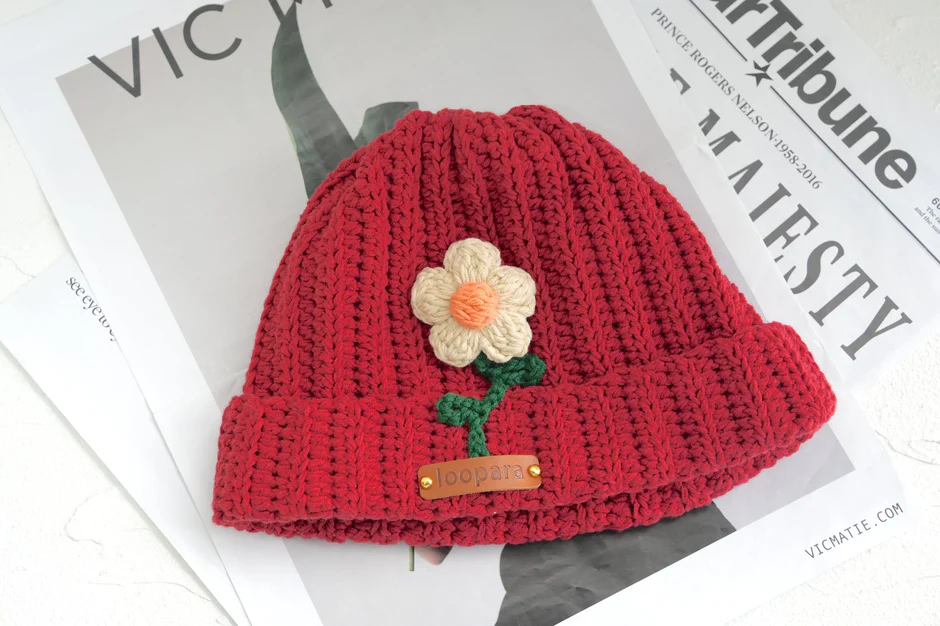
The flower is what makes your Crochet Flower Beanie Hat – TUTORIAL stand out. It’s a decorative element that adds a personal, handcrafted flair. Flowers can be simple or elaborate, depending on your skill level and the style you’re going for.
To start, choose a contrasting color to make the flower pop against the beanie. A bright, cheerful shade will give the hat an uplifting, fun look.
Begin by crocheting a chain loop or a magic ring as the center of the flower. Then work single or double crochets into the ring to form the petals. The number of stitches in each petal will determine their fullness.
Most basic flower patterns include 5 to 6 petals. For a more layered look, you can crochet two flower shapes of different sizes and stack them, sewing them together at the center.
Use a tapestry needle to securely attach the flower to the side of the beanie. You can sew it flat or just through the center to let the petals lift slightly for a 3D effect.
For added dimension, consider adding a small button or bead to the flower’s center. This gives it a finished, store-bought look while keeping it handmade.
You can even crochet multiple flowers in different sizes and group them for a bouquet effect. The possibilities are endless, and creativity is encouraged.
4. Final Touches and Styling Tips for Your Beanie
With the Crochet Flower Beanie Hat – TUTORIAL nearly complete, it’s time to focus on the final details that elevate the look. Small adjustments and styling decisions can take your handmade beanie from simple to stunning.
Make sure all ends are woven in neatly using your yarn needle. This prevents unraveling and gives the piece a professional finish.
Block your beanie if needed. Lightly spraying it with water and shaping it over a bowl or balloon helps smooth out the stitches and define the shape.
Consider adding a pom-pom to the top for extra charm. You can make one with leftover yarn or use a faux fur pom-pom for a modern twist.
When gifting or selling your beanie, include a handmade tag or care instructions. This adds value and personal touch to your creation.
Wear your beanie with pride! Pair it with casual or dressy outfits during cooler months. It’s a stylish statement piece that also keeps you warm.
Take photos of your finished beanie in good lighting. Share your work on social media or crafting communities to inspire others and receive feedback.
FAQ – Crochet Flower Beanie Hat – TUTORIAL
Q1: What is the best yarn for a crochet flower beanie hat?
A: Soft, medium-weight yarn such as acrylic or a wool blend is ideal. It offers warmth, stretch, and comfort without being too bulky.
Q2: Can beginners follow this Crochet Flower Beanie Hat – TUTORIAL?
A: Absolutely! This tutorial is beginner-friendly, with simple stitches and clear instructions. Even if it’s your first beanie, you can follow along successfully.
Q3: How long does it take to crochet a beanie hat with a flower?
A: On average, it takes 3 to 5 hours depending on your speed and experience level. The flower adds a bit more time but is quick once you get the hang of it.
Q4: How do I ensure the beanie fits properly?
A: Measure your head circumference and compare it to the pattern. Try the beanie on as you go, especially before finishing the last rounds.
Q5: Can I wash my crochet flower beanie hat?
A: Yes, but it’s best to hand wash in cold water and lay flat to dry. This keeps the shape and texture intact.
Q6: Can I sell hats made from this tutorial?
A: Yes! As long as the design is your own creation or you credit the original pattern source if applicable, you can sell your handmade beanies.
PATTERN VIDEO:
Conclusion
This Crochet Flower Beanie Hat – TUTORIAL provides a complete guide to making a beautiful and functional accessory from scratch. From selecting materials to adding those final decorative touches, you’ve learned all the essentials to create a cozy, stylish beanie with a lovely floral accent.
We hope you enjoyed this tutorial and found it helpful in your crochet journey. If you tried it, we’d love to hear your honest opinion and any suggestions for improvement. Share your thoughts and let us know what you’d like to learn next!


