Crochet enthusiasts know that the joy of crafting isn’t just limited to creating intricate blankets, shawls, or garments. A Crochet Mug Cover is a fantastic, easy project that brings warmth and personality to your mugs. Whether you’re looking to personalize your own mugs, create a thoughtful gift, or simply enjoy a quick and satisfying crochet project, this Crochet Mug Cover pattern is the perfect choice.
In this tutorial, we will walk you through the steps of creating your very own Crochet Mug Cover, which not only protects your hands from hot beverages but also adds a unique flair to your mugs. With just a few basic crochet stitches and a bit of creativity, you’ll be able to make a fun and functional accessory that makes every sip even more enjoyable.
This crochet pattern is ideal for beginners who are ready to experiment with simple techniques, as well as for seasoned crocheters who want a fast and fulfilling project. The versatility of the Crochet Mug Cover allows for endless customization with colors, textures, and decorative elements. Let’s get started with the materials and instructions needed to create this adorable cover!
1. Materials and Tools You Will Need
Before you dive into the crochet process, gather the necessary materials and tools. These items will ensure that you’re well-prepared for this simple but rewarding project.
DISCOVER MORE FREE PATTERNS HERE!
The first thing you’ll need is yarn. For a Crochet Mug Cover, medium-weight yarn (also known as worsted weight) works best. Choose a yarn that’s comfortable to work with, as it will make your crocheting experience more enjoyable. The color is entirely up to you—pick something that matches your style or your mug’s color scheme.
You’ll also need a crochet hook. A size H-8 (5mm) hook is typically perfect for worsted-weight yarn. If you’re working with a different weight of yarn, adjust the hook size accordingly.
For embellishment, you can add buttons, beads, or appliques to make your mug cover even more unique. If you’re planning to add a button, make sure to choose one that’s small enough to fit through the buttonhole you’ll crochet.
Additionally, you’ll need scissors to cut the yarn once you’ve finished, and a yarn needle to weave in the loose ends at the end of your project.
Now that you have your materials ready, let’s move on to the crochet pattern itself!
2. Step-by-Step Crochet Mug Cover Pattern
Creating a Crochet Mug Cover is a simple and enjoyable process, and it doesn’t take long to finish. Follow these easy steps to crochet your own mug cover.
1. Start with the Foundation Chain
Begin by making a foundation chain to fit the circumference of your mug. Measure the width of your mug to determine how many chains you’ll need. For a standard-sized mug, starting with 30 chains is usually a good option.
Tip: Make sure the chain is a little bit looser than usual to allow for flexibility and easier stitch work.
2. Single Crochet Row
Once you’ve completed the foundation chain, work into the second chain from the hook. Single crochet (sc) across the entire row. Continue making rows of single crochet until you have created a length that wraps around your mug. Depending on your preference, you can make the cover as tall or short as you like.
3. Add a Decorative Border
Once your mug cover reaches the desired length, you can add a decorative border for a polished finish. To create a simple yet elegant border, crochet a row of slip stitches (sl st) or half double crochet (hdc) along the edges of the cover.
If you prefer a more intricate design, you can experiment with other borders, such as picots or shell stitches, for an added touch of flair. The border helps give the cover a nice, neat edge.
4. Creating the Buttonhole
For a functional and stylish detail, incorporate a buttonhole into your crochet mug cover. Choose a spot on one side of the cover where the buttonhole will align with the button when the cover is wrapped around your mug.
To make the buttonhole, crochet a few chains and then skip a few stitches before continuing the row. This will create an opening large enough for the button to fit through. Don’t worry if it’s not perfect—buttons can vary in size, so adjust the hole accordingly.
5. Attaching the Button
After finishing the last row, sew the button onto the opposite side of the cover using a yarn needle. Make sure it’s placed correctly so it fits through the buttonhole. This is a simple but effective way to close your Crochet Mug Cover securely.
6. Weaving in Ends
Once you’ve attached the button, it’s time to weave in the loose ends. Use your yarn needle to weave the starting and ending yarn tails into the stitches of the cover to secure them. Trim any excess yarn, and you’re done!
3. Creative Variations and Personalization Ideas
The best part about creating a Crochet Mug Cover is how customizable it can be. You can use different yarn colors, stitch patterns, and embellishments to create a unique design that matches your style or the season.
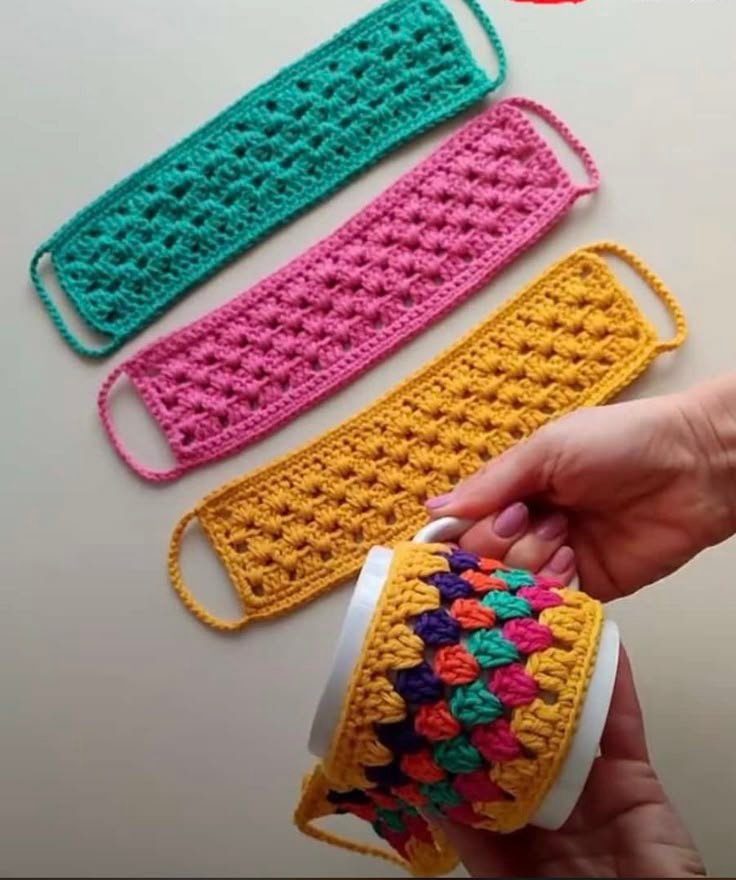
For instance, consider using variegated yarn to give your mug cover a beautiful, multi-colored look. You could also experiment with different stitch patterns such as shell stitch, bobble stitch, or granny squares to add texture and depth to the design.
If you want to create seasonal mug covers, use colors that reflect the holidays. For example, bright red and green for Christmas, pastel shades for Easter, or even orange and black for Halloween. This is a great way to make your mugs festive for different occasions.
You can also add fun embellishments, such as tiny flowers, bows, or even a cute animal motif. The possibilities are endless when it comes to adding personality to your Crochet Mug Cover.
If you’re feeling adventurous, why not try adding pockets to the side of your mug cover to hold tea bags or sweeteners? This would make for a practical yet adorable touch.
4. Troubleshooting and Tips for Success
When crocheting your Crochet Mug Cover, you may encounter a few challenges along the way. Here are some common issues and helpful tips to keep in mind.
- Stitches Too Tight: If you find that your stitches are too tight, try loosening your tension a bit. Crocheting too tightly can make your cover difficult to stretch around the mug.
- Crooked Rows: If your rows are becoming crooked, make sure you’re crocheting into the correct stitch at the end of each row. Use stitch markers to keep track of where your rows should end.
- Buttonhole Issues: If the buttonhole is too small for your button, don’t be afraid to adjust it. You can always make the buttonhole slightly larger by adding more chains or skipping more stitches.
By following the pattern carefully and experimenting with creative ideas, you’ll soon be able to crochet beautiful mug covers that are both functional and stylish!
FAQ
Q1: Can I make a Crochet Mug Cover with thicker yarn?
Yes, you can use thicker yarn, but keep in mind that the cover will turn out bigger. If you want a snug fit, adjust the number of foundation chains accordingly to match the circumference of your mug.
Q2: How can I make my Crochet Mug Cover more insulated?
To add more insulation, consider using a thicker yarn or even double-layering your mug cover. This can help keep your drink warmer for longer and add a cozy feel.
Q3: What type of button should I use for the mug cover?
It’s best to use a small, lightweight button that fits comfortably through the buttonhole. Wooden or plastic buttons are often a great choice.
Q4: Can I make the Crochet Mug Cover without a button?
Yes! If you prefer, you can skip the button entirely and simply create a snug-fitting cover that wraps around your mug. The button is just a fun addition for functionality.
Q5: Can I wash the Crochet Mug Cover?
Yes, you can wash your mug cover! Just be sure to follow the yarn manufacturer’s care instructions. Typically, it’s best to hand wash or use a gentle cycle in cold water and lay it flat to dry.
INSPIRATION VIDEO
In this tutorial, we’ve shown you how to create a charming Crochet Mug Cover with simple crochet techniques and a creative touch. Whether you’re looking to keep your hands safe from a hot mug or just want to add a fun and personal accessory to your kitchen, this pattern is perfect for all skill levels.
We hope you enjoyed this project and that it inspired you to create beautiful crochet mug covers for yourself or as gifts. If you have any questions or suggestions, feel free to leave a comment below. Happy crocheting!


