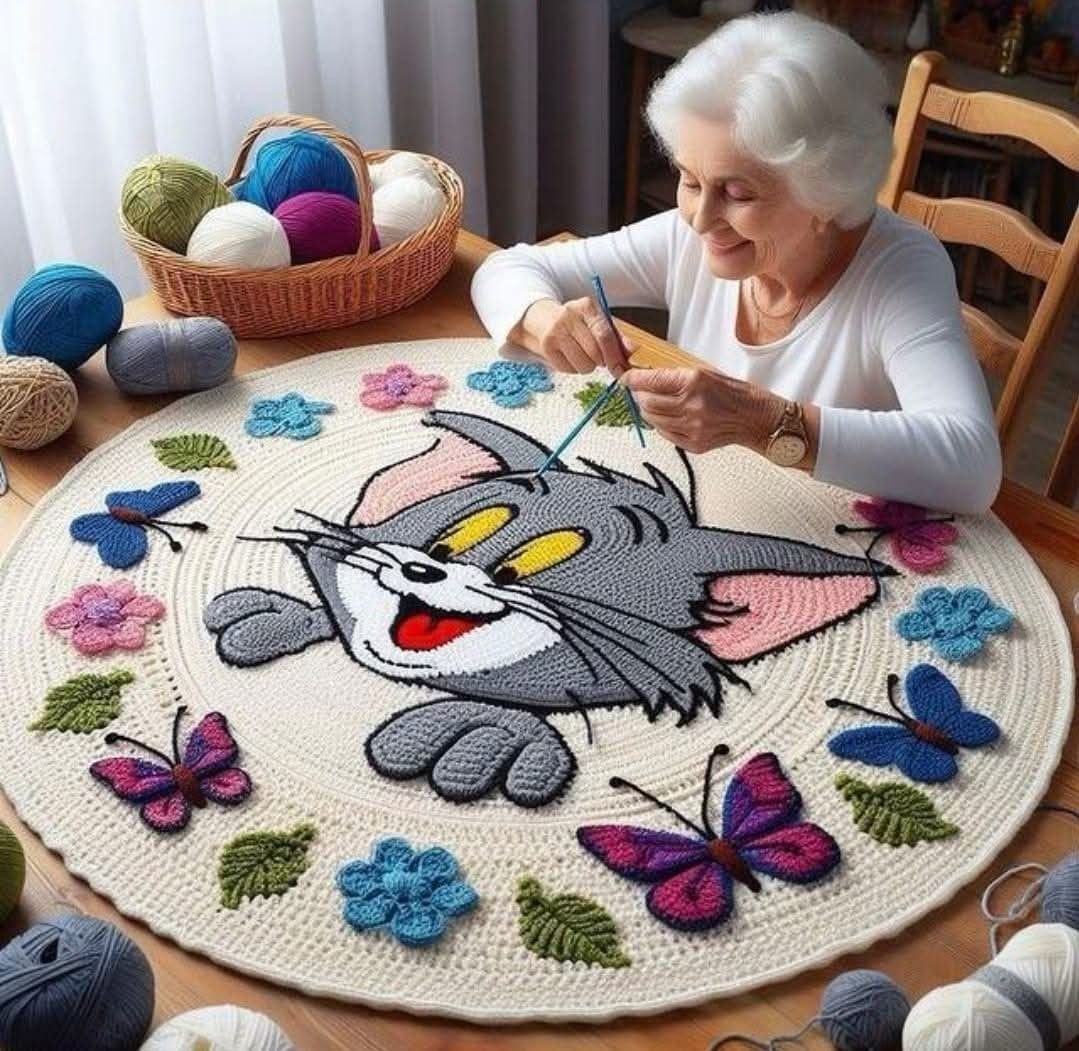
The Crochet Rug “TOM” THE CAT – tutorial is a bold, playful, and heartwarming project for crocheters who love creating statement pieces for the home. Inspired by the classic cartoon-style cat look, this rug transforms yarn into a fun decorative accent that instantly brings personality to any room.
Whether you’re decorating a child’s bedroom, adding charm to a playroom, or surprising a cat lover with a handmade gift, this project combines creativity with functionality. Large crochet rugs may look complex, but with the right yarn, consistent stitches, and careful shaping, they are very achievable — even for confident beginners ready to level up.
In this guide, you’ll learn how to plan your rug, choose durable materials, construct the base, shape the facial features, and add the finishing touches that bring “Tom” to life.
1. Understanding the Structure of the Cat Rug
The Crochet Rug “TOM” THE CAT – tutorial is typically worked in sections or as a large base with appliqué elements added afterward. The structure usually includes:
DISCOVER MORE FREE PATTERNS HERE!
A large oval or round base for the head and body
Separate ears with triangular shaping
Facial appliqués (eyes, nose, mouth)
Optional paws and tail extensions
Most versions are made using basic stitches such as:
Single crochet for dense, tight texture
Half double crochet for faster coverage
Increases to maintain flat shaping
Simple decreases for ear points
Because this is a rug, stitch tightness is essential. A dense fabric ensures durability and prevents curling or stretching over time.
The rug can be designed as:
A full-body cat shape
A large cartoon-style cat face
A simplified silhouette version
Before starting, decide on the final size and placement. A nursery rug may be medium-sized, while a statement piece for a living room could be much larger.
2. Choosing Yarn and Materials for Durability
Rugs require stronger yarn than lightweight garments. The Crochet Rug “TOM” THE CAT – tutorial works best with sturdy, washable materials.
Recommended yarn choices:
Bulky cotton yarn
T-shirt yarn
Cotton-blend yarn
Strong acrylic with tight twist
Cotton is ideal because it holds shape well and is easy to clean.
Materials you’ll need:
Large crochet hook appropriate for your yarn
Stitch markers
Tapestry needle
Scissors
Optional non-slip rug backing
Color Suggestions for “Tom”:
Gray body with white accents
Blue-gray tones for a cartoon look
White muzzle area
Pink for inner ears and nose
Black for outlines and whiskers
If the rug will sit on tile or hardwood, attaching a non-slip backing increases safety.
To make the rug extra sturdy, you can:
Hold two strands of yarn together
Use a smaller hook for tighter stitches
Add a fabric lining on the back
Planning ahead ensures your rug maintains its shape with use.
3. Step-by-Step Construction Overview
The Crochet Rug “TOM” THE CAT – tutorial can be broken into clear stages.
Step 1: Create the Main Base
Start with a magic ring or foundation chain. Work in continuous rounds, increasing evenly to create a flat circle or oval for the cat’s face or body.
Step 2: Shape the Head and Body
Continue expanding until you reach the desired size. Maintain even increases to prevent rippling or curling.
Step 3: Crochet the Ears
Make two separate triangular ear pieces. Use simple decreases to create sharp points. Attach securely to the top of the head section.
Step 4: Add Facial Features
Create appliqué pieces for:
Eyes (white base with colored center)
Muzzle section in contrasting yarn
Small triangular nose
Embroidered mouth and whiskers
Placement is key. Lay out all features before sewing to ensure symmetry.
Step 5: Optional Paws and Tail
For a full-body design, crochet additional rounded shapes for paws and a curved piece for the tail. Attach firmly.
Step 6: Reinforce and Finish
Weave in all ends carefully. Consider adding a backing or anti-slip layer.
Take your time with assembly — the personality of the rug comes from the facial details.
4. Customization and Creative Variations
One of the most exciting parts of the Crochet Rug “TOM” THE CAT – tutorial is the freedom to personalize it.
Fun variations include:
Making oversized cartoon eyes
Creating a sleeping cat version
Adding blush details to cheeks
Using pastel colors for a nursery version
Adding textured stitches for “fur” effect
Advanced options:
Surface crochet outlines for bold definition
3D whiskers
Layered eye details
Chunky jumbo yarn for oversized impact
You can even adapt the pattern to resemble other cat breeds by changing color placement.
This project makes a wonderful gift for:
Children’s birthdays
Baby showers
Cat lovers
Housewarming celebrations
Because rugs are both decorative and practical, they are always appreciated.
Frequently Asked Questions (FAQ)
Is this rug beginner-friendly?
Yes, if you are comfortable working in the round and making basic increases.
How long does it take to complete?
Depending on size and yarn thickness, it may take several days or a weekend of focused work.
How do I prevent curling?
Ensure increases are evenly spaced and maintain consistent tension.
Can I wash the rug?
If made with washable yarn like cotton, yes. Always follow yarn care instructions.
Can I resize the pattern?
Absolutely. Continue increasing the base to make it larger.
Conclusion
The Crochet Rug “TOM” THE CAT – tutorial is a fun, eye-catching crochet project that blends comfort, creativity, and character. From sturdy yarn selection to carefully placed facial details, every step allows you to create a handmade piece that brings joy to any space.
Whether you’re crafting it for your home or as a thoughtful gift, this rug is sure to spark smiles and compliments.
Have you made character-inspired crochet rugs before? Share your ideas and experiences in the comments — your creativity might inspire another crocheter to start their next playful project today.

