Crochet Star Stitch: A Guide to Mastering This Beautiful Technique
The Crochet Star Stitch is a stunning and versatile technique that adds texture and elegance to any crochet project. Known for its unique, raised, star-shaped design, this stitch is perfect for adding visual interest to blankets, scarves, hats, and more. Whether you’re a beginner looking to expand your crochet skills or an experienced crocheter seeking to master new techniques, the Crochet Star Stitch will quickly become a favorite in your repertoire.
This stitch involves working multiple yarn overs and pull-throughs, creating intricate loops that come together to form a star-like shape. The results are both beautiful and tactile, making the Crochet Star Stitch ideal for both decorative and functional crochet projects. In this article, we’ll explore how to work the Crochet Star Stitch, some tips and tricks for success, and the variety of projects that can benefit from its use.
Whether you’re crocheting a cozy blanket or adding texture to your next garment, the Crochet Star Stitch will give your work a special touch. Let’s dive into the step-by-step guide for working the Crochet Star Stitch, so you can start incorporating this elegant technique into your next project!
1. Understanding the Crochet Star Stitch
Before jumping into creating the Crochet Star Stitch, it’s important to understand what makes this stitch so unique. The Star Stitch is characterized by its raised texture and star-shaped pattern, which is achieved by pulling through multiple loops in a specific sequence. This stitch may look complicated at first glance, but with a little practice, you’ll find it’s relatively easy to master.
DISCOVER MORE FREE PATTERNS HERE!
- Foundation of the Star Stitch: The first step in creating the star is making a foundation chain. You will need to work a multiple of stitches (usually 5 or 6) in the chain. This forms the base for your star-shaped motifs.
- Creating the Star Shape: To create the star, you will be making a series of yarn overs and pull-throughs. By inserting your hook into the necessary stitches and yarn over, you’ll form loops that create the “petals” of the star.
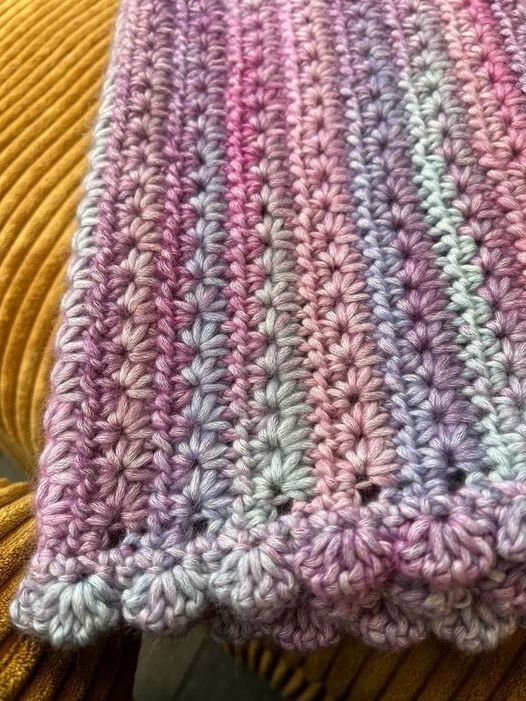
- The Finished Look: Once all the loops are worked through, the end result is a beautiful, raised star shape. The star stitch is especially eye-catching when used in larger sections or combined with other stitches for texture contrast.
The Crochet Star Stitch is incredibly versatile. You can use it on its own for a bold look or combine it with other crochet techniques, like the Half Double Crochet or Double Crochet, for a rich, textured effect.
2. How to Crochet the Star Stitch
Now that you understand the basics of the Star Stitch, let’s walk through the steps of creating it from start to finish. Follow these instructions, and soon you’ll be crafting beautiful stars in no time!
- Start with a Foundation Chain: Begin by making a foundation chain. For this example, let’s use a chain of 6 stitches. You can adjust the number depending on the pattern you’re following or the size of the project.
- First Set of Loops: Yarn over and insert your hook into the second chain from the hook. Yarn over again and pull through the stitch. Now you should have two loops on your hook.
- Continue Making Loops: Yarn over again, and insert your hook into the next chain. Yarn over and pull through again, creating a third loop on your hook. Repeat this step for a total of 5 loops.
- Pulling Through All Loops: Once you have 5 loops on your hook, yarn over once more and pull through all 5 loops at once. This creates the first part of your Star Stitch.
- Secure the Star: After pulling through, yarn over and pull through the remaining loop on your hook. This completes the first star.
- Continue Across the Row: To continue creating stars, repeat these steps for each new group of stitches. You’ll continue forming stars across your row by inserting your hook into the next stitch and following the same steps.
The Crochet Star Stitch creates an eye-catching texture that adds both depth and style to your project. You can continue working the stitch in rows or circles, depending on the design you’re going for. It’s also important to remember that while the stitch itself can look intricate, it’s a repetitive technique that becomes easier with practice.
3. Tips and Tricks for Perfecting the Crochet Star Stitch
While the Crochet Star Stitch is relatively easy to learn, there are a few tips and tricks that can help you achieve the best results. Here are some recommendations to ensure that your stars come out looking crisp and beautiful every time:
- Work Loose Stitches: To prevent the star from looking too tight or distorted, try working the stitch loosely. Tension plays a big role in the appearance of the star, so make sure not to pull the yarn too tightly when making the loops.
- Use the Right Hook Size: The size of your crochet hook can affect the size and appearance of your stars. If you’re working with bulky yarn, consider using a larger hook. For finer yarn, use a smaller hook to keep your stitches neat and compact.
- Practice Consistency: One of the most important aspects of creating a beautiful Star Stitch is consistency. Make sure each star is made with the same number of loops and in the same way. Consistent tension and stitch placement will help your stars look uniform and professional.
- Use Stitch Markers: If you’re working with a complicated pattern, stitch markers can help you keep track of where each star starts and ends. This is especially useful when working in the round or when following a detailed pattern.
- Block Your Work: After finishing your project, it’s a good idea to block your work. Blocking helps to even out the texture and shape of the stars, making them appear crisp and polished. Wet blocking or steam blocking are both effective methods for this technique.
- Mix with Other Stitches: Don’t be afraid to mix the Crochet Star Stitch with other techniques. Combining it with other textured stitches like the Shell Stitch or Bobble Stitch can add even more depth and dimension to your project.
With these tips in mind, you’ll be well on your way to mastering the Crochet Star Stitch and incorporating it into all sorts of creative projects.
4. Projects That Benefit from the Crochet Star Stitch
The Crochet Star Stitch isn’t just for decorative purposes—it can be used in a variety of projects, from functional items to beautiful accessories. Here are a few ideas for projects that can benefit from the stunning texture of the star stitch:
- Blankets and Throws: Adding the Crochet Star Stitch to a blanket or throw will give it a luxurious, textured feel. The stars provide a beautiful visual effect that adds warmth and charm to your space. Use the star stitch as the main stitch pattern or mix it with other stitches for variety.
- Scarves and Shawls: A scarf or shawl worked with the Crochet Star Stitch will stand out for its intricate texture. The stars will add both warmth and style, making it a perfect accessory for cooler months. You can also experiment with color gradients to enhance the beauty of the star pattern.
- Hats and Beanies: For a cozy and stylish winter hat, try using the Crochet Star Stitch. The stitch works well for beanies and other headwear because of its thick, warm texture. Adding stars to the brim or throughout the body of the hat creates a stunning and unique design.
- Pillows and Cushions: Crochet pillows featuring the star stitch are a great way to add a pop of texture and design to your home. You can crochet small stars on the pillow front and use them as the focal point, or create a pillow cover entirely out of the star stitch.
- Baby Blankets: The soft, bouncy texture of the Crochet Star Stitch is perfect for baby blankets. It creates a thick, warm fabric that is gentle on little ones’ skin. You can create small, star-shaped motifs and stitch them together or work a large blanket with rows of stars.
- Bags and Accessories: Bags, purses, and other accessories can also benefit from the Star Stitch. The raised, textured design adds personality to the item and makes it stand out from simpler crochet projects. Try working the stars into the body of a bag for a touch of elegance.
Whether you’re making a blanket, accessory, or home decor piece, the Crochet Star Stitch adds a unique and professional touch to your crochet work. With its distinctive texture and beautiful shape, it’s a stitch that will always impress.
FAQ – Frequently Asked Questions About the Crochet Star Stitch
- What is the Crochet Star Stitch? The Crochet Star Stitch is a textured stitch that creates star-shaped motifs by working multiple loops into a single stitch and pulling them through. It creates a raised, starry pattern that’s perfect for adding texture to projects.
- Is the Star Stitch hard to learn? The Crochet Star Stitch may look complicated, but with a little practice, it’s relatively simple to master. The key is to ensure consistent tension and follow the steps carefully to create uniform stars.
- What yarn works best for the Crochet Star Stitch? The Crochet Star Stitch works well with a variety of yarn types. However, it’s best to use yarn that has some structure to it. A medium-weight yarn (like worsted weight) is a great option for showcasing the texture of the stars.
- Can I use the Star Stitch in a round project? Yes, the Star Stitch works beautifully in both flat and round projects. When working in the round, be sure to adjust the pattern to maintain the star formation and avoid distortion.
- How can I make my stars look consistent? Consistency is key when working the Star Stitch. Be sure to use even tension and work each star with the same number of loops. Stitch markers can also help you keep track of your stitches.
- How can I make a project look even more textured? To enhance the texture of your project, try mixing the Star Stitch with other textured stitches, like the Shell Stitch or Bobble Stitch. This will create contrast and elevate the visual appeal of your crochet piece.
TUTORIAL VIDEO
Conclusion
In this article, we’ve explored the beauty and technique of the Crochet Star Stitch, providing you with a clear guide on how to create this stunning, textured pattern. We’ve discussed the steps to crochet the star, tips for perfecting your technique, and ideas for projects where the Star Stitch will truly shine.
Now it’s your turn to practice and incorporate this technique into your crochet work. We’d love to hear your thoughts and suggestions! Leave your feedback in the comments below, and happy crocheting!


