The Crochet Tutorial: Siamese Cat Rug is the perfect combination of creativity, functionality, and personality. If you love crochet projects that make a statement while remaining practical, this adorable rug design is an exciting addition to your handmade collection. Inspired by the elegant look of the Siamese cat, this project allows you to transform yarn into a cozy decorative piece that adds warmth and charm to any room.
Whether you’re decorating a nursery, adding character to a craft room, or creating a unique gift for a cat lover, the Crochet Tutorial: Siamese Cat Rug offers a rewarding experience. It’s suitable for confident beginners and intermediate crocheters who are comfortable with basic stitches, color changes, and simple shaping techniques.
In this guide, you’ll learn how to choose the right materials, understand the construction process, shape the facial details, and add finishing touches that make your rug truly stand out.
1. Understanding the Design and Construction
The Crochet Tutorial: Siamese Cat Rug is typically worked in sections or as a large continuous base with added appliqué features. The design usually includes:
DISCOVER MORE FREE PATTERNS HERE!
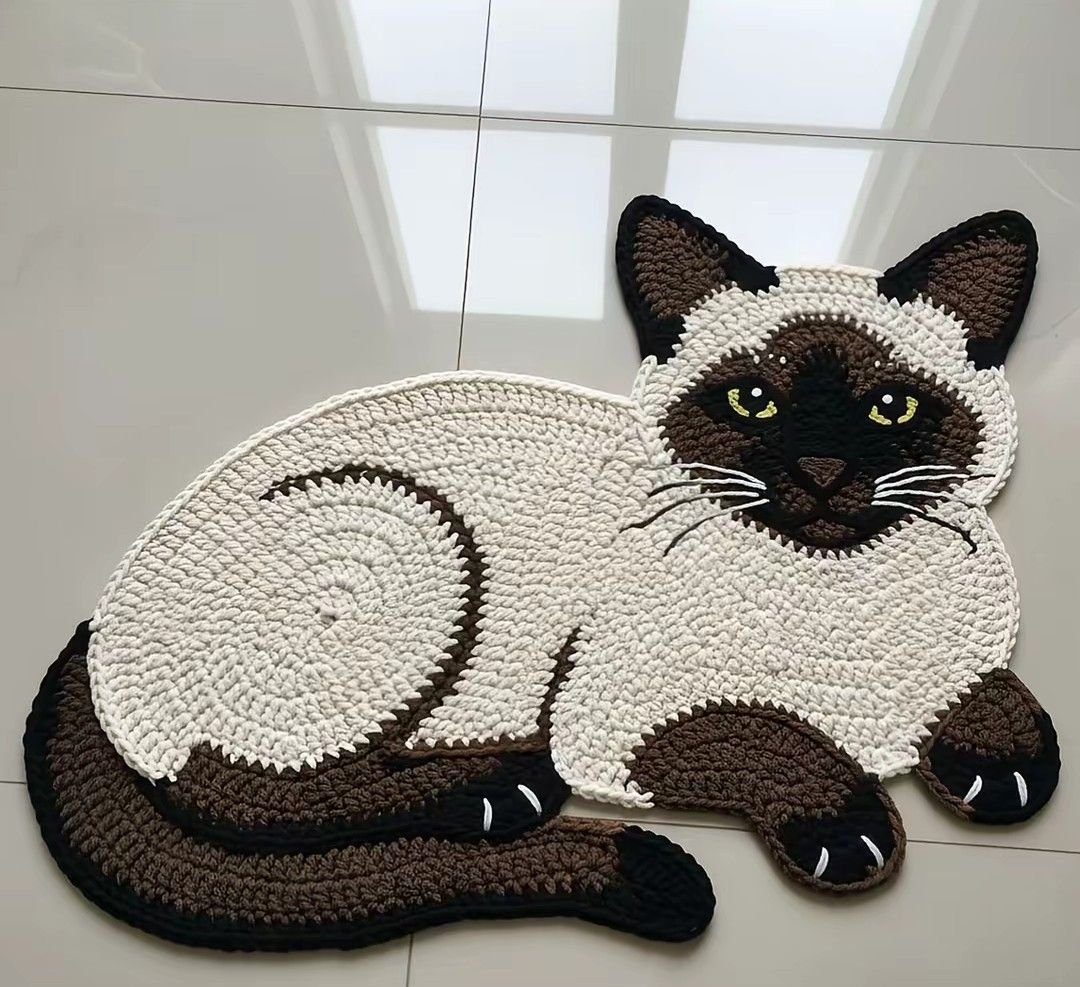
A large oval or round base for the body
Contrasting ears and tail sections
Color changes to replicate Siamese markings
Facial details such as eyes, nose, and whiskers
The iconic Siamese look comes from its distinct color contrast — a light body with darker face, ears, paws, and tail. Recreating this in crochet involves strategic color placement rather than complex stitch techniques.
Most versions of this rug are made using:
Single crochet stitches for a dense texture
Half double crochet for slightly faster progress
Increases to shape the oval or round base
Simple shaping for ears and tail
Because this is a rug, stitch density matters. Tight stitches create durability and structure, preventing stretching over time.
This project can be made in different sizes depending on your needs — from a small accent rug to a larger statement piece for a bedroom or play area.
2. Choosing Yarn and Materials for Durability
When making a rug, yarn selection is extremely important. The Crochet Tutorial: Siamese Cat Rug requires sturdy yarn that can handle foot traffic and regular use.
Recommended yarn types:
Bulky or super bulky cotton yarn
Cotton-blend yarn for durability
T-shirt yarn for a modern, thick look
Acrylic with strong twist for budget-friendly options
Cotton is especially popular because it is durable, washable, and holds its shape well.
Color Selection:
Light cream or beige for the body
Dark brown, chocolate, or gray for markings
Soft pink or beige for the nose
Black or deep brown for eyes and whiskers
You will also need:
A large crochet hook suitable for your yarn weight
Stitch markers
Tapestry needle for assembly
Non-slip rug backing or fabric liner (optional but recommended)
If your rug will be placed on tile or hardwood floors, adding a non-slip backing improves safety and stability.
Before beginning, consider the final location of your rug. A nursery version may use softer tones, while a craft room version can have bold, high-contrast details.
3. Step-by-Step Construction Overview
The Crochet Tutorial: Siamese Cat Rug can be broken down into manageable stages.
Step 1: Create the Base
Start with a foundation chain and work in the round to form an oval, or begin with a magic ring if making a circular base. Increase evenly to maintain a flat shape. Continue expanding until you reach your desired rug size.
Step 2: Add Color Changes
Incorporate darker yarn where the face and paws will be located. Plan your color transitions in advance to ensure symmetry. Carry yarn neatly or fasten off and rejoin to maintain clean edges.
Step 3: Crochet the Ears
Create two triangular pieces separately. Use simple decreases to shape the points. Attach securely to the top of the rug base.
Step 4: Make the Tail
The tail can be crocheted as a long tube or flat strip. Slight shaping or gentle curves can be added with strategic increases and decreases. Sew or crochet it directly onto the rug base.
Step 5: Add Facial Features
Eyes can be embroidered, appliquéd, or made with crochet circles. The nose is often a small triangle stitched in soft pink. Whiskers can be embroidered using black yarn.
Step 6: Reinforce and Finish
Weave in all ends securely. If desired, sew a fabric lining to the back or attach a non-slip mat.
Take your time during assembly. Precise placement of facial features brings the character to life.
Because this rug may experience frequent use, double-check all seams and attachments for strength.
4. Customization Ideas and Creative Variations
One of the most exciting parts of the Crochet Tutorial: Siamese Cat Rug is how easily it can be personalized.
Creative variations include:
Making oversized cartoon-style eyes
Adding blush details to the cheeks
Creating a sleeping cat version with closed eyes
Using pastel colors for a whimsical look
Adding a textured border around the rug
You can also adjust the pattern to resemble other cat breeds by changing color placement. Gray tones create a Russian Blue look, while orange and cream produce a playful tabby effect.
For advanced crocheters, consider:
Using textured stitches for fur dimension
Adding 3D paw pads
Incorporating surface crochet for outline definition
Crocheting the rug in chunky jumbo yarn for dramatic impact
This project also makes a wonderful handmade gift for baby showers, birthdays, or housewarming celebrations.
Crochet rugs combine practicality and artistry. They bring warmth into a space while showcasing your handmade talent.
Frequently Asked Questions (FAQ)
Is this rug suitable for beginners?
Yes, if you are comfortable with basic stitches and working in the round. The shaping is simple and repetitive.
How long does it take to complete?
Depending on size and yarn weight, it can take a weekend or several days of relaxed crocheting.
Can I wash the rug?
If made with washable yarn like cotton, yes. Always follow yarn care instructions.
How do I prevent curling?
Make sure increases are evenly spaced and do not pull stitches too tightly.
Can I make it larger?
Absolutely. Continue increasing the base evenly until reaching your desired size.
Conclusion
The Crochet Tutorial: Siamese Cat Rug is a charming, functional project that blends creativity with comfort. From selecting durable yarn to shaping adorable facial details, every step offers an opportunity to express your personal style.
This rug is more than home décor — it’s a conversation piece, a cozy accent, and a handmade treasure. Whether you’re creating it for your own space or as a heartfelt gift, the result is sure to impress.
Have you tried making crochet rugs before? Share your experience and ideas in the comments. Your creativity might inspire another crocheter to start their next project today.

