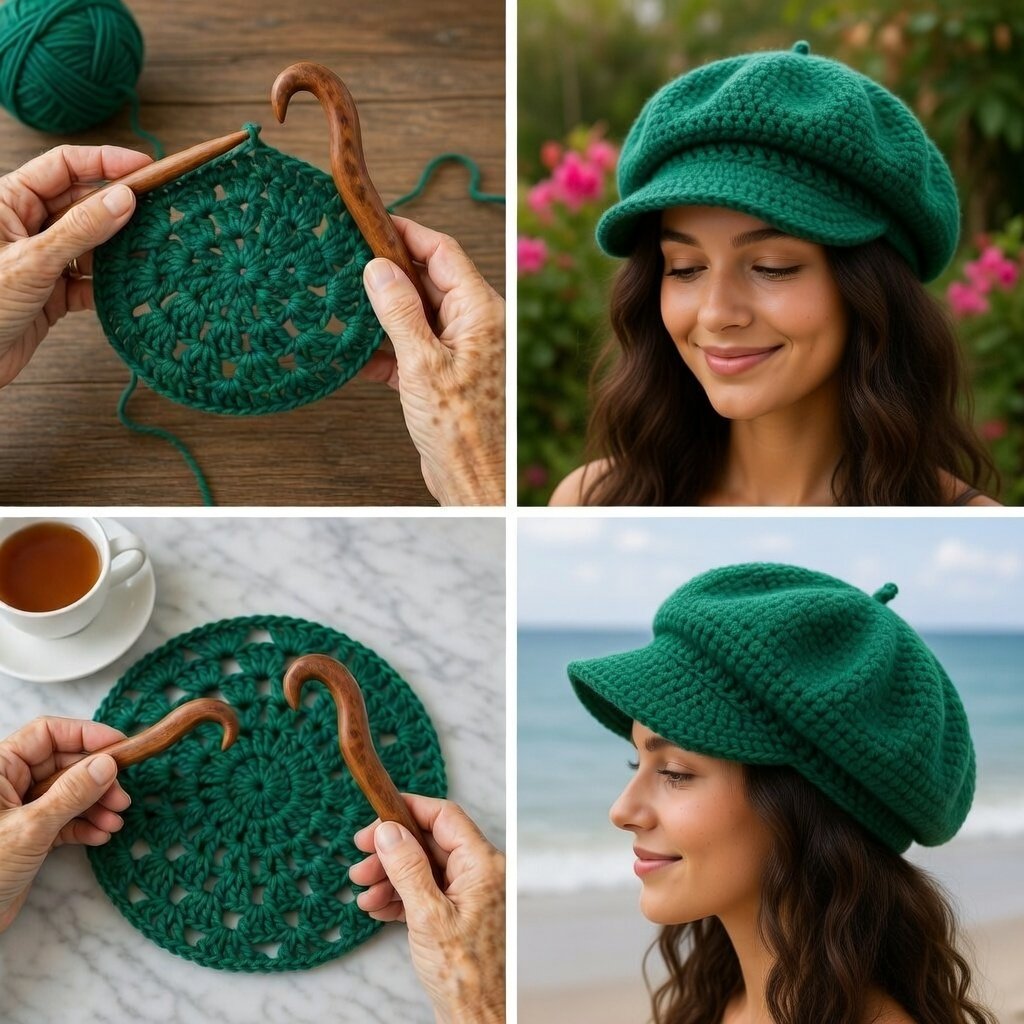
Crocheted Beret – TUTORIAL is a stylish and timeless crochet project that allows you to create a fashionable accessory with your own hands. Learning the Crocheted Beret – TUTORIAL is a great way to explore texture, shaping techniques, and creativity while making something both practical and elegant. This type of hat is widely loved for its versatility and ability to complement different outfits and styles.
One of the best things about the Crocheted Beret – TUTORIAL is that it can be customized in countless ways. From soft neutral tones to bold, vibrant colors, you can adapt the design to suit your personal taste. You can also experiment with different stitches to create unique textures that make your beret stand out.
In this complete Crocheted Beret – TUTORIAL, you will learn how to choose the right materials, create the crown, shape the body of the beret, and finish it with professional details. Whether you are a beginner looking for a new challenge or an experienced crocheter seeking inspiration, this tutorial will guide you step by step.
1. Materials Needed for Crocheted Beret
The first step in the Crocheted Beret – TUTORIAL is gathering all the materials needed to start your project. Having everything prepared will make the process smoother and more enjoyable
.DISCOVER MORE FREE PATTERNS HERE!
Yarn selection is very important for this project. Soft acrylic or wool yarn is ideal for a comfortable and warm beret.
Cotton yarn can also be used if you prefer a lighter and more breathable option.
A crochet hook that matches your yarn weight is essential. Most berets are made using hooks between 4 mm and 6 mm.
You will also need scissors and a yarn needle to weave in ends and assemble the final piece.
Stitch markers are helpful for keeping track of rounds, especially when working in continuous circles.
Measuring tape is useful to ensure the beret fits properly according to head size.
2. Creating the Crown of the Beret
The crown is the starting point of the Crocheted Beret – TUTORIAL and forms the top of the hat.
Begin with a magic ring, which allows you to create a tight and adjustable center.
Work in rounds, gradually increasing stitches to form a flat circular shape.
In the Crocheted Beret – TUTORIAL, it is important to maintain even tension to keep the circle smooth and balanced.
Continue increasing until the crown reaches the desired diameter.
The size of the crown will determine how slouchy or fitted your beret will be.
Once the correct size is reached, stop increasing and move on to shaping the body.
3. Shaping the Body of the Beret
After completing the crown, the next step in the Crocheted Beret – TUTORIAL is shaping the body.
This is where the beret begins to take its classic, slightly slouchy form.
Work several rounds without increasing to create depth and volume.
You can use different stitches such as double crochet, puff stitch, or shell stitch to add texture.
In the Crocheted Beret – TUTORIAL, experimenting with stitch patterns can give your beret a unique look.
Make sure to check the fit as you go to ensure it sits comfortably on the head.
The body should drape naturally without being too tight or too loose.
4. Finishing the Band and Final Details
The final step in the Crocheted Beret – TUTORIAL is creating the band and adding finishing touches.
To shape the band, begin decreasing stitches gradually to fit the head circumference.
Use tighter stitches such as single crochet or ribbed stitches for a snug and secure fit.
In the Crocheted Beret – TUTORIAL, the band is essential for keeping the beret in place.
Once the band is complete, fasten off the yarn and weave in any loose ends.
You can add decorative elements such as a pom-pom, buttons, or embroidery.
Finally, lightly block the beret if needed to enhance its shape and overall appearance.
FAQ – Crocheted Beret – TUTORIAL
Is this project suitable for beginners?
Yes, the Crocheted Beret – TUTORIAL is beginner-friendly, especially if you are familiar with basic stitches.
What yarn is best for a beret?
Wool or acrylic yarn is ideal for warmth, while cotton works well for lighter versions.
How long does it take to make a beret?
Most crocheters can complete a beret in a few hours to a day.
Can I adjust the size?
Yes, you can adjust the size by changing the number of increases in the crown and the length of the band.
Do I need to block the beret?
Blocking is optional but helps improve the final shape.
Can I customize the design?
Absolutely, you can use different colors, stitches, and embellishments to personalize your beret.
Conclusion
The Crocheted Beret – TUTORIAL is a rewarding and stylish crochet project that allows you to create a versatile accessory with your own hands. It combines simple techniques with creative freedom, making it suitable for crocheters of all levels.
In this tutorial, you learned how to select materials, create the crown, shape the body, and finish the beret with a comfortable band. Each step plays an important role in achieving a beautiful and functional final piece.
Projects like the Crocheted Beret – TUTORIAL highlight how crochet can be both practical and artistic. A handmade beret not only keeps you warm but also adds a personal touch to your wardrobe.
PATTERN VIDEO:
If you enjoyed this tutorial, feel free to leave your honest opinion and share your suggestions. Your feedback helps inspire more creative crochet ideas and tutorials.

