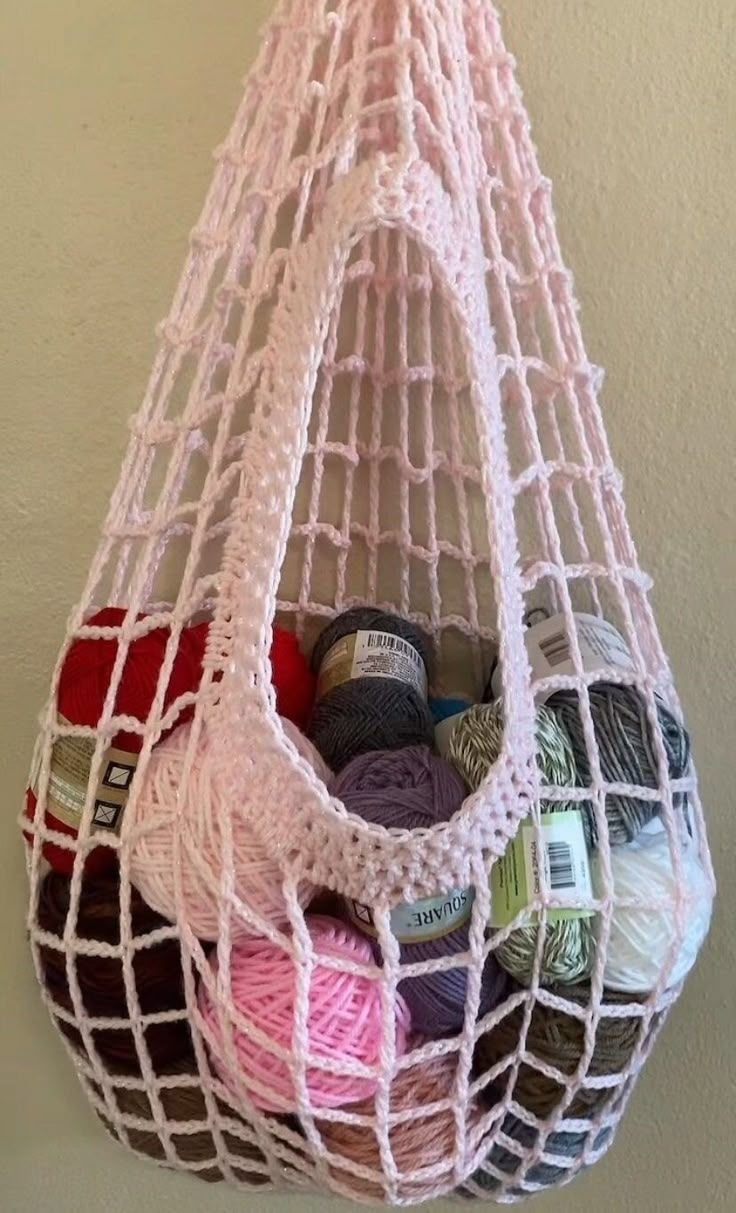
The crocheted hanging basket – tutorial is the perfect project for makers who love combining beauty and practicality. Whether you want to organize your craft supplies, display plants, store bathroom essentials, or add a handmade decorative touch to your home, a hanging basket made with crochet offers both function and charm.
This project is ideal for beginners who already know basic stitches and are ready to try working in the round with sturdy tension. At the same time, it provides plenty of room for creativity and customization for more experienced crocheters.
In this guide, you’ll learn how to choose the right yarn, shape a durable basket, create strong hanging loops, and personalize your design for different spaces. Let’s turn simple yarn into a stylish storage solution.
1. Why Make a Crocheted Hanging Basket?
The crocheted hanging basket – tutorial is not just about creating something beautiful — it’s about maximizing vertical space in a smart and stylish way. Hanging baskets are perfect for small homes, apartments, craft rooms, nurseries, kitchens, and even entryways.
DISCOVER MORE FREE PATTERNS HERE!
Here’s why crocheted hanging baskets are so popular:
They save counter and shelf space
They are lightweight and versatile
They can be customized in size and color
They make thoughtful handmade gifts
They work in both modern and rustic décor
Unlike traditional storage bins, hanging baskets add texture and warmth to a room. The handmade stitches create visual interest while remaining practical.
You can use them to hold:
Yarn skeins
Crochet hooks
Plants (with a liner)
Toiletries
Keys and mail
Children’s toys
This project is also a great stash-buster. You can use leftover cotton yarn or combine multiple strands for a thicker, sturdier finish.
2. Choosing Yarn and Materials for Structure
Because this basket will hang and potentially hold weight, yarn selection is crucial. The crocheted hanging basket – tutorial works best with yarn that offers structure and durability.
Recommended yarn types:
Cotton yarn (best for structure and minimal stretch)
Cotton-blend yarn
T-shirt yarn for a chunky, modern look
Macramé cord for extra sturdiness
Cotton is especially popular because it holds its shape well and resists stretching over time.
Hook Size:
Choose a hook slightly smaller than recommended for your yarn if you want a tighter, firmer basket. Dense stitches prevent sagging.
Additional materials:
Stitch markers
Tapestry needle
Scissors
Wooden ring (optional for hanging)
Metal or plastic ring (optional support)
If you plan to store heavier items, consider doubling your yarn or holding two strands together to create thicker fabric.
Color Ideas:
Neutral tones for minimalist décor
Earthy shades for a boho vibe
Pastels for nurseries
Bold colors for modern spaces
Before starting, think about where your basket will hang. The environment can influence your yarn and color choices.
3. Step-by-Step Construction Overview
The crocheted hanging basket – tutorial is typically worked from the bottom up in continuous rounds.
Step 1: Create the Base
Start with a magic ring or a small chain circle. Work single crochet stitches in the round, increasing evenly to create a flat circular base. Continue increasing until you reach the desired diameter.
Step 2: Build the Basket Walls
Once the base is large enough, stop increasing. Continue working evenly in the round to build the sides upward. This naturally forms the basket shape.
To create a defined edge between the base and walls, you can work one round in the back loop only.
Step 3: Shape the Front Opening (Optional)
Some hanging baskets feature a dip in the front for easier access. To create this, switch to working back and forth in rows for a few rounds instead of continuous rounds.
Step 4: Create the Hanging Strap
You can create the strap in several ways:
Chain a long strap and attach it securely to both sides
Crochet a thick reinforced strap separately and sew it on
Attach the basket to a wooden or metal ring
Make sure the strap is tightly stitched and reinforced where it connects to the basket.
Step 5: Reinforce and Finish
Weave in all ends carefully. Add extra stitches at connection points for durability.
If desired, lightly steam block the basket to shape it properly.
This entire project can often be completed in a few hours, making it perfect for a weekend crochet session.
4. Creative Variations and Customization Ideas
One of the most exciting aspects of the crocheted hanging basket – tutorial is how customizable it is. You can adapt it for different rooms and purposes.
Creative ideas include:
Adding wooden beads to the strap
Incorporating color stripes
Using textured stitches like half double crochet or puff stitches
Adding a decorative border at the top
Including a drawstring closure
For plant lovers, you can insert a small pot inside the basket to create a hanging planter. Always use a liner if watering plants inside.
Advanced customization options:
Using tapestry crochet for patterns
Adding leather straps instead of yarn
Creating multiple baskets in graduated sizes
Designing stackable hanging storage sets
You can even create a wall storage system by making several baskets in coordinating colors.
This project also makes a beautiful handmade gift for housewarmings, baby showers, or craft enthusiasts.
Frequently Asked Questions (FAQ)
Is this project beginner-friendly?
Yes. If you know how to single crochet and work in the round, you can make this basket.
How do I prevent the basket from stretching?
Use cotton yarn, tight tension, and possibly a smaller hook size.
Can I wash the basket?
If made with washable yarn like cotton, yes. Always follow yarn care instructions.
How strong should the strap be?
Very strong. Reinforce attachment points and avoid loose stitches.
Can I make it larger?
Absolutely. Increase the base diameter and continue building taller walls.
Conclusion
The crocheted hanging basket – tutorial is a simple yet highly functional crochet project that blends style with organization. From choosing sturdy yarn to shaping a durable strap, every step helps you create a piece that is both decorative and practical.
Whether you use it to store craft supplies, display plants, or organize everyday essentials, this basket adds handmade charm to any space.
Have you tried making crochet storage solutions before? Share your ideas and experiences in the comments. Your creativity might inspire another crocheter to start their next project today.

