If you’ve ever wanted to add a playful and adorable accessory to your wardrobe, this Learn How to Make the Kitty Hat – Tutorial is just what you need. This crochet project is perfect for beginners and experienced crafters alike, bringing together comfort, cuteness, and creativity. The Kitty Hat is a charming piece that not only keeps you warm during colder months but also adds a touch of fun to your outfit. Whether you’re making it for yourself, a child, or as a thoughtful handmade gift, this project is bound to make anyone smile.
The Kitty Hat combines simple crochet techniques with a creative design inspired by everyone’s favorite feline features—pointed ears, soft textures, and cozy warmth. You can customize it with different colors, yarn types, or embellishments to reflect your unique personality. Using this Learn How to Make the Kitty Hat – Tutorial, you’ll be guided step by step through the process, ensuring a successful and enjoyable crochet experience from start to finish.
Aside from being an enjoyable creative outlet, this project is also a great way to practice foundational crochet stitches such as single crochet, double crochet, and increases. It’s quick to make, uses minimal materials, and offers endless room for customization. So, grab your hook and yarn, and let’s get started on crafting your adorable Kitty Hat today!
1. Materials and Preparation
Before you begin your Learn How to Make the Kitty Hat – Tutorial, make sure you have all your materials ready. You’ll need soft yarn in your desired color (acrylic or cotton works perfectly), a crochet hook suitable for your yarn weight (usually between 4 mm and 5.5 mm), scissors, a yarn needle, and stitch markers if needed.
DISCOVER MORE FREE PATTERNS HERE!
Choosing the right yarn will determine the comfort and stretch of your hat. If you’re making it for colder weather, opt for a thicker yarn to ensure warmth. For lighter seasons, a medium-weight cotton yarn will provide breathability and softness.
Measure the head circumference of the person who will wear the hat. This step is essential to ensure a comfortable fit. Use the standard size chart for guidance—around 21 to 23 inches for adults and smaller sizes for children.
If you want your Kitty Hat to stand out, you can select contrasting colors for the ears, edge, or even add small details like whiskers or a bow. These tiny touches make your project unique and full of personality.
Keep all your tools within reach and ensure you’re working in a comfortable, well-lit space. Crocheting can take some time, so having a cozy environment will help you enjoy the process even more.
Lastly, review the basic crochet stitches you’ll be using in this tutorial. Knowing them beforehand will make the project flow smoothly and help you achieve neat, even results.
2. Crocheting the Base of the Kitty Hat
To start your Learn How to Make the Kitty Hat – Tutorial, begin by crocheting the base of the hat. Start with a magic ring and create a few chains to form the center circle. Work single crochet or half double crochet stitches around the ring, depending on your desired texture.
Continue increasing evenly in each round to shape the top of the hat. The key is to make sure the circle lays flat as you work. If it begins to curl, you may need to add more increases. This will form the crown of your Kitty Hat.
Once the top is wide enough, stop increasing and continue crocheting in rounds without adding stitches. This will start to form the sides of the hat, giving it depth and structure. The length of this section will determine how far the hat covers your head or ears.
Try on the hat occasionally as you work to ensure it fits comfortably. Adjust the number of rounds based on the desired length—some prefer a snug fit, while others like a slouchy style.
To finish the base, make a round of slip stitches or a decorative edge using a contrasting color. This simple detail gives your Kitty Hat a polished, finished look.
Remember to keep your tension consistent throughout the project. Uneven tension can affect the hat’s shape and elasticity. Take your time and enjoy each stitch!
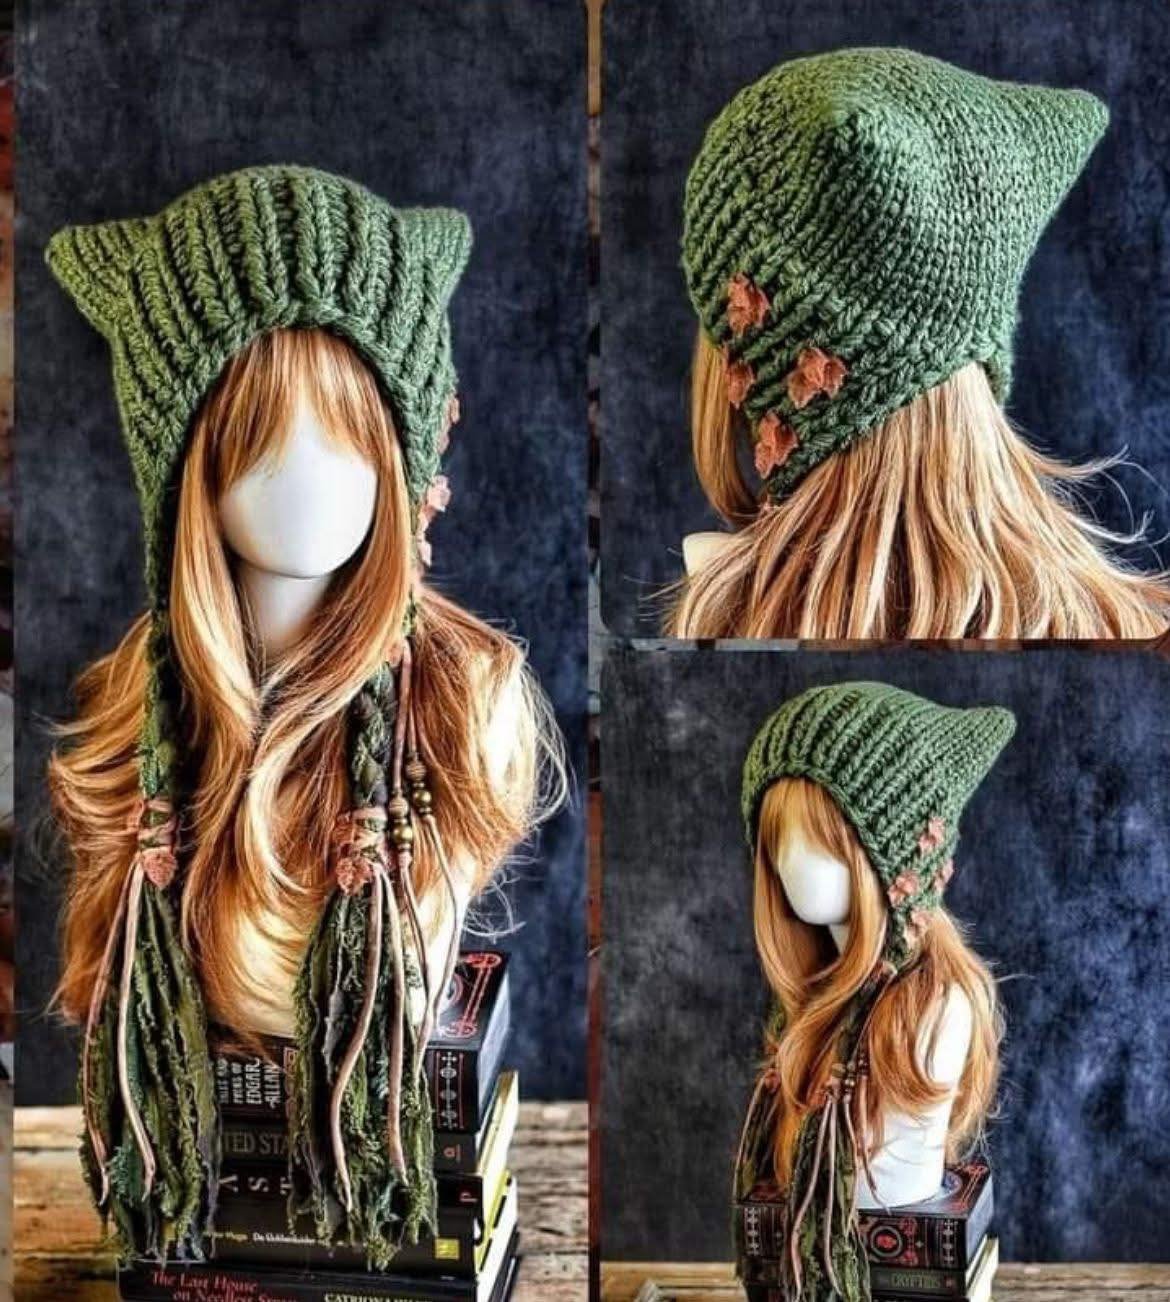
3. Creating the Adorable Kitty Ears
No Kitty Hat would be complete without its signature ears! To make them, you’ll crochet two triangular pieces and attach them to the top of the hat once finished. Start by chaining a small foundation row, then decrease stitches at each end as you move upward to form a triangle.
You can adjust the size of the ears based on your preference—larger ears for a playful look, smaller ones for a subtle, cute style. Use the same color as the base for a cohesive design, or choose a lighter shade for the inner ear to create contrast.
Once both ears are complete, stuff them lightly with yarn scraps or leave them flat, depending on the look you want. Sew or crochet them securely onto the top corners of the hat, ensuring they’re symmetrical.
To give the ears more definition, you can outline them with a row of slip stitches in a darker color or use embroidery thread to add fine details.
If you’re making the Kitty Hat for children, consider sewing the ears down partially to make them more secure and durable during playtime.
This step truly brings your project to life—the moment those ears are attached, your hat transforms from a simple beanie into a charming feline masterpiece.
4. Personalizing and Adding Final Touches
One of the best parts of the Learn How to Make the Kitty Hat – Tutorial is customizing it to reflect your style. Once the main structure is complete, you can decorate your hat with adorable features such as whiskers, a cute embroidered nose, or even button eyes for a cartoon-like effect.
For a minimalist look, keep the hat simple and let the shape of the ears be the main attraction. For a playful twist, add a bow, pom-pom, or colorful trim along the edge. These small enhancements make your Kitty Hat unique and eye-catching.
Experiment with different yarn textures—try using fluffy or variegated yarn for added visual interest. If you enjoy themed creations, you can design seasonal versions like Halloween black cats or pastel-colored spring kittens.
Consider making matching hats for friends or family members. The Kitty Hat makes an excellent handmade gift, combining warmth, comfort, and personality in one project.
If you love sharing your crochet work online, don’t forget to photograph your finished hat in good lighting to showcase your craftsmanship. Post your creation using crochet hashtags or in crafting communities to inspire others.
Lastly, remember that practice makes perfect. Each time you create this hat, you’ll get faster and more precise with your stitches, leading to even more beautiful results in the future.
FAQ – Learn How to Make the Kitty Hat – Tutorial
Q1: What skill level do I need to make the Kitty Hat?
This project is beginner-friendly, requiring only basic crochet stitches. With patience and practice, anyone can complete it successfully.
Q2: How long does it take to make the Kitty Hat?
Depending on your crochet speed and the hat size, it can take between 2 to 4 hours to complete.
Q3: Can I use any type of yarn?
Yes, but medium-weight yarn works best. Thicker yarn creates a warmer hat, while lighter yarn is ideal for mild weather.
Q4: How do I wash my Kitty Hat?
Hand wash in cold water with mild detergent and lay flat to dry. Avoid wringing or using a dryer to maintain its shape.
Q5: Can I adjust the hat size for kids or adults?
Absolutely! Simply adjust your starting chain and number of increase rounds to fit the head circumference you need.
Q6: Is it possible to add ear flaps to this hat?
Yes! You can easily crochet ear flaps onto the sides for added warmth and style.
Conclusion
The Learn How to Make the Kitty Hat – Tutorial is a fun and rewarding crochet project that blends creativity with practicality. From its simple base to the cute kitty ears, every step allows you to express your unique style. Whether you make it for yourself, a friend, or a child, this hat is sure to bring smiles and warmth wherever it goes.
Now it’s your turn! Try this tutorial, experiment with colors, and make your own version of the Kitty Hat. Share your honest opinion and suggestions below—we’d love to hear how your project turned out and what creative twists you added!

