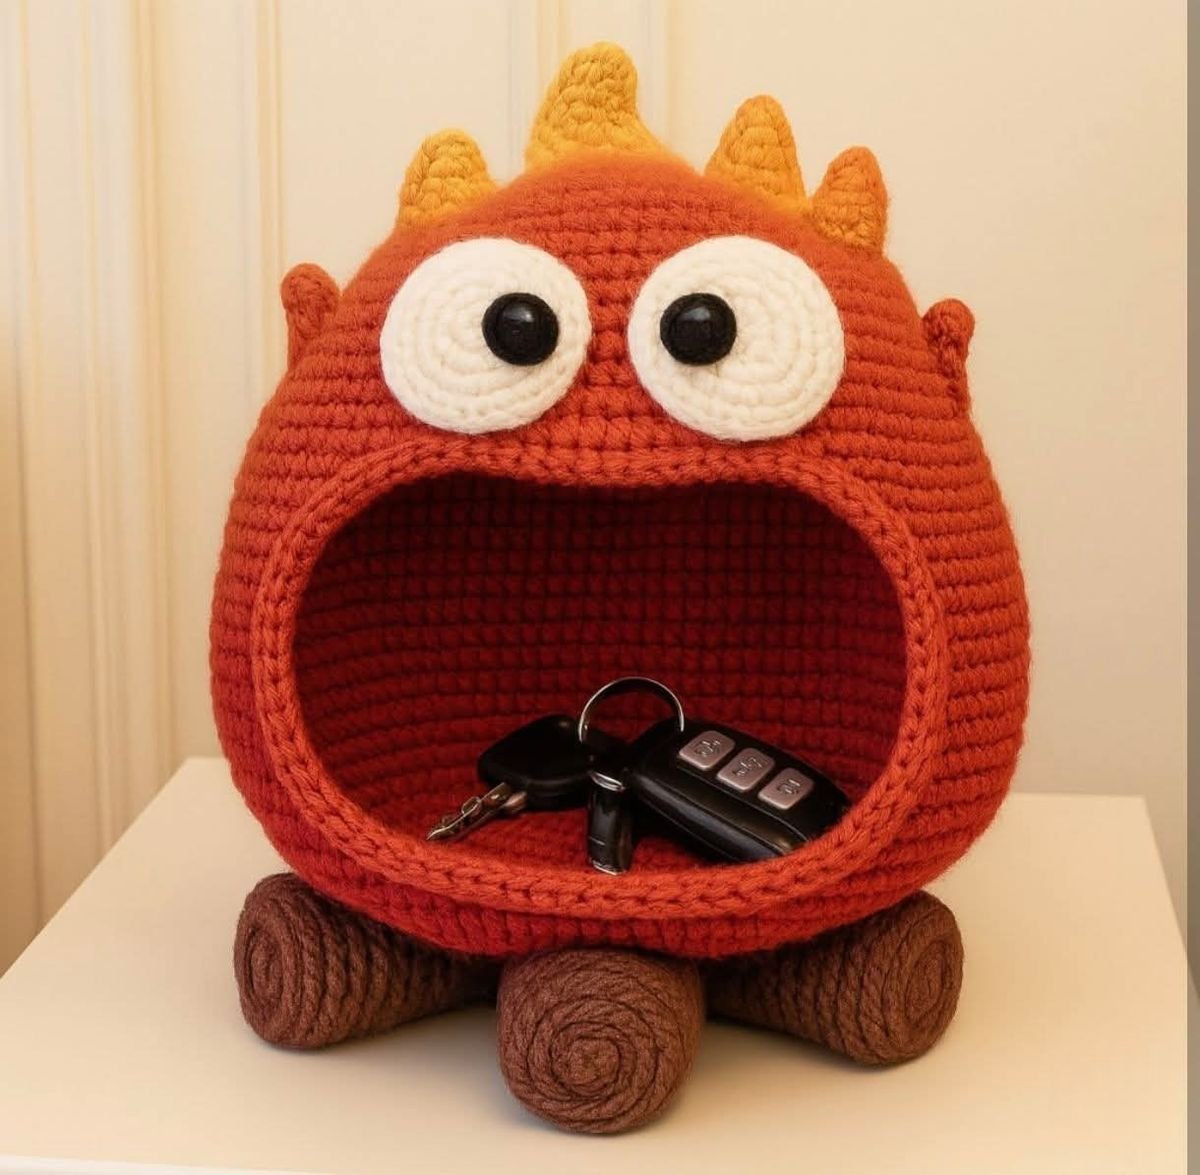
Step-by-Step Crochet Tutorial: Dino Monster Key Holder – Best Materials to Use is the perfect project for crochet lovers who want to create something fun, functional, and eye-catching. This adorable dino monster key holder, as shown in the image, combines amigurumi techniques with practical storage, making it ideal for organizing keys while decorating your space.
Crochet projects like this are trending in the United States, Japan, and across Europe, especially among crafters who enjoy amigurumi and creative home accessories. The bold colors, large expressive eyes, and playful shape make this project not only useful but also a great conversation piece.
In this complete guide, you’ll learn everything about Step-by-Step Crochet Tutorial: Dino Monster Key Holder – Best Materials to Use, including the top materials, exact sizing, stitch techniques, and a highly detailed 7-step tutorial to recreate this design with precision.
1. Top 5 Materials to Use for a Dino Monster Key Holder
Selecting the right materials is essential when working on Step-by-Step Crochet Tutorial: Dino Monster Key Holder – Best Materials to Use, as they directly affect the structure, durability, and final look.
The first and most important material is medium-weight cotton yarn (worsted weight). Cotton yarn is widely used in the U.S. because it provides structure and helps the key holder maintain its shape.
The second essential is a crochet hook (4.0 mm to 5.0 mm). This size works well with worsted yarn and ensures tight stitches, which are crucial for amigurumi projects.
Third, you’ll need polyester fiberfill stuffing. This helps shape the body and gives the dino monster its rounded, plush appearance.
Fourth, safety eyes (12–18 mm) are used to create the large, expressive eyes. These are extremely popular in amigurumi projects worldwide.
Finally, tapestry needle and stitch markers are essential tools for assembling pieces and maintaining stitch accuracy.
Using these materials ensures your project aligns with the best practices in Step-by-Step Crochet Tutorial: Dino Monster Key Holder – Best Materials to Use.
2. Measurements, Structure, and Pattern Planning
Before starting, understanding the structure is key to mastering Step-by-Step Crochet Tutorial: Dino Monster Key Holder – Best Materials to Use.
The finished dino monster should measure approximately:
- 20 cm (8 inches) wide
- 18 cm (7 inches) tall
- Depth of about 10–12 cm (4–5 inches)
The design consists of:
- A rounded hollow body (main compartment)
- A large front opening (mouth)
- Two large eyes
- Small spikes on top (dino detail)
- A flat base or small “feet” for support
The opening (mouth) should be about 10–12 cm wide, large enough to hold keys, small items, or accessories.
Use stitch markers to track rounds, as most of the body is worked in continuous spirals (common in amigurumi).
Planning your structure carefully ensures symmetry and stability in Step-by-Step Crochet Tutorial: Dino Monster Key Holder – Best Materials to Use.
3. Step-by-Step Crochet Tutorial (7 Detailed Stages)
This is the most important part of Step-by-Step Crochet Tutorial: Dino Monster Key Holder – Best Materials to Use. Follow each step carefully for a professional result.
Step 1: Start the Base Circle (Magic Ring)
Begin with a magic ring using orange yarn. Work 6 single crochets (sc) into the ring. Pull tight and continue increasing in rounds (2 sc in each stitch) until you reach a circle of about 12–14 cm diameter. This forms the base.
Step 2: Build the Body Walls (Continuous Rounds)
Without increasing, continue working single crochet stitches in each round to build height. Crochet for about 10–12 cm upward, forming a bowl shape. Keep stitches tight to maintain structure.
Step 3: Create the Mouth Opening
Mark the front section where the opening will be. Instead of continuing in full rounds, crochet back and forth (rows) across only part of the circle to leave an open space. Reinforce the edges of the opening with slip stitches or single crochet to make it sturdy.
Step 4: Crochet the Eyes (Amigurumi Circles)
Using white yarn, create two flat circles (start with magic ring, increase rounds until about 5–6 cm diameter). Attach black safety eyes in the center or crochet small black circles for pupils. Sew the eyes securely above the mouth opening.
Step 5: Make the Dino Spikes (Top Details)
Using yellow or orange yarn, crochet small cone shapes:
- Magic ring with 4–5 sc
- Increase slightly, then crochet 2–3 rounds without increase
Make 3–5 spikes and sew them along the top center.
Step 6: Add the Base Support (Feet or Bottom Roll)
To help the holder stand, crochet small cylindrical shapes or flat ovals (like “feet”) and attach them underneath. Alternatively, create a thicker base by adding extra rounds or inserting cardboard/plastic inside (optional for structure).
Step 7: Final Assembly and Finishing Touches
Lightly stuff the sides (not the storage area) with fiberfill to maintain shape. Use a tapestry needle to sew all parts securely. Reinforce seams, especially around the opening. Optionally, add a hanging loop at the back for wall use.
By following these detailed steps, you will successfully complete your Step-by-Step Crochet Tutorial: Dino Monster Key Holder – Best Materials to Use project with a clean, durable, and adorable finish.
4. Tips for Professional Results and Creative Variations
To enhance your Step-by-Step Crochet Tutorial: Dino Monster Key Holder – Best Materials to Use, consider these expert tips.
Always use tight stitches to avoid gaps, especially when working with stuffing.
Choose vibrant colors like orange, red, or green for a playful monster look, or pastel tones for a softer aesthetic.
Use stitch markers to keep track of rounds and avoid uneven shaping.
Reinforce the mouth opening with an extra row of slip stitches for durability.
Experiment with expressions by adjusting eye size or adding eyebrows.
You can also create themed versions—dinosaurs, monsters, or even animals—by modifying colors and shapes.
These tips will help you elevate your results and master Step-by-Step Crochet Tutorial: Dino Monster Key Holder – Best Materials to Use.
FAQ – Frequently Asked Questions
1. Is this project beginner-friendly?
Yes, if you know basic stitches like single crochet and increasing.
2. What yarn is best?
Cotton yarn is recommended for structure and durability.
3. Can I make it bigger or smaller?
Yes, adjust hook size and yarn weight to change dimensions.
4. How long does it take?
Approximately 2–4 hours depending on experience.
5. Do I need to use safety eyes?
No, you can embroider eyes instead.
6. Can it be washed?
Yes, hand washing is recommended.
Conclusion
In this complete guide on Step-by-Step Crochet Tutorial: Dino Monster Key Holder – Best Materials to Use, you learned how to choose the best materials, plan the structure, and follow a detailed 7-step crochet tutorial to create a fun and functional key holder.
This project is a perfect mix of creativity and practicality, allowing you to organize your space while showcasing your crochet skills.
Now it’s your turn! Try this pattern and bring your dino monster to life. Don’t forget to share your honest opinion and suggestions—your feedback helps inspire even more creative ideas!