Beads Quilt – Tutorial is a beautiful and versatile quilting project that combines classic geometry with a modern visual rhythm. From the very first stitch, the Beads Quilt – Tutorial helps quilters understand how repeating shapes and color placement can create movement, depth, and elegance in a finished quilt. This pattern is especially loved by quilters who enjoy structured designs with a playful twist, making it suitable for both beginners who want to grow their skills and experienced quilters looking for a refined project.
One of the reasons the Beads Quilt – Tutorial is so popular is its adaptability. You can easily customize the quilt by changing fabric colors, adjusting block sizes, or experimenting with different layouts. Whether you prefer bold, high-contrast fabrics or soft, neutral tones, this quilt pattern highlights your choices beautifully while maintaining a clean and professional look.
In this article, you will learn everything you need to know about the Beads Quilt – Tutorial, from understanding the design concept to selecting fabrics, assembling blocks, and finishing your quilt. The goal is to guide you step by step in a clear and humanized way, while also sharing practical tips to ensure a polished and satisfying result.
1. Understanding the Beads Quilt Design
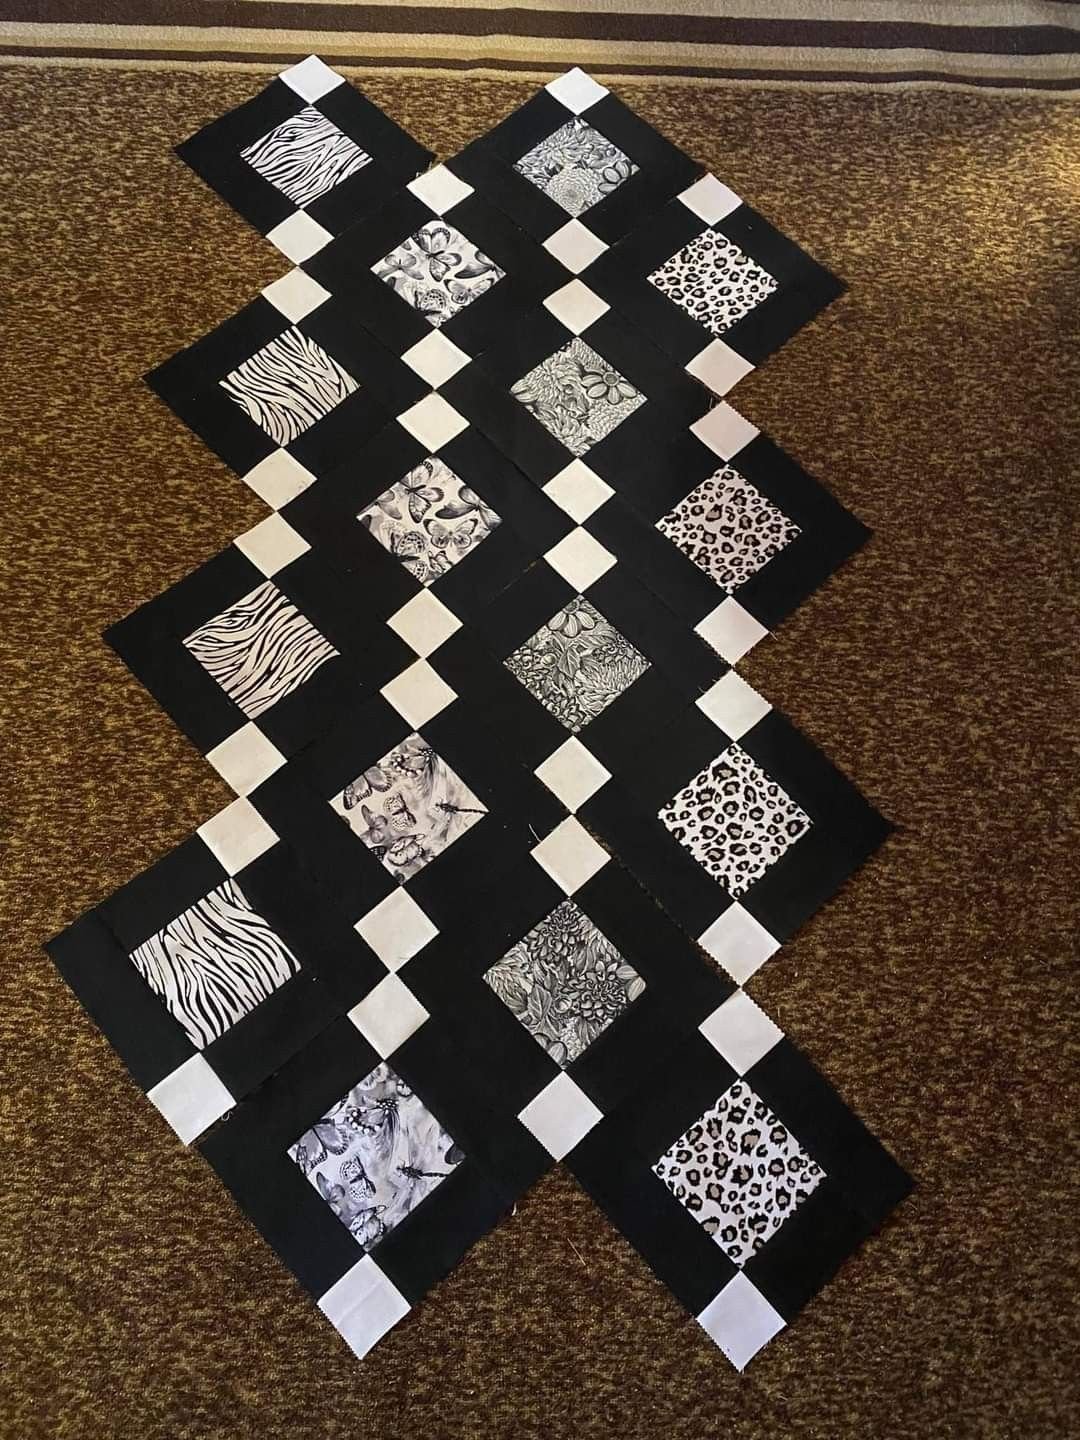
The Beads Quilt – Tutorial is inspired by the idea of beads strung together in a repeating sequence. Each block is designed to resemble a bead or a section of beads, creating a flowing visual effect across the quilt top.
DISCOVER MORE FREE PATTERNS HERE!
This design relies heavily on repetition and alignment. When blocks are placed correctly, the pattern creates an illusion of movement, almost as if the beads are rolling across the quilt. This makes the Beads Quilt – Tutorial visually engaging without being overly complex.
One of the strengths of this quilt is its modular nature. Each block is constructed individually, which makes the process manageable and less overwhelming. Quilters can work at their own pace while gradually seeing the pattern come together.
Color placement plays a key role in the success of the Beads Quilt – Tutorial. Alternating light and dark fabrics helps define the bead shapes and enhances contrast. Thoughtful color planning will make the design stand out clearly.
The pattern works well in a variety of quilt sizes, from baby quilts to large bed quilts. This flexibility makes the Beads Quilt – Tutorial a great option for gifts, home décor, or even quilt shows.
Overall, understanding the design concept before cutting fabric will help you visualize the final result and make confident decisions throughout the quilting process.
2. Fabric Selection and Color Planning
Choosing the right fabrics is essential for a successful Beads Quilt – Tutorial. Because the design depends on contrast, selecting fabrics with clearly different values is more important than choosing specific colors.
Start by selecting a main color palette. This could be bold and modern, soft and pastel, or classic and neutral. The Beads Quilt – Tutorial works beautifully with solids, tone-on-tone prints, or small-scale patterns.
It is recommended to use at least two contrasting fabrics for the bead shapes and the background. High contrast helps define the pattern and ensures the bead effect is visible from a distance.
Scrap fabric lovers will also enjoy the Beads Quilt – Tutorial, as it is an excellent way to use leftover pieces. Scrappy beads combined with a consistent background can create a lively and unique quilt.
Before cutting, lay out your fabrics and experiment with different combinations. This planning stage allows you to adjust colors and balance the design before committing to the final layout.
Taking time with fabric selection ensures that your Beads Quilt – Tutorial will look intentional, cohesive, and visually striking once completed.
3. Step-by-Step Block Construction
The block construction process in the Beads Quilt – Tutorial is straightforward and methodical. Each block is built using basic quilting techniques, making it accessible to quilters with fundamental sewing skills.
Begin by accurately cutting your fabric pieces. Precision at this stage is critical, as even small measurement errors can affect block alignment later in the project.
Next, assemble the smaller units that form the bead shapes. Chain piecing is highly recommended, as it saves time and keeps your workflow organized throughout the Beads Quilt – Tutorial.
Pressing is just as important as sewing. Press seams consistently, either open or to one side, depending on your preference and the pattern instructions. Good pressing ensures flat, professional-looking blocks.
Once individual blocks are completed, check their size and trim if necessary. Consistent block sizing is essential for a smooth quilt top assembly.
Taking your time with block construction will make the rest of the Beads Quilt – Tutorial much easier and more enjoyable, leading to a clean and accurate final quilt top.
4. Assembling, Quilting, and Finishing
After completing all the blocks, the next step in the Beads Quilt – Tutorial is arranging the layout. This is where the bead effect truly comes to life, so take time to experiment with block placement.
Lay out the blocks on a design wall or flat surface. Step back and observe how colors and shapes interact across the quilt. Small adjustments can significantly improve visual balance.
Once satisfied, sew the blocks together row by row. Pinning at intersections helps maintain alignment and prevents shifting during sewing.
When the quilt top is finished, choose a quilting design that complements the bead pattern. Straight-line quilting enhances the geometric look, while gentle curves can add softness and movement.
Finally, bind the quilt using a fabric that frames the design without overpowering it. A well-chosen binding completes the Beads Quilt – Tutorial and gives your quilt a polished, professional appearance.
With careful assembly and finishing, your quilt will be durable, beautiful, and ready to be enjoyed for years to come.
FAQ – Beads Quilt – Tutorial
Is the Beads Quilt – Tutorial suitable for beginners?
Yes, the pattern uses basic quilting techniques, making it suitable for confident beginners with some sewing experience.
What fabric types work best for this quilt?
Cotton quilting fabric is ideal, as it is easy to cut, sew, and press, ensuring accurate blocks.
Can I resize the Beads Quilt – Tutorial?
Absolutely. You can add or remove blocks to create different quilt sizes without altering the basic pattern.
Does this quilt work well with scrap fabrics?
Yes, the design is excellent for scrap quilting, especially when paired with a consistent background fabric.
What quilting style is recommended?
Straight-line quilting is popular, but free-motion or curved designs can also work beautifully depending on your style.
How long does it take to complete this quilt?
The time varies based on size and experience, but most quilters complete the project over several days or weekends.
Conclusion
The Beads Quilt – Tutorial is a timeless and adaptable pattern that blends simplicity with visual impact. Throughout this article, you learned about the design concept, fabric selection, block construction, and finishing techniques needed to complete this beautiful quilt.
By following these steps and applying thoughtful color planning, you can create a quilt that is both elegant and personal. If you enjoyed this tutorial, please leave your honest opinion and share any suggestions or ideas you would like to see in future quilting articles.

