Bunny Butt Pillow with Ears – tutorial is one of those charming quilt projects that instantly captures attention and brings a sense of warmth, creativity, and playful design into any home. This adorable quilted pillow has become increasingly popular among quilters who enjoy mixing functionality with decorative appeal, especially during springtime, Easter décor, or children’s room projects.
The Bunny Butt Pillow with Ears – tutorial is designed for quilters of various skill levels, offering a balance between simple piecing techniques and creative embellishments. Whether you are an experienced quilter or a confident beginner looking to expand your skills, this project delivers both satisfaction and visual impact.
In this article, you will learn everything you need to know about the Bunny Butt Pillow with Ears – tutorial, from understanding the concept behind the design to selecting fabrics, assembling the quilted pieces, and finishing the pillow professionally. By the end, you will feel confident to create your own version and even personalize it to match your unique style.
1. Understanding the Bunny Butt Pillow with Ears – Tutorial Concept
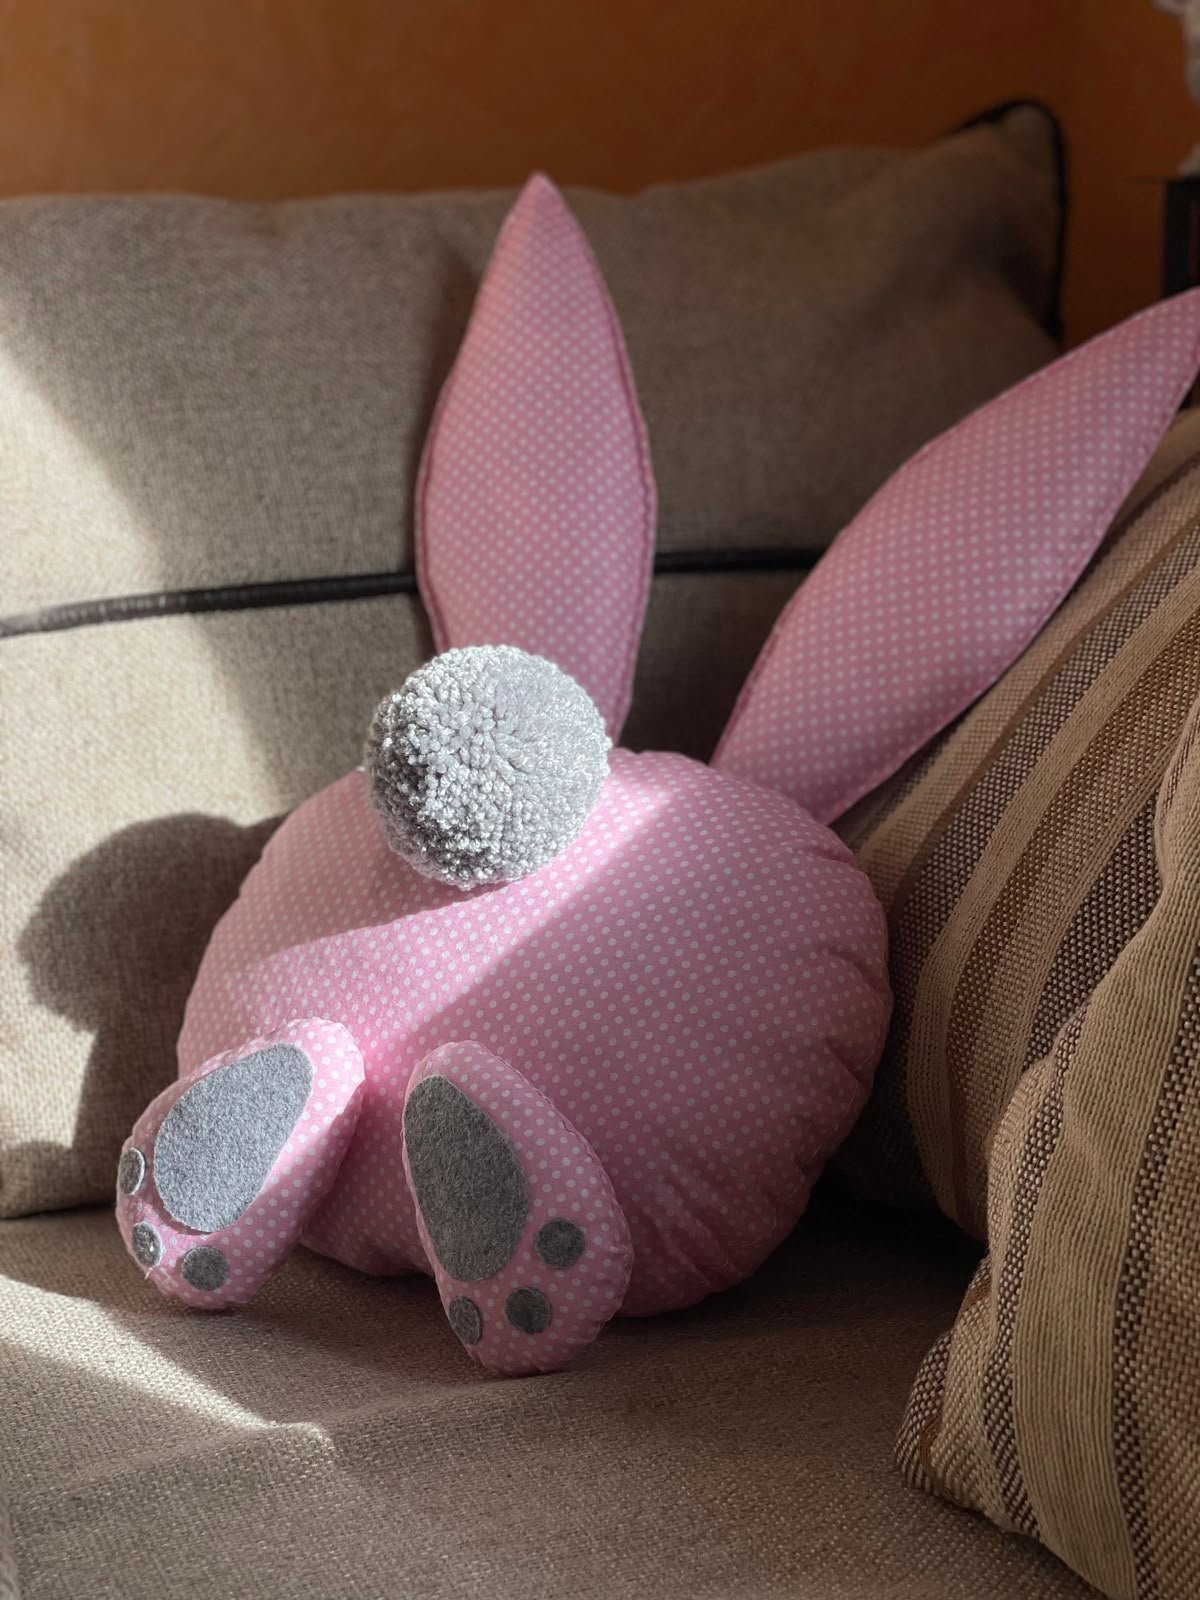
The Bunny Butt Pillow with Ears – tutorial is a quilt pattern centered around a playful bunny design, usually featuring a rounded bunny bottom, a fluffy tail, and soft fabric ears that extend beyond the pillow’s edges. This three-dimensional effect is what makes the design so charming.
DISCOVER MORE FREE PATTERNS HERE!
One of the key attractions of this quilt tutorial is its versatility. The pattern can be adapted to different pillow sizes, making it suitable for couches, nursery chairs, beds, or seasonal décor displays. Quilters love how easily the design scales up or down.
This quilt tutorial also allows for creative expression. From fabric choices to quilting styles, each Bunny Butt Pillow can look completely different while following the same base instructions. This makes it a favorite project for gift-giving and craft fairs.
The Bunny Butt Pillow with Ears – tutorial often incorporates basic quilting techniques such as simple piecing, appliqué, and straight-line quilting. These techniques make the project accessible while still looking polished and professional.
Another important aspect of this quilt pattern is its decorative function. While fully functional as a pillow, it also works beautifully as a seasonal accent, particularly for Easter and spring-themed interiors.
Finally, this tutorial encourages quilters to experiment with texture. Using faux fur, minky fabric, or textured cottons for the tail and ears adds depth and visual interest, elevating the final result.
2. Materials and Fabric Selection for the Quilt Project
Choosing the right materials is essential when following the Bunny Butt Pillow with Ears – tutorial. Fabric selection plays a major role in how soft, durable, and visually appealing the final pillow will be.
Most quilters prefer high-quality cotton fabrics for the main pillow body. Cotton is easy to quilt, holds its shape well, and comes in endless colors and prints that work beautifully for bunny-themed designs.
For the bunny ears and tail, many quilt tutorials recommend textured fabrics such as fleece, minky, or faux fur. These materials create a realistic and cozy look, making the pillow especially appealing to children.
Batting choice also matters in this quilt pattern. A medium-loft batting is usually ideal, as it provides enough structure without making the pillow too stiff. This ensures comfort while maintaining the pillow’s shape.
Thread selection should not be overlooked. Neutral-colored threads work well for most of the quilting, while matching or contrasting threads can be used to highlight details like appliqué stitching or decorative quilting lines.
In addition to fabrics and batting, basic quilting tools such as rotary cutters, rulers, pins, and a sewing machine are essential. Having everything prepared in advance helps the quilting process flow smoothly.
Lastly, pillow stuffing or a pillow insert is required to complete the Bunny Butt Pillow with Ears – tutorial. Many quilters prefer removable inserts, as they make cleaning and seasonal storage much easier.
3. Step-by-Step Construction of the Bunny Butt Pillow with Ears
The construction process in the Bunny Butt Pillow with Ears – tutorial begins with cutting all fabric pieces accurately. Precision at this stage ensures that the final pillow looks balanced and professional.
Once the pieces are cut, the next step usually involves assembling the bunny design on the pillow front. This may include appliqué techniques to create the bunny shape and positioning the tail for a centered look.
Attaching the ears is one of the most enjoyable parts of this quilt tutorial. The ears are often sewn into the pillow seam, allowing them to extend naturally from the top of the pillow while remaining securely attached.
After assembling the pillow front, quilting begins. Straight-line quilting is commonly used, but some quilters choose free-motion quilting to add texture and personality to the background.
The pillow back is typically constructed using a simple envelope closure or a zippered back. This allows easy removal of the pillow insert and gives the finished project a clean, professional appearance.
Finally, the pillow front and back are sewn together, turned right side out, and stuffed or fitted with an insert. At this point, the Bunny Butt Pillow with Ears – tutorial truly comes to life.
4. Customization Ideas and Finishing Touches
One of the biggest advantages of the Bunny Butt Pillow with Ears – tutorial is how easy it is to customize. Color choices alone can dramatically change the mood of the final quilt project.
Pastel fabrics create a soft, traditional Easter look, while bold or modern prints can give the pillow a contemporary twist. This flexibility makes the pattern appealing to a wide range of quilters.
Personalization options are endless. Adding embroidered names, decorative stitching, or themed fabrics allows you to tailor the pillow for specific recipients or occasions.
Quilting designs also offer room for creativity. Echo quilting around the bunny shape or using playful patterns in the background adds depth and texture to the quilted pillow.
Edge finishing techniques such as binding or flange edges can elevate the final look. A contrasting binding color often frames the pillow beautifully and draws attention to the design.
Lastly, thoughtful finishing touches like neatly trimmed threads and carefully pressed seams ensure that your Bunny Butt Pillow with Ears – tutorial project looks polished and professional.
FAQ – Bunny Butt Pillow with Ears – Tutorial
Is the Bunny Butt Pillow with Ears tutorial suitable for beginners?
Yes, this quilt tutorial is beginner-friendly, especially for those with basic sewing and quilting knowledge.
What size is the finished Bunny Butt Pillow?
Sizes vary depending on the pattern, but most finished pillows range between 16 and 20 inches square.
Can I wash the Bunny Butt Pillow?
Yes, if made with washable fabrics and removable inserts, the pillow can be gently washed.
What fabric works best for the bunny tail?
Faux fur, minky, or fleece fabrics are popular choices for creating a fluffy, realistic tail.
Can I sell items made from this quilt tutorial?
That depends on the pattern’s licensing terms. Always check the designer’s usage guidelines.
Is this quilt pattern seasonal only?
While popular during spring and Easter, many quilters use neutral designs to enjoy it year-round.
Conclusion
The Bunny Butt Pillow with Ears – tutorial is a delightful quilt project that combines creativity, charm, and practical quilting techniques. Throughout this article, we explored the concept behind the pattern, essential materials, construction steps, and customization ideas to help you confidently create your own quilted pillow.
This quilt tutorial is perfect for adding a playful touch to home décor, creating heartfelt handmade gifts, or expanding your quilting skill set. With thoughtful fabric choices and careful finishing, the final result is both functional and decorative.
PATTERN VIDEO:
If you enjoyed this tutorial or have tried making your own Bunny Butt Pillow, feel free to leave an honest opinion and share your suggestions. Your feedback helps inspire future projects and improvements!

