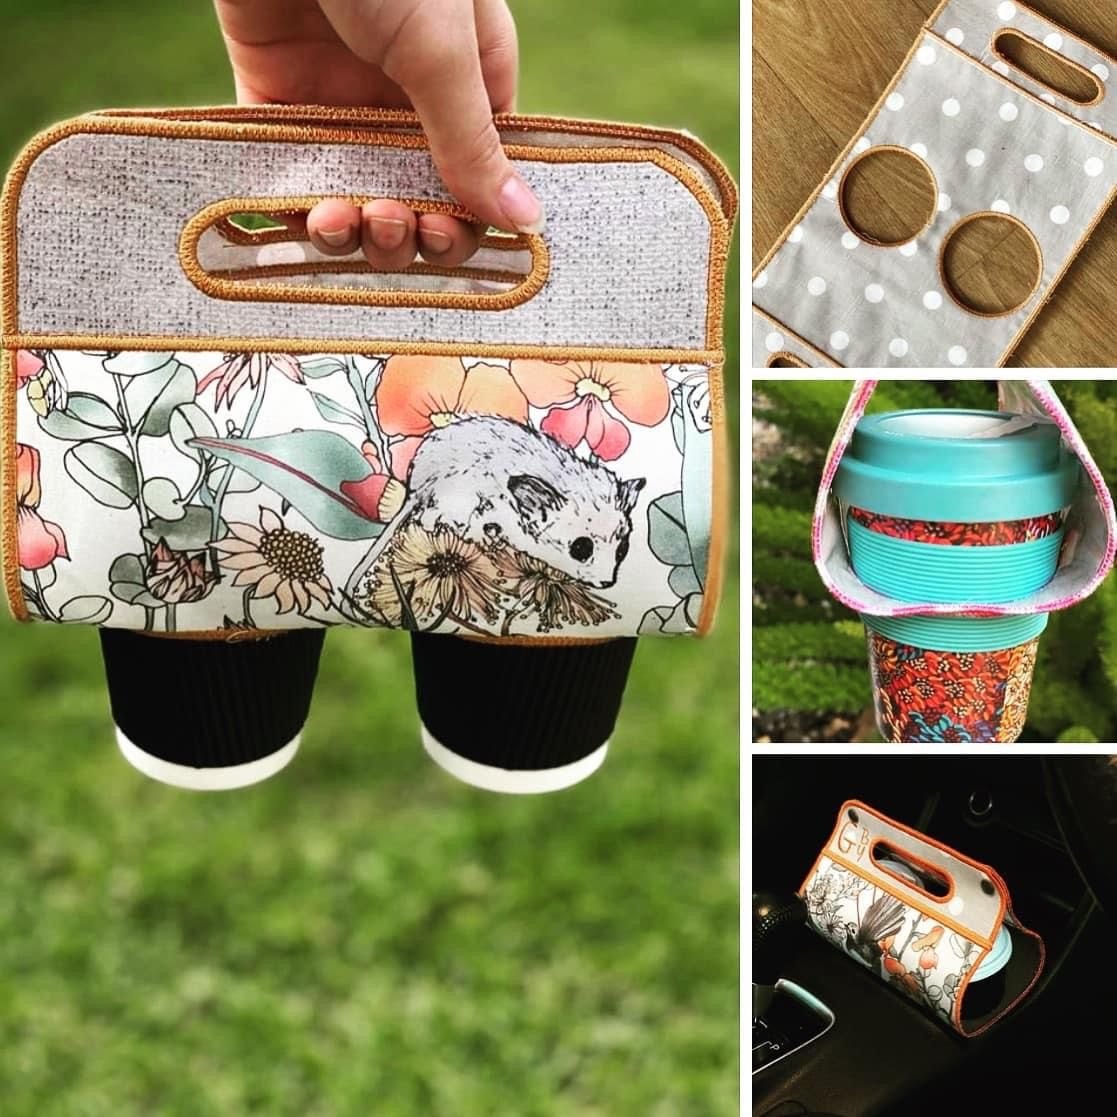
The Coffee Cup Carrier – Quilt Tutorial is a creative and practical project that combines the warmth of quilting with the everyday joy of coffee. This charming design allows you to make a reusable quilted carrier that keeps your hands safe from hot drinks while adding a personal, handmade touch to your daily coffee routine. Whether you’re a seasoned quilter or just starting out, this pattern is a delightful way to use your favorite fabric scraps, express your style, and create something both functional and beautiful.
Perfect for coffee lovers and eco-conscious makers, the Coffee Cup Carrier Quilt is designed to fit most cup sizes and can be easily customized with various colors, textures, and quilting patterns. It’s also a wonderful handmade gift idea—ideal for birthdays, holidays, or simply to surprise a fellow coffee enthusiast. This tutorial will guide you through every step, from fabric selection to final stitching, helping you create a stylish and reusable carrier that reflects your personal touch.
Handmade projects like this not only promote sustainability but also add a comforting sense of craftsmanship to your everyday life. Each stitch becomes part of your story—one that begins with creativity and ends with a cozy cup of coffee in hand.

1. Materials and Preparation for the Coffee Cup Carrier Quilt
Before you start sewing your Coffee Cup Carrier Quilt, gather all the materials you’ll need. Since this project is small, it’s a great way to use leftover fabrics from previous quilting projects. You’ll need two fabric pieces for the front and back panels, quilt batting for insulation, coordinating thread, and basic sewing supplies such as pins, scissors, an iron, and a sewing machine.
SEE OTHER FACE PATTERNS HERE!
Choose 100% cotton fabric for durability and comfort. Quilting cotton works perfectly since it’s easy to handle and can withstand heat from the coffee cup. For the inside layer, you might prefer a fabric that’s slightly thicker or insulated—some quilters like to use heat-resistant batting such as Insul-Bright to provide extra protection.
Select fabrics that represent your personality or match your favorite coffee shop vibes. Earthy browns, soft creams, or patterned fabrics with coffee beans or cups can give your carrier a warm, inviting look. If you love a pop of color, go for bright prints or patchwork styles to make your carrier truly stand out.
Measure the circumference and height of your favorite reusable cup before cutting the fabric. Add seam allowances and a bit of extra length to ensure a comfortable fit. Once you’ve cut the fabric and batting to the correct dimensions, iron them well to remove any wrinkles before layering.
Organize your workspace so everything is within reach. Quilting projects, even small ones like this, flow more smoothly when your tools and materials are neatly arranged. Having good lighting and a clean surface will make your stitching more accurate and enjoyable.
2. Piecing and Quilting the Fabric Layers
Now comes the fun part—assembling your Coffee Cup Carrier Quilt. Begin by placing your quilt sandwich together: one outer fabric piece (right side facing down), the batting in the middle, and the inner fabric piece (right side facing up). Pin or clip the layers together securely.
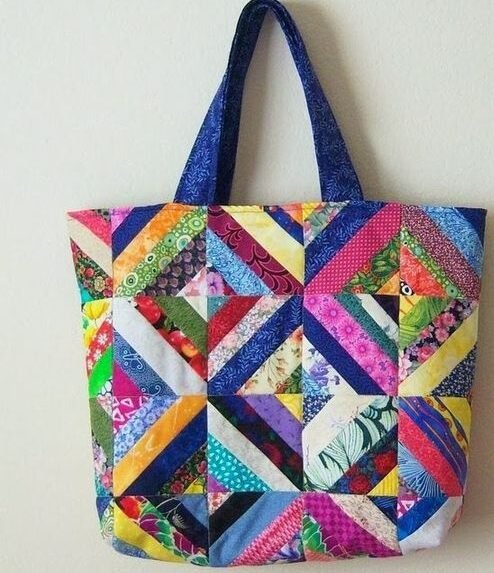
If you’d like to add a decorative touch, you can piece together small fabric scraps to create a patchwork design for the outer layer before assembling. This gives your carrier a unique, handcrafted charm. Use simple blocks or strips, and press your seams flat for a professional finish.
Once your layers are ready, it’s time to quilt them. You can use straight-line quilting for a clean, modern look or opt for free-motion quilting to create swirls, waves, or other playful designs. The quilting not only adds beauty but also secures the layers together, providing structure and durability.
After quilting, trim any excess fabric or batting so that all edges are even. If you’d like, you can round the corners of your carrier for a softer, more polished appearance.
Next, prepare the edges for binding. Cut strips of fabric about 2 inches wide, fold them in half lengthwise, and press. Align the raw edges of the binding with the edges of your carrier, sew them together, then fold the binding over to the opposite side and stitch it down. This step adds a beautiful finishing touch while protecting the raw edges from fraying.
Take your time with this stage—the quality of your quilting and binding will determine how polished your final product looks. A neatly finished carrier not only feels satisfying to hold but also showcases your quilting skills beautifully.
3. Adding the Handle and Fastening Options
Once your quilted body is complete, it’s time to add the handle or strap to your Coffee Cup Carrier Quilt. The handle makes it easy to carry your cup safely and comfortably, especially when you’re on the go.
Cut a fabric strip measuring about 12–15 inches long and 2 inches wide for the handle. Fold it lengthwise with the right sides together, sew along the edge, and then turn it inside out. Press it flat and topstitch along both sides for extra strength.
Attach the handle to opposite sides of the carrier using strong stitches or rivets if you prefer a more durable finish. Make sure it’s positioned evenly so your cup remains balanced when carried.
You can also add a fastening mechanism to keep your carrier snug around the cup. Velcro, snap buttons, or even fabric ties are all great options. Velcro provides quick closure, while ties give a charming handmade look. If you choose buttons, consider using decorative ones shaped like hearts, stars, or coffee beans for an extra touch of personality.
Once you’ve added the handle and fastening, test the fit by wrapping the carrier around your cup. Adjust as needed so that it holds firmly without being too tight.
This step is a great opportunity to personalize your project even more. Add embellishments such as embroidery, applique, or small patches with coffee-related designs. You could also stitch a label with your initials or a short quote like “Brew Love” or “Sip & Smile.” These little details make your project special and uniquely yours.
4. Creative Ways to Use and Gift the Coffee Cup Carrier Quilt
Your Coffee Cup Carrier Quilt is now ready to accompany you on your daily coffee adventures! Beyond being practical, it’s a stylish way to show your love for handmade crafts. But this beautiful creation can also serve many other purposes.
One of the most popular ideas is to make a set of carriers in different fabrics and give them as gifts. They’re perfect for friends, family, coworkers, or teachers—anyone who enjoys a good cup of coffee or tea. Pair the carrier with a reusable cup and a small bag of coffee beans for a thoughtful, eco-friendly gift.
You can also make themed carriers for different occasions. Try festive fabrics for Christmas, floral patterns for spring, or cozy plaids for fall. Each one can reflect the season or the personality of the person receiving it.
For crafters who love to sell their handmade creations, the Coffee Cup Carrier Quilt is an excellent product to offer at craft fairs or online shops. It’s lightweight, quick to make, and highly marketable—especially when customized with name tags or unique stitching.
If you enjoy a matching set, consider quilting a small pouch or tote bag in the same fabric as your carrier. This makes a cute and coordinated ensemble for your coffee runs or morning walks.
Finally, remember that this project isn’t just about functionality—it’s about creativity and mindfulness. Taking time to make something by hand, even a small item like a coffee carrier, brings joy and relaxation. Every stitch you sew becomes part of a daily ritual that reminds you to slow down and savor life, one sip at a time.
FAQ
Q: What type of fabric works best for the Coffee Cup Carrier Quilt?
A: Quilting cotton is ideal—it’s durable, easy to work with, and available in endless prints.
Q: Can I wash the carrier?
A: Yes! Use gentle detergent and cold water. Air drying is recommended to preserve its shape.
Q: How can I make the carrier more heat-resistant?
A: Use insulated batting like Insul-Bright between the fabric layers for added protection.
Q: Is this project suitable for beginners?
A: Absolutely. The Coffee Cup Carrier Quilt is simple, making it a perfect beginner-friendly introduction to quilting.
Q: Can I resize the pattern for larger or smaller cups?
A: Yes, just adjust the measurements based on the circumference and height of your cup before cutting the fabric.
Conclusion
The Coffee Cup Carrier – Quilt Tutorial is more than a sewing project—it’s a celebration of creativity, warmth, and mindful living. By combining practical design with beautiful quilting, you can create something that not only looks amazing but also adds comfort and joy to your everyday routine.
Whether you’re making one for yourself or crafting gifts for others, this project proves that the simplest stitches can hold the biggest meaning. So gather your fabrics, pour yourself a warm drink, and start stitching your new favorite handmade essential.


