The Cube Quilt Block – TUTORIAL is a visually striking and surprisingly simple quilt design that creates an incredible 3D illusion. Perfect for quilters of all levels, this block mimics the look of a cube through clever color placement and precise piecing. Whether you’re crafting a bold statement quilt or adding dimension to your patchwork projects, the cube block brings a modern twist to traditional quilting.
At first glance, the Cube Quilt Block – TUTORIAL might look complex, but it relies on basic geometric shapes—mainly diamonds or half-hexagons—arranged in a way that tricks the eye. Often referred to as a “tumbling block,” this pattern dates back centuries and continues to charm quilters with its timeless appeal and endless color possibilities.
This tutorial will guide you through everything you need to know about the Cube Quilt Block – TUTORIAL, from fabric selection to step-by-step piecing. You’ll also find customization ideas, common questions answered, and inspiration for bringing this optical illusion to life in your next quilt.
1. Understanding the Basics of the Cube Quilt Block – TUTORIAL
The Cube Quilt Block – TUTORIAL uses the power of color and symmetry to create a captivating 3D effect on flat fabric. Before you begin, it’s essential to understand how the illusion is achieved.
SEE OTHER FACE PATTERNS HERE!
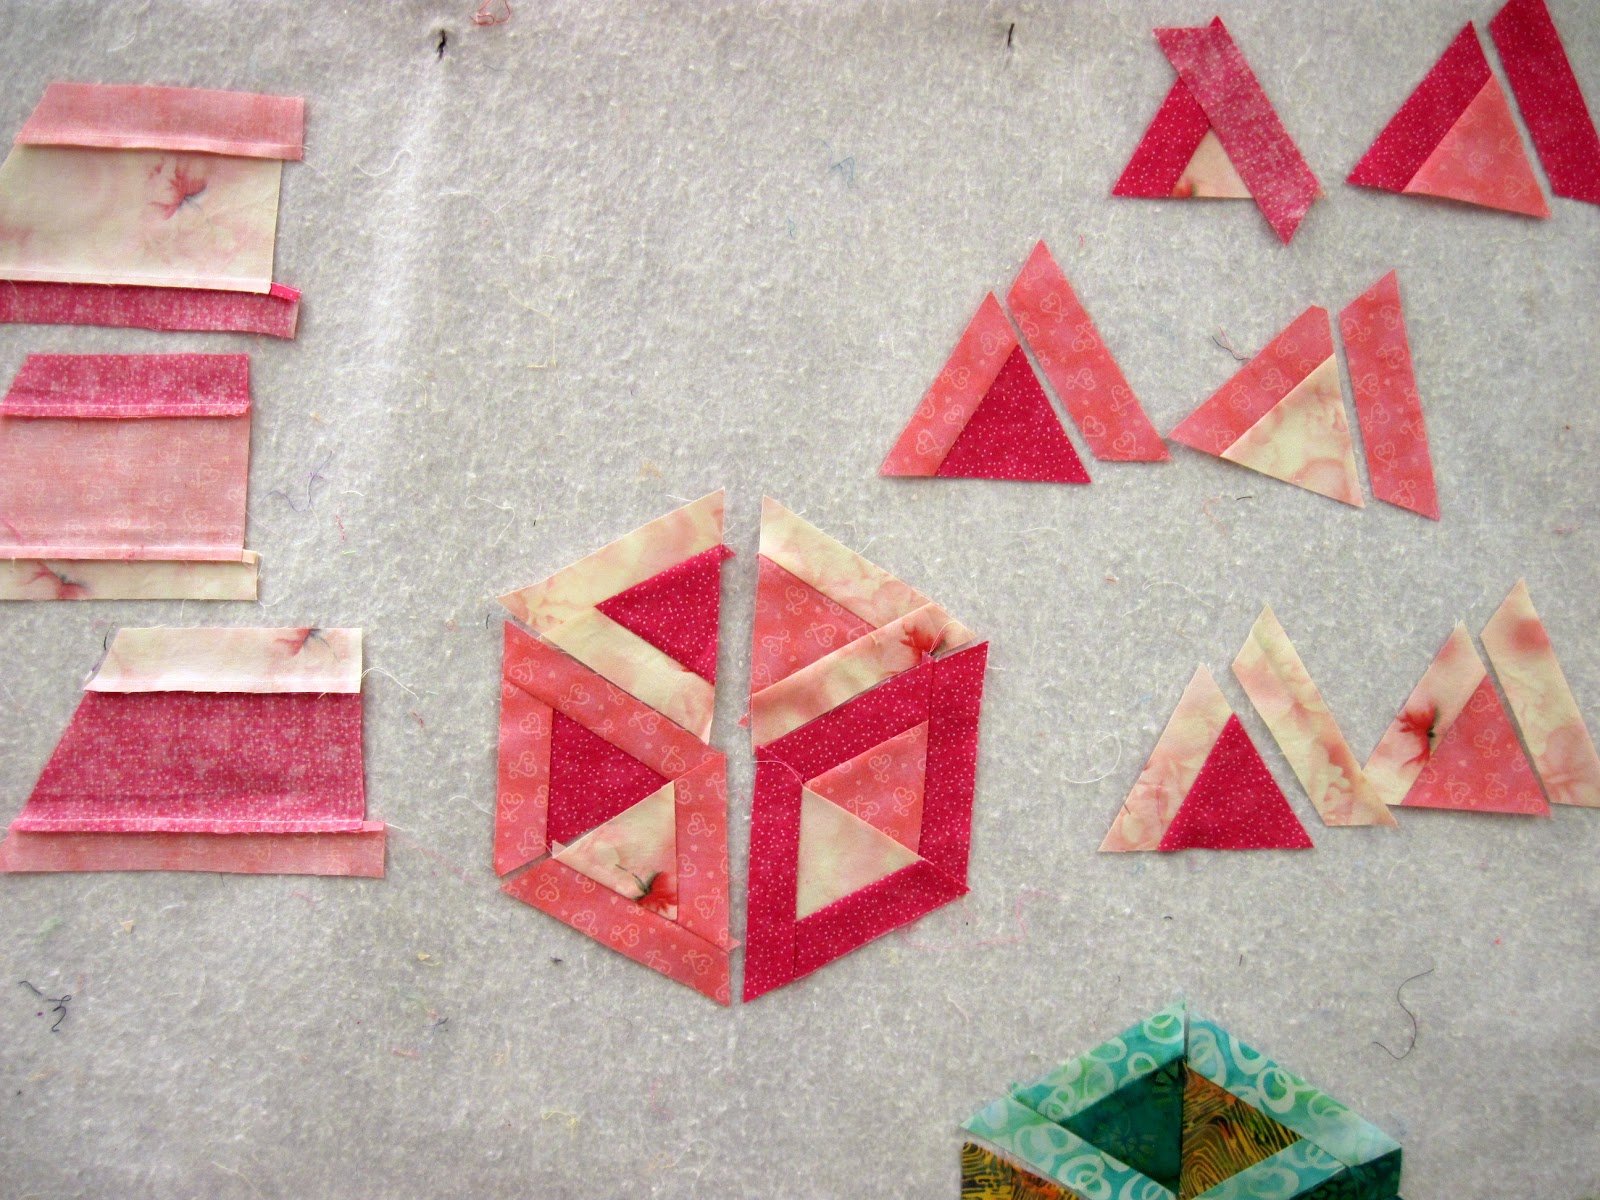
Each cube is made from three diamond-shaped pieces, typically cut from 60-degree angles. These three pieces represent the top, left, and right faces of a cube.
To create the illusion of depth, you need three distinct fabric tones: a light, a medium, and a dark. Placement of these tones in consistent positions is what gives the block its cube-like appearance.
It’s best to use solids or tone-on-tone fabrics to emphasize the shape. Avoid busy prints, which may distort the illusion.
The block can be created using English Paper Piecing (EPP) or standard machine piecing techniques. EPP is great for precision, while machine piecing is quicker for large projects.
Once you make one cube, you can repeat it to create rows or tessellate them for an entire quilt top filled with 3D cubes.
This block is sometimes used in baby quilts, modern wall hangings, or even art quilts due to its bold visual impact.
2. Materials Needed for the Cube Quilt Block – TUTORIAL
Before you dive into your Cube Quilt Block – TUTORIAL, make sure you have the right tools and fabrics to ensure clean cuts, accurate piecing, and beautiful results.
Fabric: Choose three fabrics per cube—light, medium, and dark. Fat quarters or scraps work well, and solid colors are ideal for maximum contrast.
Template or ruler: Use a 60-degree diamond ruler, or download a printable template to cut your pieces accurately.
Cutting tools: A rotary cutter and self-healing mat are essential. Sharp fabric scissors and a small acrylic ruler are also helpful.
Sewing machine: Any machine will do, but accurate piecing is key, so make sure your 1/4″ seam allowance is precise.
Thread: Use neutral-colored cotton thread for piecing. Choose something that blends across all three shades used in the cube.
Iron and pressing surface: Pressing your seams flat will help keep the points crisp and the illusion intact.
Optional: Foundation paper piecing templates if you prefer that method for precision.
3. Step-by-Step Instructions for the Cube Quilt Block – TUTORIAL
Let’s get into the heart of the Cube Quilt Block – TUTORIAL. Below is a simplified overview of how to construct the block using standard machine piecing.
Step 1: Cut out three diamonds for each cube using your template—one from each of your chosen light, medium, and dark fabrics.
Step 2: Lay the pieces out in a hexagon formation. The light fabric will be the top of the cube, the medium fabric will be the left side, and the dark fabric will be the right side.
Step 3: Sew the light and medium diamonds together along one edge. Be careful with your angles—these aren’t squares, so alignment is crucial.
Step 4: Sew the dark diamond to the other side of the light diamond. You’ll now have a Y-shaped unit with three diamonds joined at the center.
Step 5: Press the seams open or to one side. Open seams often lie flatter in this pattern and prevent bulk at the center.
Step 6: You can now add this cube block to others to create a row, or rotate cubes for a tumbling effect. Sew the rows together using edge matching.
Step 7: Continue joining blocks to create your desired quilt size. Add borders or sashing if you want to frame the cubes.
This block becomes more intuitive as you go, and you’ll be amazed at how quickly the 3D effect starts to pop out visually!
4. Design Ideas Using the Cube Quilt Block – TUTORIAL
One of the best things about the Cube Quilt Block – TUTORIAL is how versatile it is. You can keep it classic or experiment with modern interpretations.
Make a monochrome quilt using shades of gray for a sophisticated, modern art piece that looks like sculpture on fabric.
Use bold primaries—red, yellow, and blue—on a black background for a retro 80s-style quilt that really pops.
Turn cubes into “floating” shapes by adding negative space between blocks or offsetting them asymmetrically.
Try ombré cubes by using gradient fabrics for the light, medium, and dark tones. This gives the illusion of glowing or transparent cubes.
Use tiny cubes as accent blocks in a larger quilt. A single cube in the corner or center can act as a focal point.
Turn the cube block into a pillow, tote bag, or table runner to enjoy its unique design on a smaller scale.
🌟Join our exclusive Quilt broadcast list on Messenger! Receive the best patterns, tips, and updates directly in your inbox. Our team is ready to send you delightful content that will inspire your projects. Don’t miss this opportunity to stay updated and create amazing pieces. Join now and be part of this passionate quilt community!✨📩
FAQ – Cube Quilt Block – TUTORIAL
Is the Cube Quilt Block hard to make?
Not really! With accurate cutting and consistent seam allowance, even beginners can master it after a few tries.
What size should each cube be?
That depends on your template. A 4″ or 6″ finished cube is common, but you can scale the pattern easily with larger diamonds.
Can I use prints instead of solids?
Yes, but choose tone-on-tone prints or ones with minimal patterning to preserve the 3D illusion.
What’s the best way to ensure the 3D look?
Always use a consistent light, medium, and dark value across the quilt. The illusion relies entirely on color value contrast.
Do I need to use paper piecing?
No, although some prefer it for precision. You can use regular piecing methods with accurate templates.
Can I make the block into something other than a quilt?
Absolutely! The cube block is great for pillows, pouches, mini quilts, and even framed fabric art.
Conclusion
The Cube Quilt Block – TUTORIAL is a stunning and satisfying way to bring visual interest and modern style to your quilting projects. With just three fabrics, a smart layout, and a few simple steps, you can create a quilt that looks complex and professional, even if you’re just starting out.
VIDEO TUTORIAL:
We hope this guide has inspired you to try making your own 3D cube quilt block. Have fun playing with color, shape, and dimension! Don’t forget to share your thoughts and let us know how your version turned out. Your feedback and suggestions help us bring you even more exciting tutorials. Happy quilting! 🧵✨


